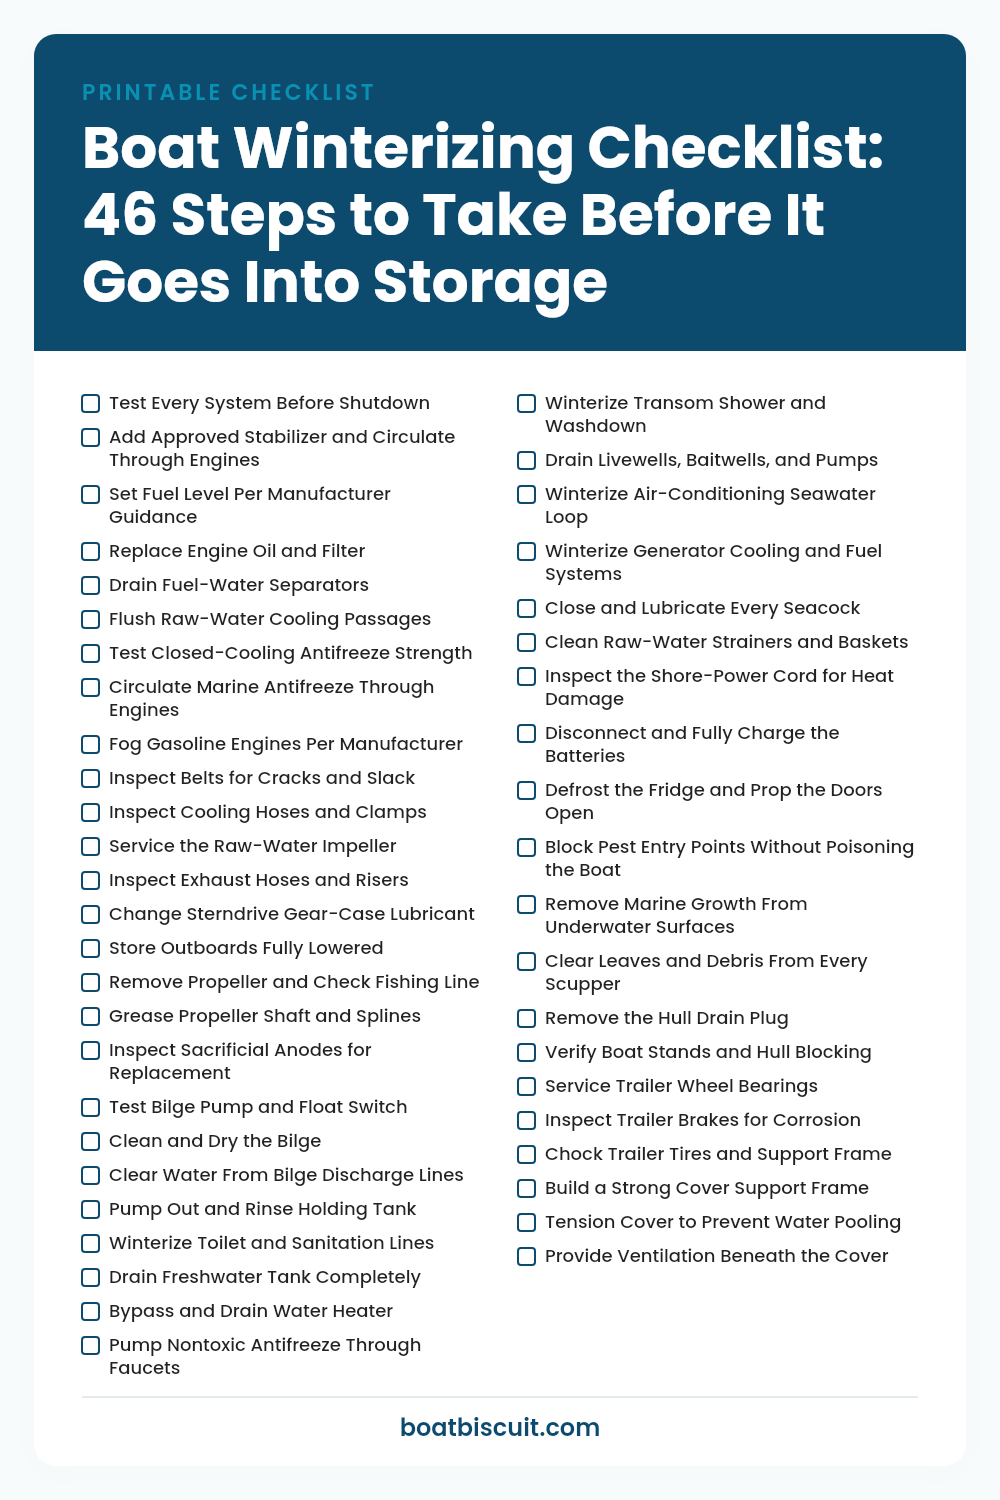
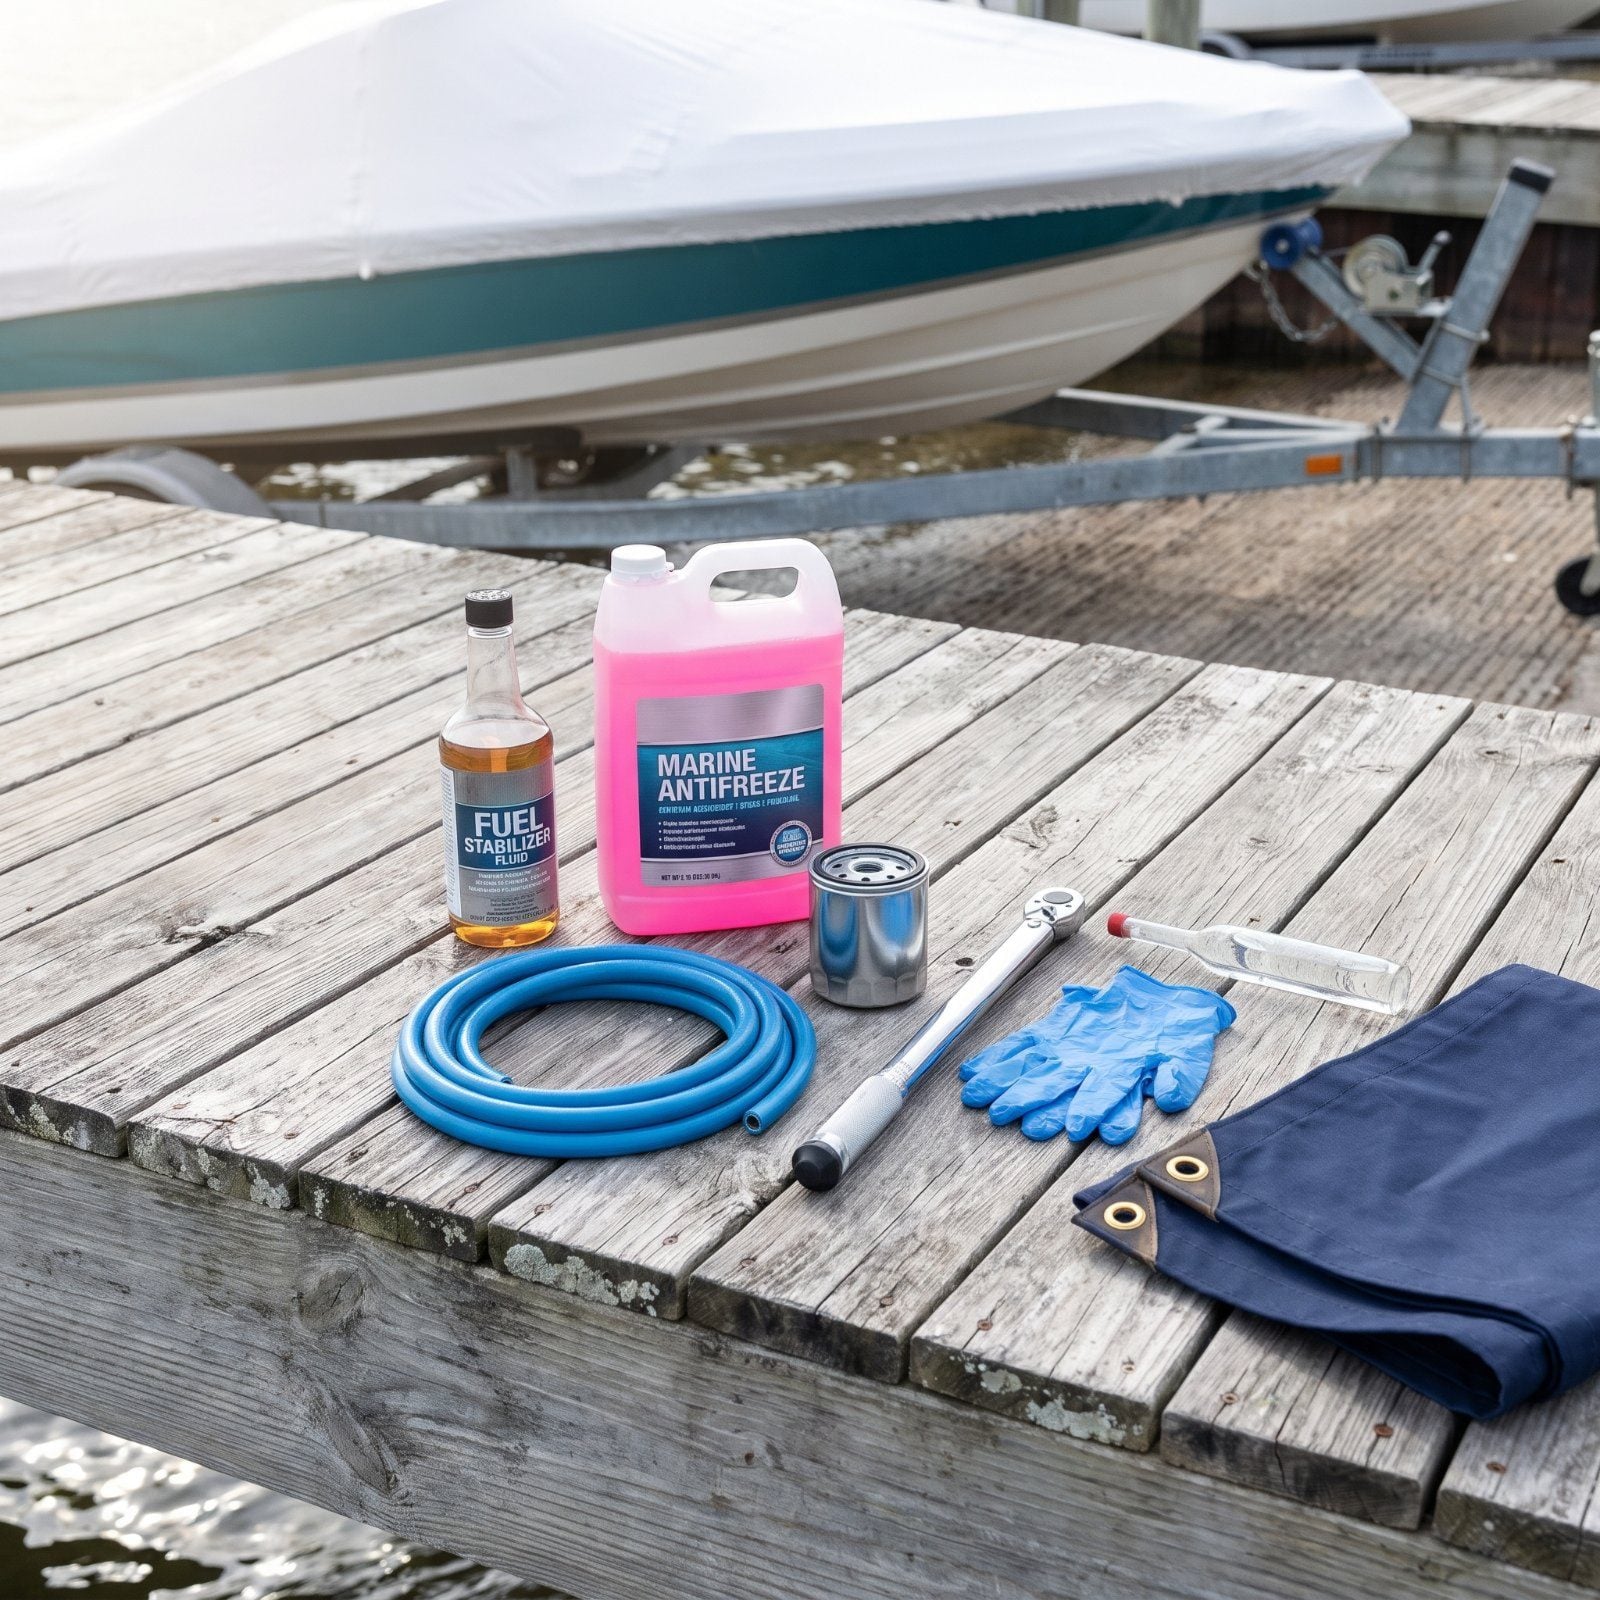
A cracked engine block is the spring surprise nobody wants. It costs more than most people’s first boat, and it happens quietly, overnight, while you sleep in a warm house thinking the season went fine. Water left in the wrong place freezes, expands, and splits metal that was never meant to split. None of it has to happen, though. Work through the checks below in order, skip nothing, and you’ll roll the cover off in April to an engine that fires on the first turn.
Please note that some of the imagery in this article may have been enhanced with the assistance of AI.
46. Test Every System Before Shutdown
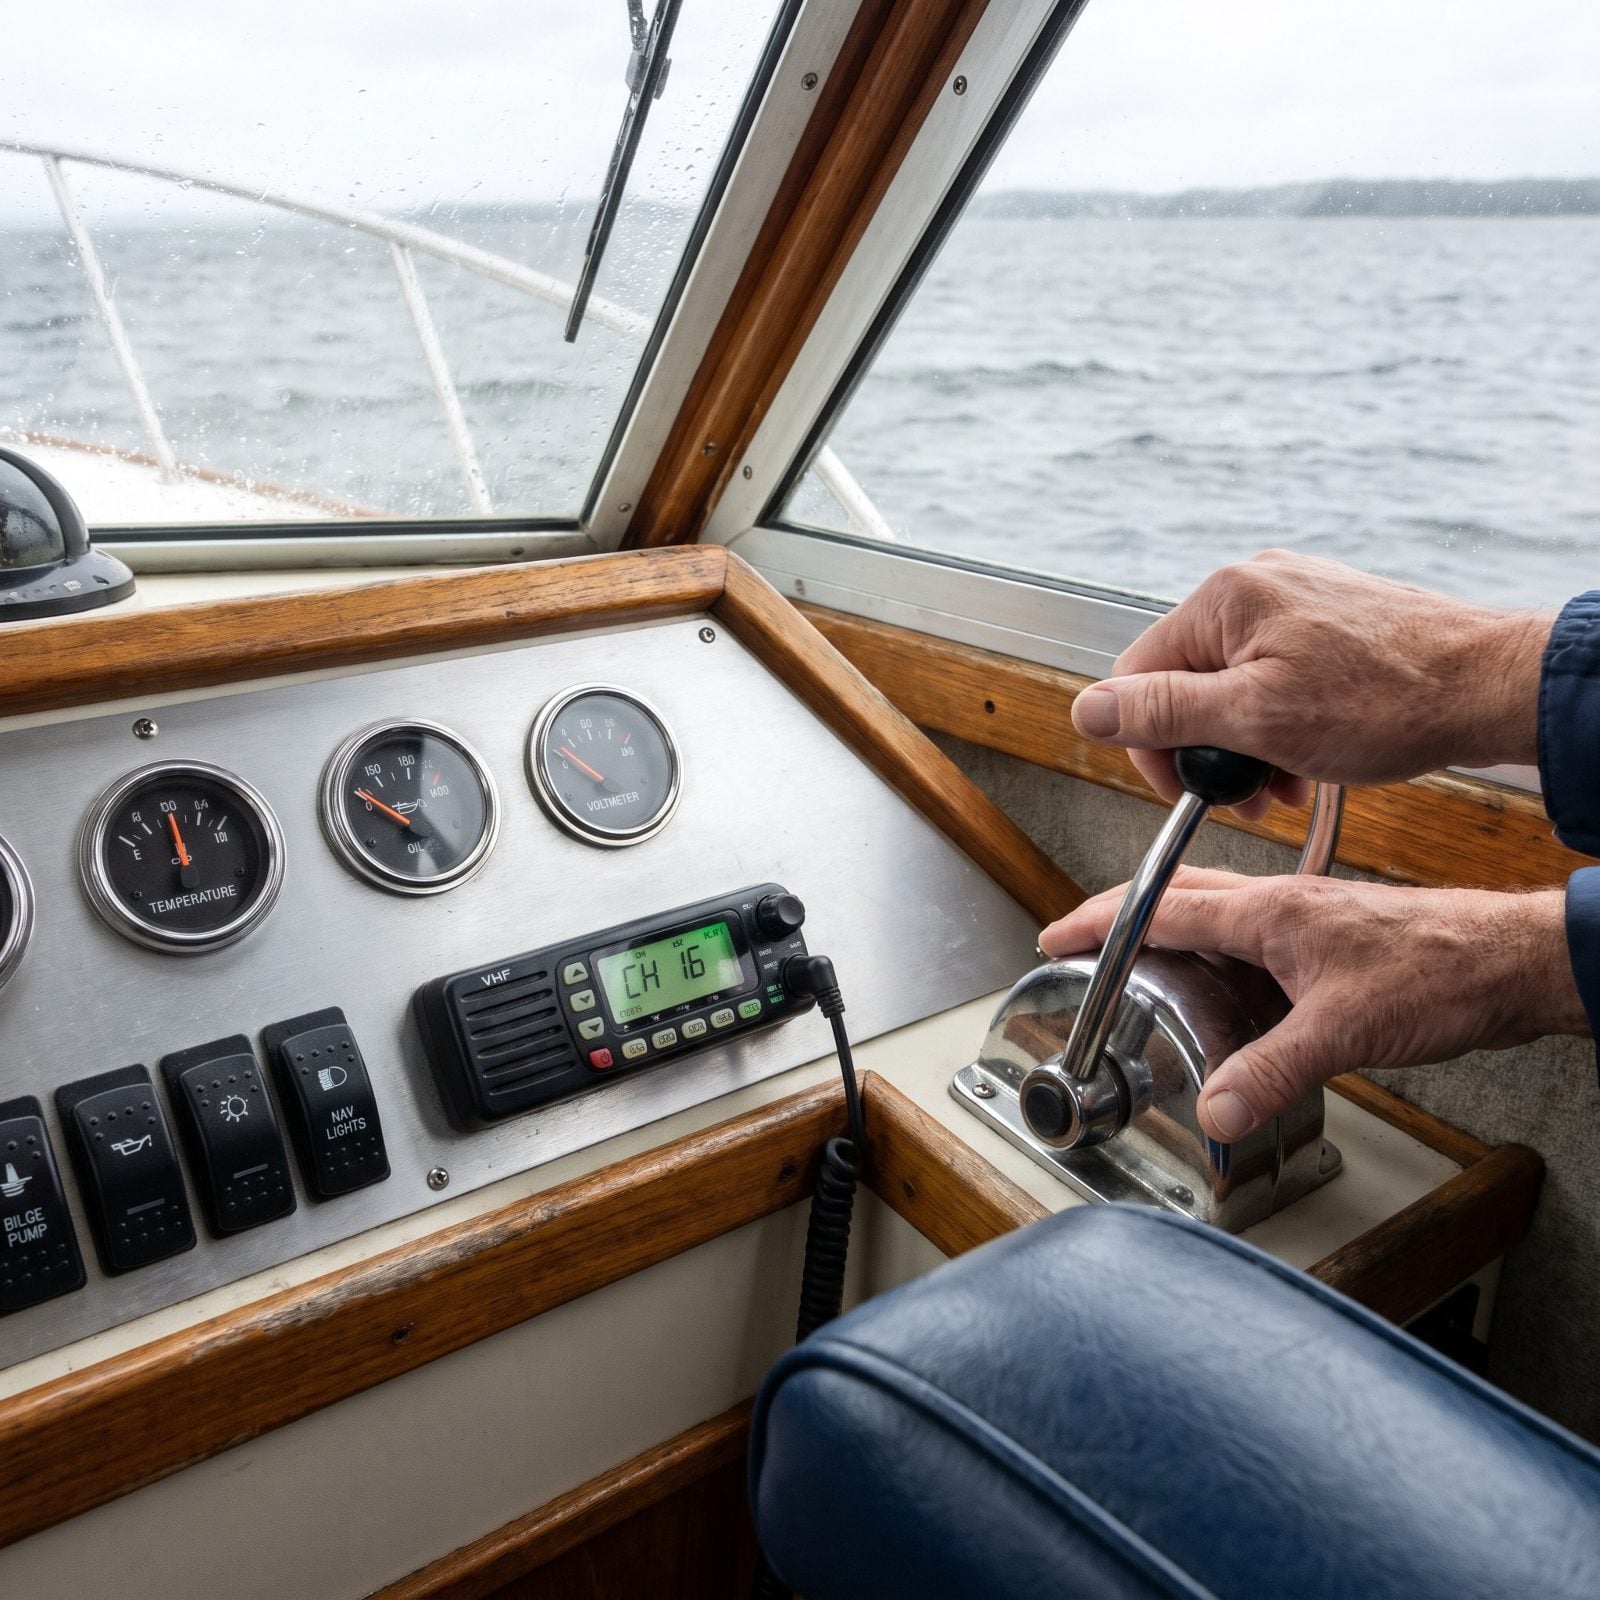
This is the part everybody skips because they’re already daydreaming about the cover. Run the boat one last time and actually watch it work — bilge pump, blower, lights, horn, trim, electronics, the whole lot. A pump that’s half-seized or a corroded light socket is a ten-minute fix in October. In April, with the memory long gone, it’s a cold and frustrating afternoon.
Log anything that’s acting up. Write it on tape and stick it to the helm. Future you, standing in the driveway on the first warm Saturday, will thank present you for the note instead of staring blankly at a horn that won’t honk.
45. Add Approved Stabilizer and Circulate Through Engines
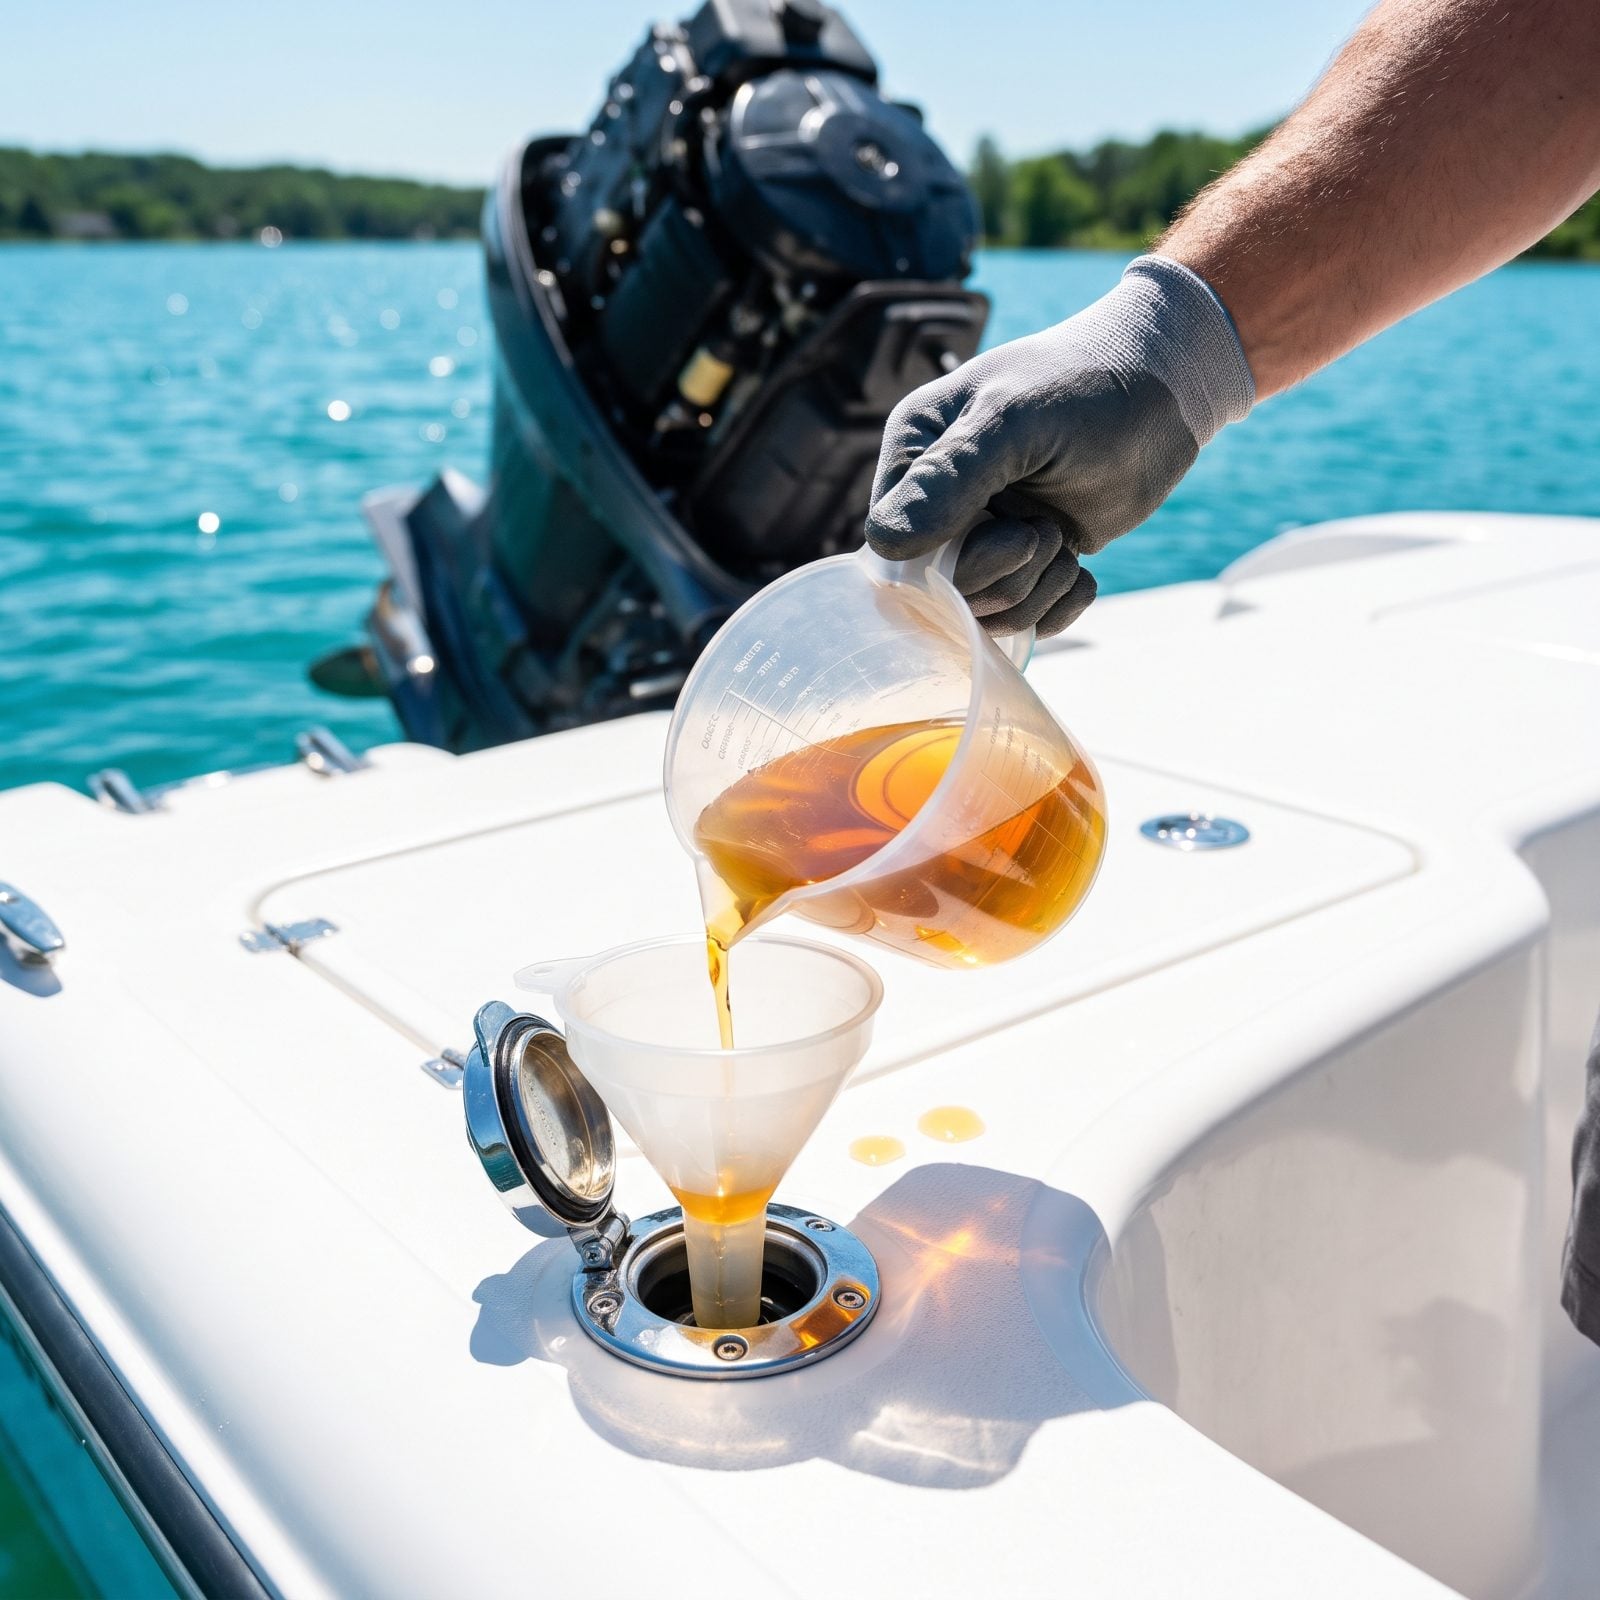
Gas goes stale fast. Modern ethanol fuel starts breaking down in weeks, turning gummy and pulling water out of the air until it won’t fire clean. Stabilizer buys you months. Add it at the dose on the bottle, then run the engine long enough to pull treated fuel all the way through the carbs or injectors.
That last step is the one people miss. Pouring stabilizer in the tank does nothing for the fuel already sitting in the lines and the bowl. A few minutes of run time circulates it where varnish actually forms. Shut down with treated fuel in the whole system, not just the tank.
44. Set Fuel Level Per Manufacturer Guidance
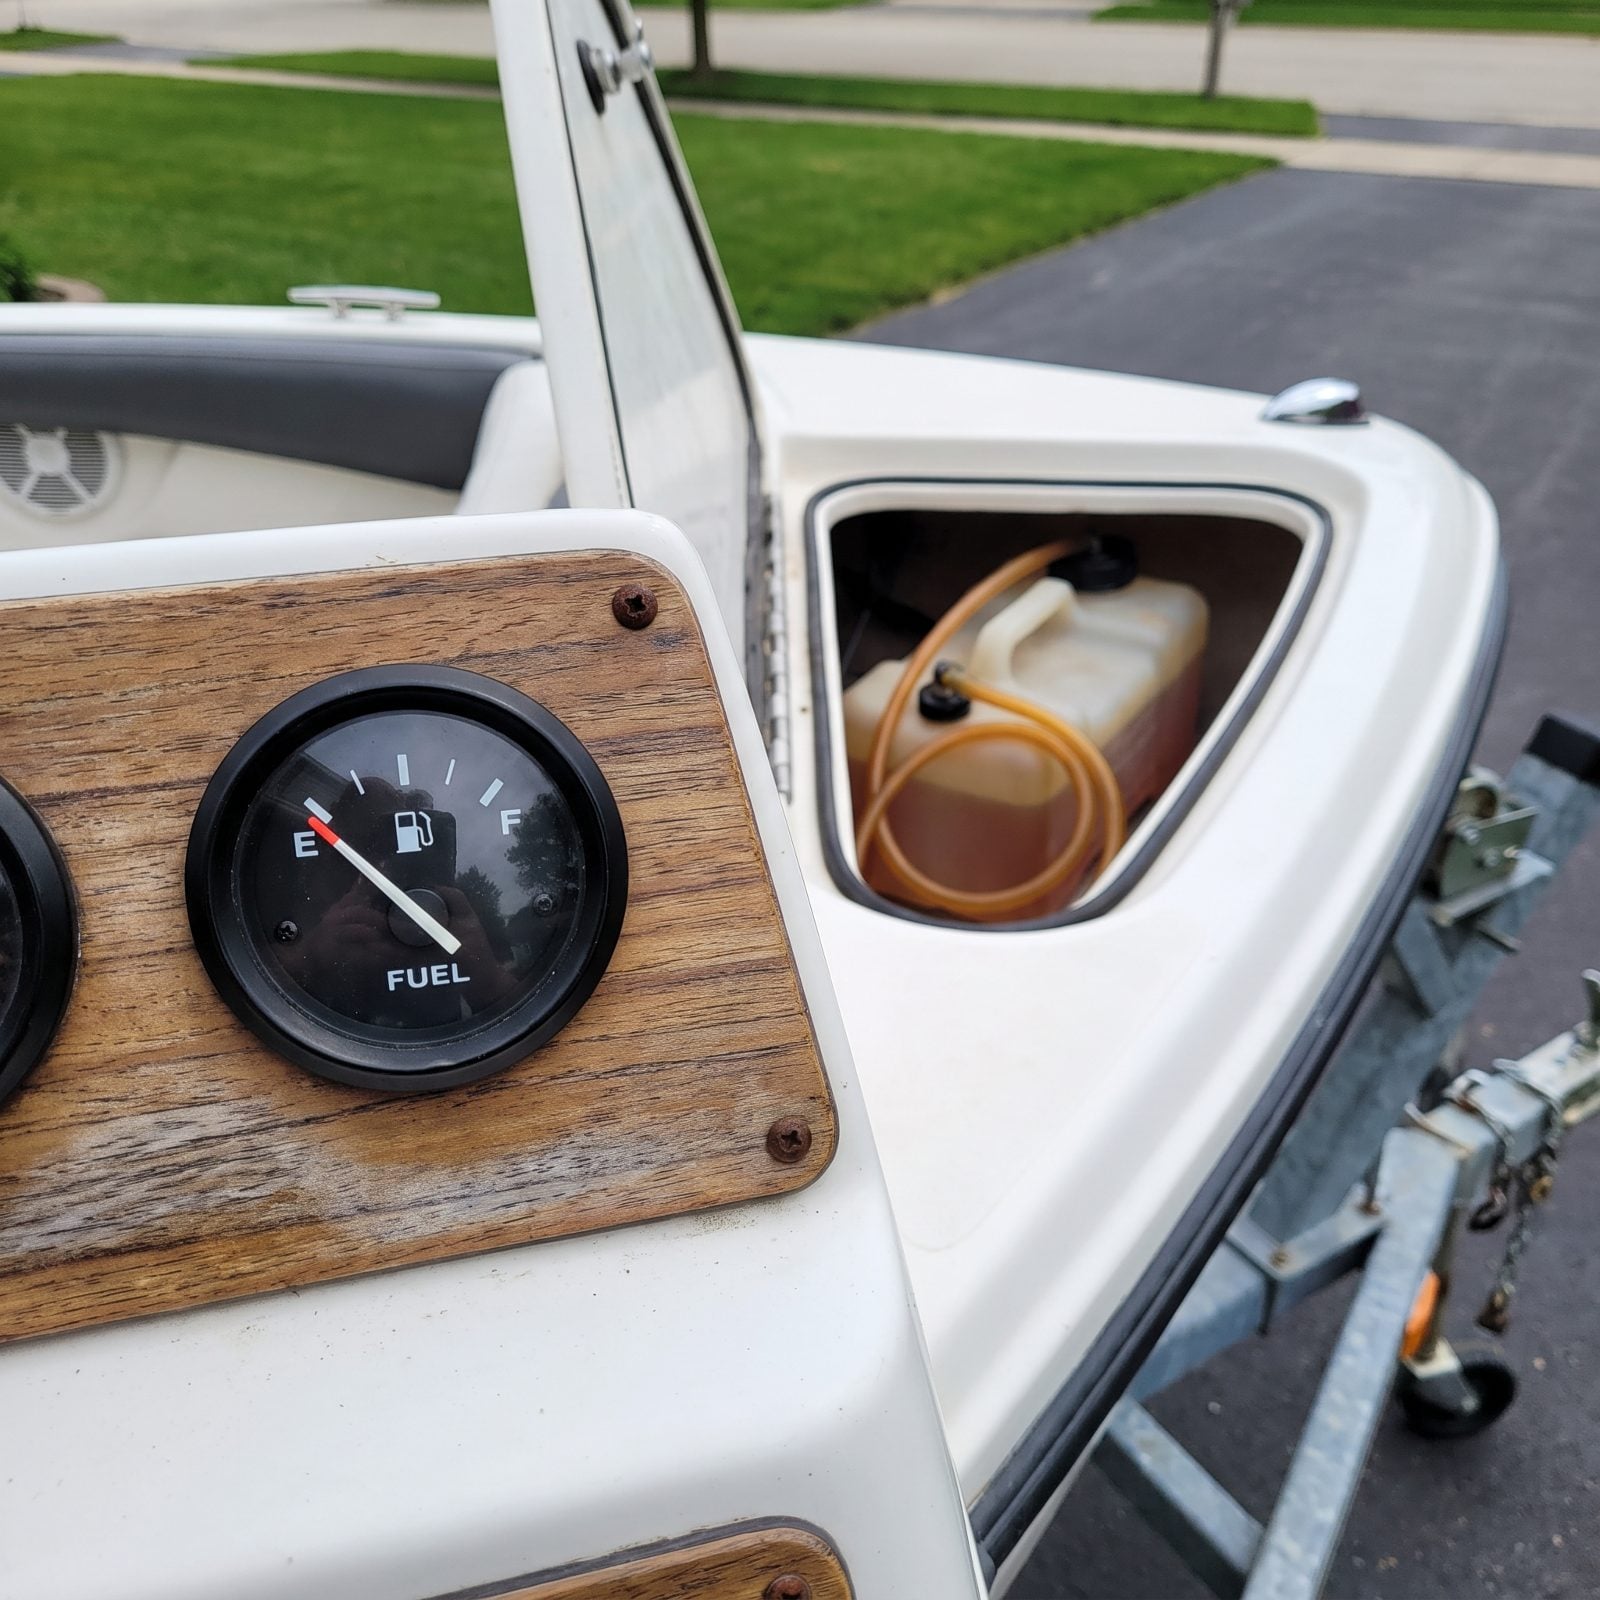
There are two camps on this, and both are right depending on your tank. Metal tanks want to be nearly full so there’s little air space inside to breathe moist air and sweat condensation. Plenty of modern plastic and aluminum tanks do fine lower. The trap is assuming one rule fits your boat.
Check your owner’s manual before you fill or drain. Guess wrong on a steel tank and you get a winter’s worth of water condensing on the bare walls, pooling at the bottom, and ruining spring. Guess wrong the other way and you’ve stored a full tank of fuel that goes stale.
43. Replace Engine Oil and Filter
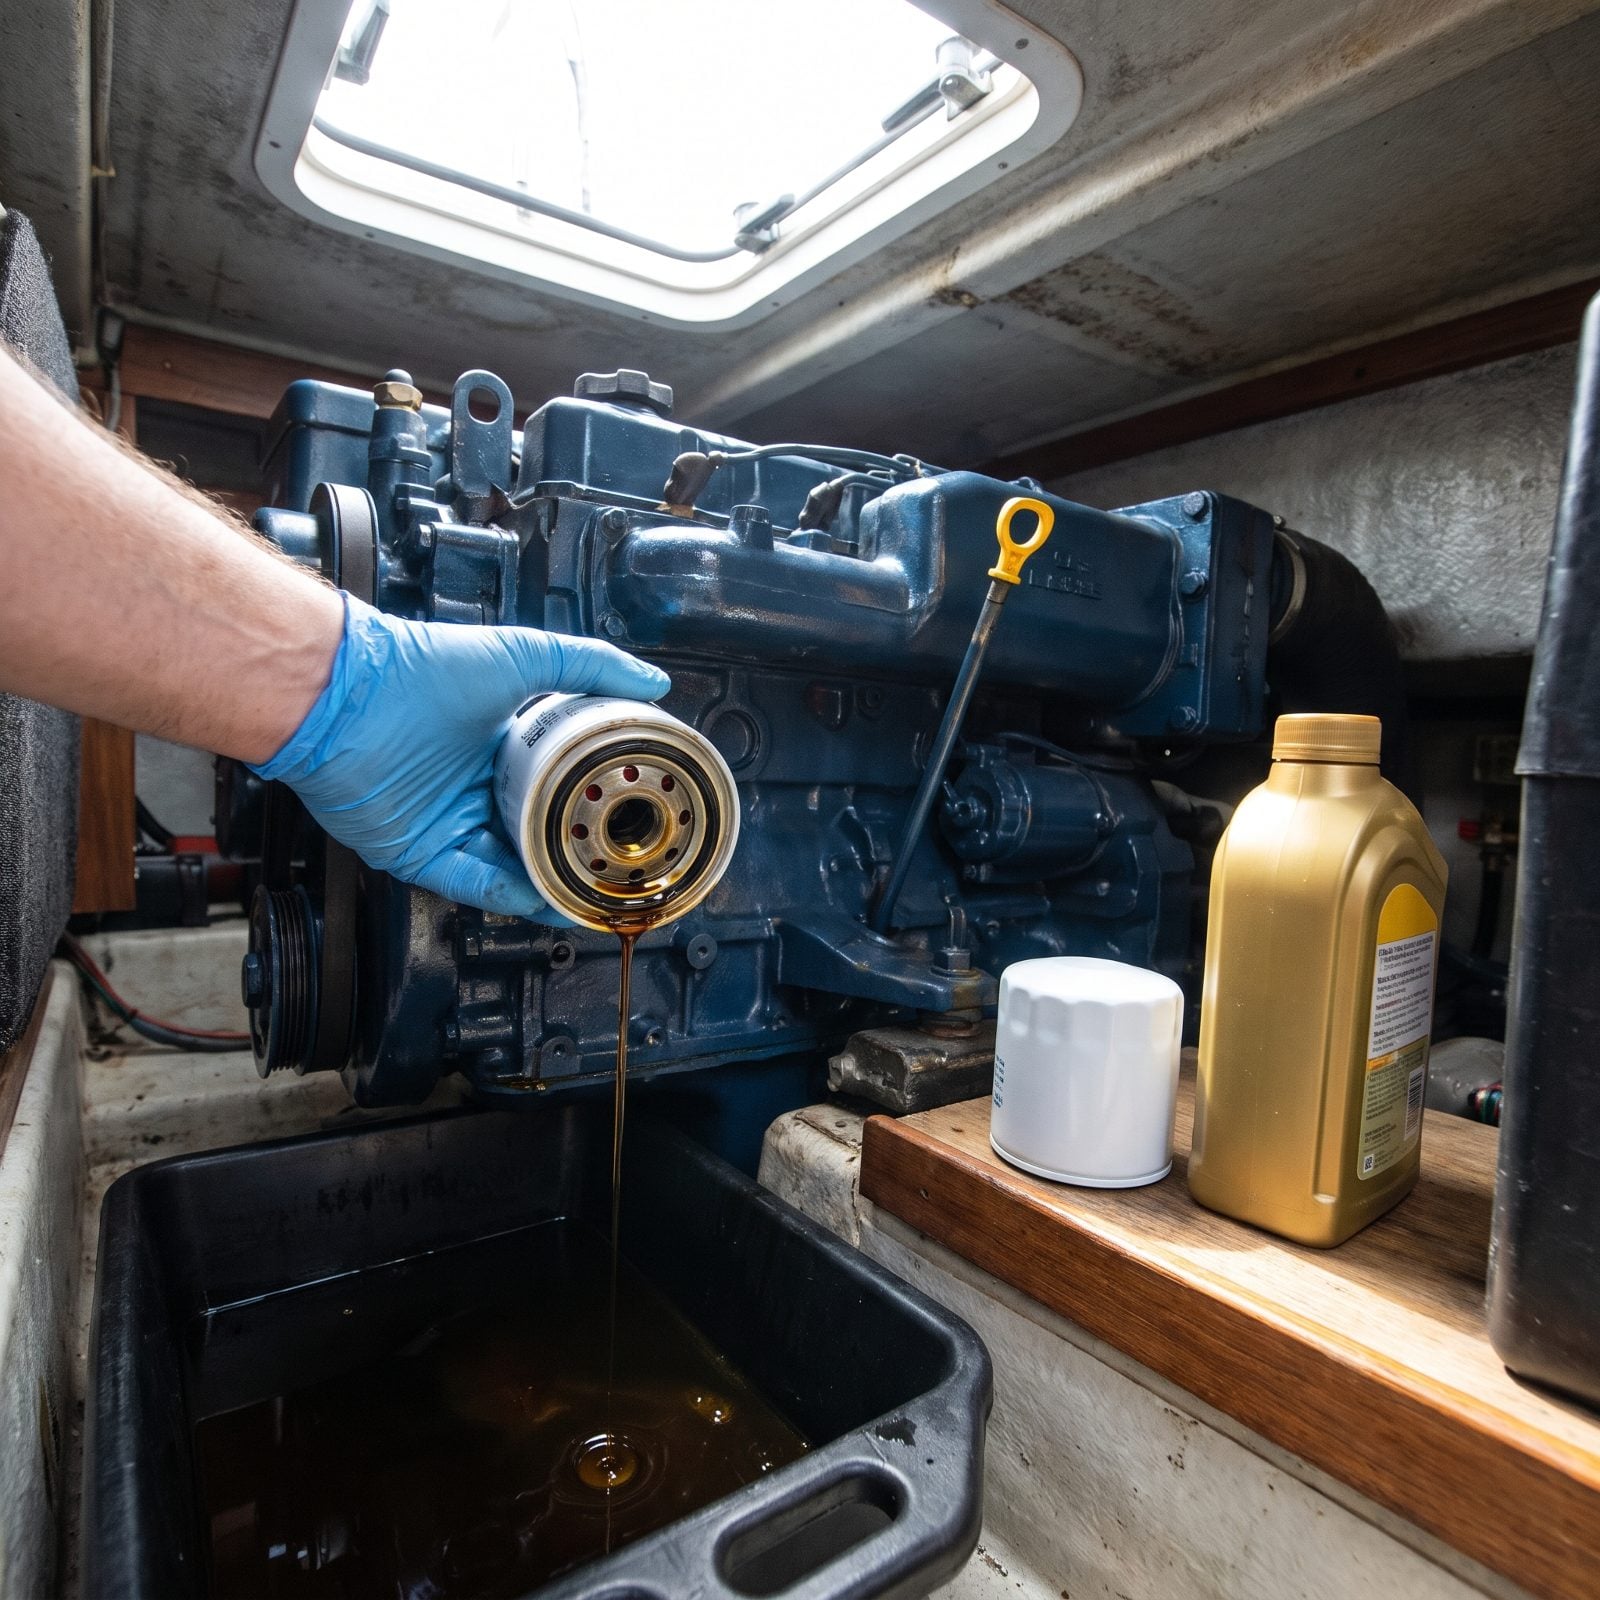
Old oil is acidic. The combustion byproducts and moisture it’s been holding all season sit there eating bearings and cam surfaces for five months straight if you leave them in. Change the oil and filter now, not in spring, so clean oil protects the internals through storage.
Warm the engine first so the oil drains fully and carries the junk out with it. Cold oil leaves sludge behind. Pull the old filter, prime the new one with a little fresh oil so you don’t dry-start in April, and snug it hand-tight plus the quarter turn marked on the filter.
Skipping this to save an afternoon just means spending that afternoon later, dealing with what the acid did.
42. Drain Fuel-Water Separators
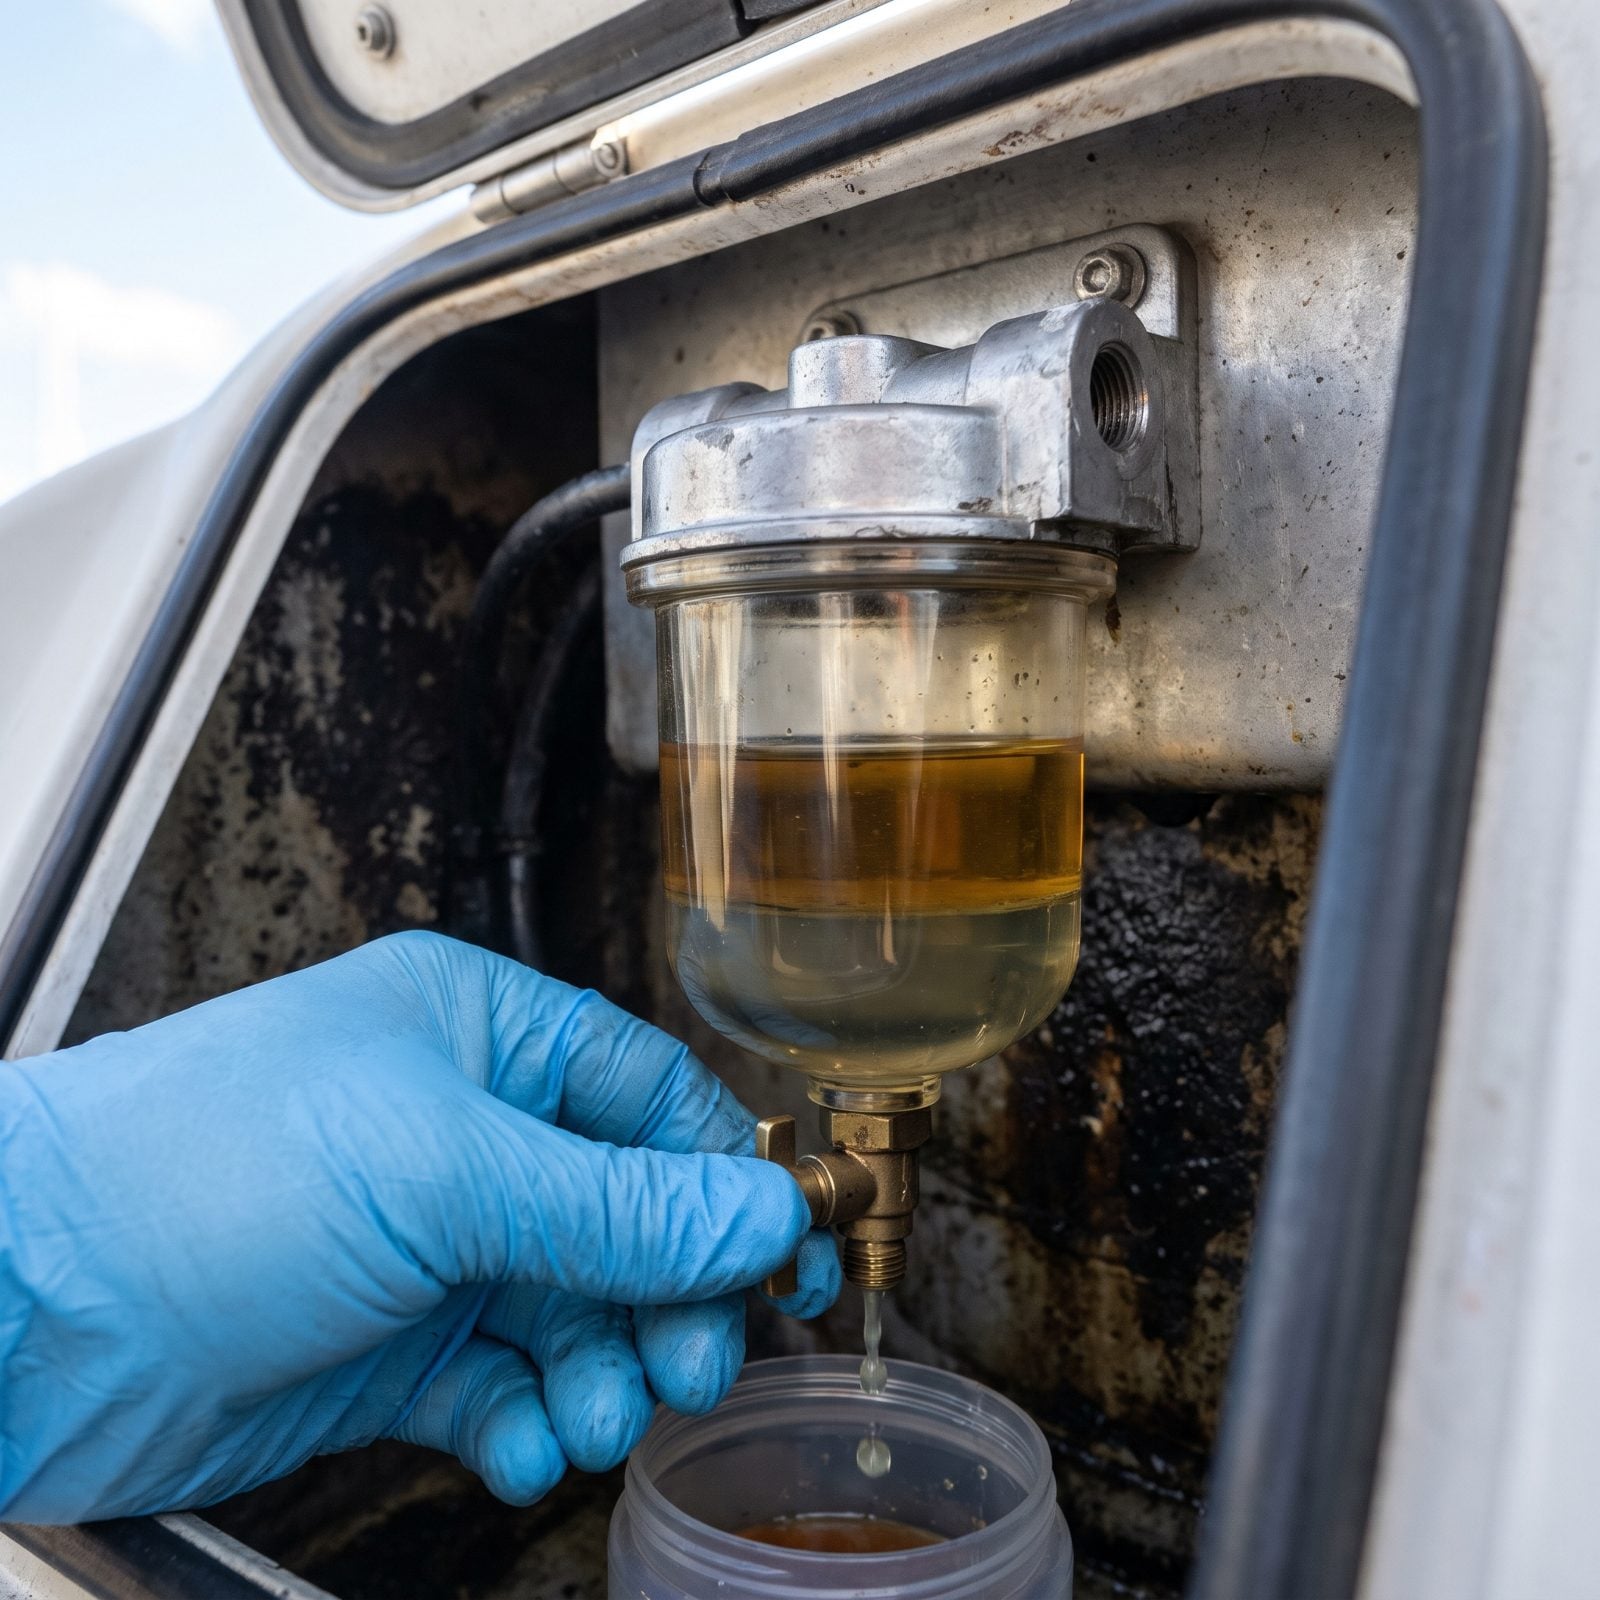
Water in your fuel system over winter is a block of ice waiting to happen in the wrong spot. It also feeds the microbial growth that clogs filters and corrodes metal. Drain the separator bowls before storage so you’re not leaving standing water in the line.
Look through the clear bowl first. You’ll see water sink below the fuel as a distinct layer. Crack the drain at the bottom and catch what comes out in a clear cup. Drain until it runs clean amber. Most people swap the whole element now too — you’re already in there, and a fresh filter means a clean start in spring.
41. Flush Raw-Water Cooling Passages
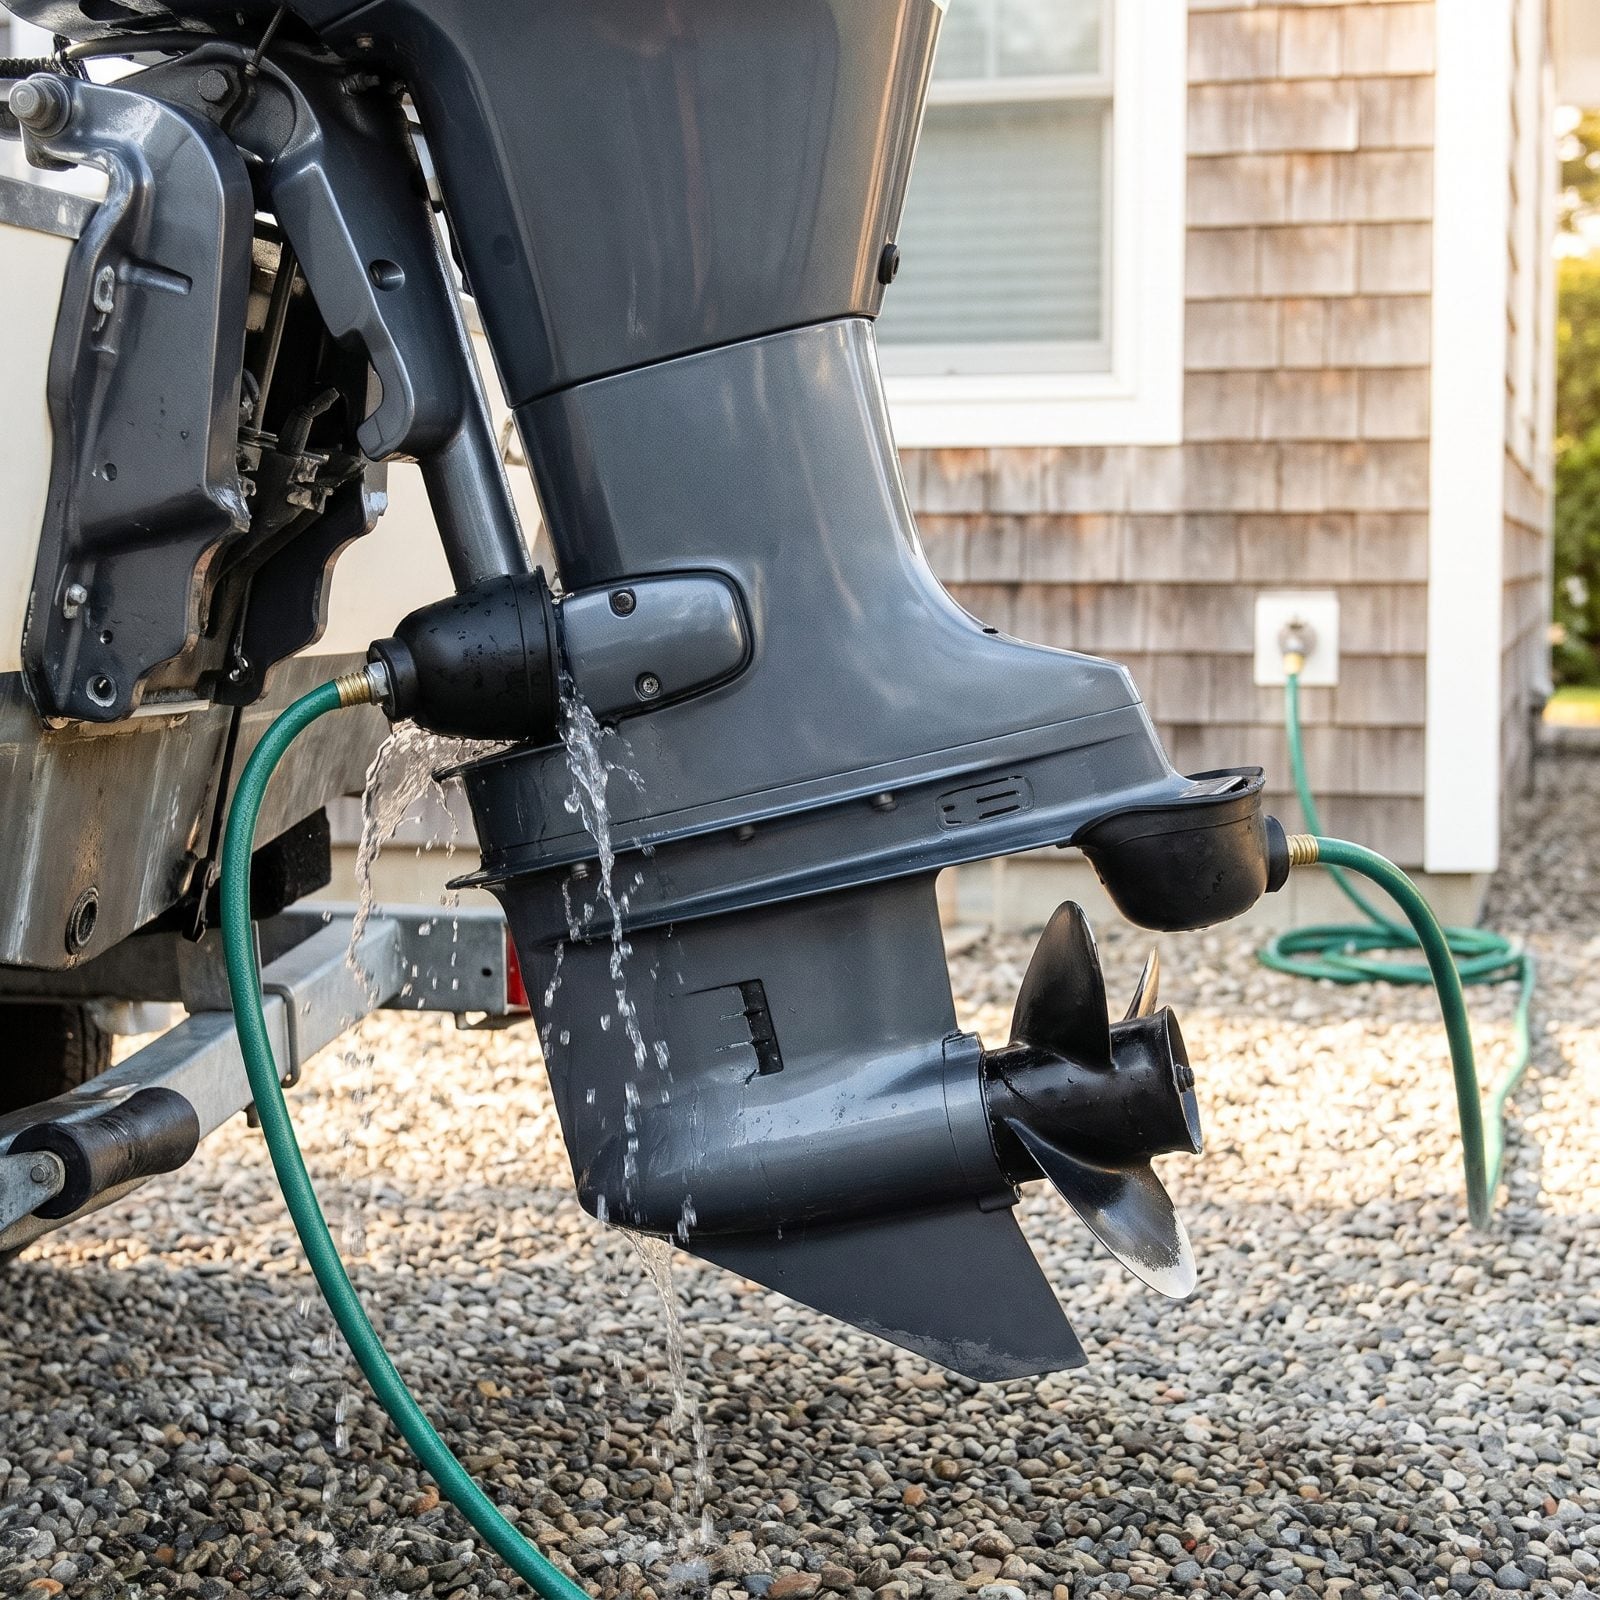
Raw-water systems pull lake or sea water straight through the engine, and that water leaves behind salt, silt, and mineral scale. Flush it with fresh water before you put her away so you’re not storing corrosive gunk inside your cooling passages all winter.
On an outboard or sterndrive, slip a pair of flush muffs over the water intakes on the lower unit, run the hose, and let fresh water circulate at idle for several minutes until it runs clear. Salt especially has to come out. Left behind, it keeps pulling moisture and eating aluminum all winter.
40. Test Closed-Cooling Antifreeze Strength
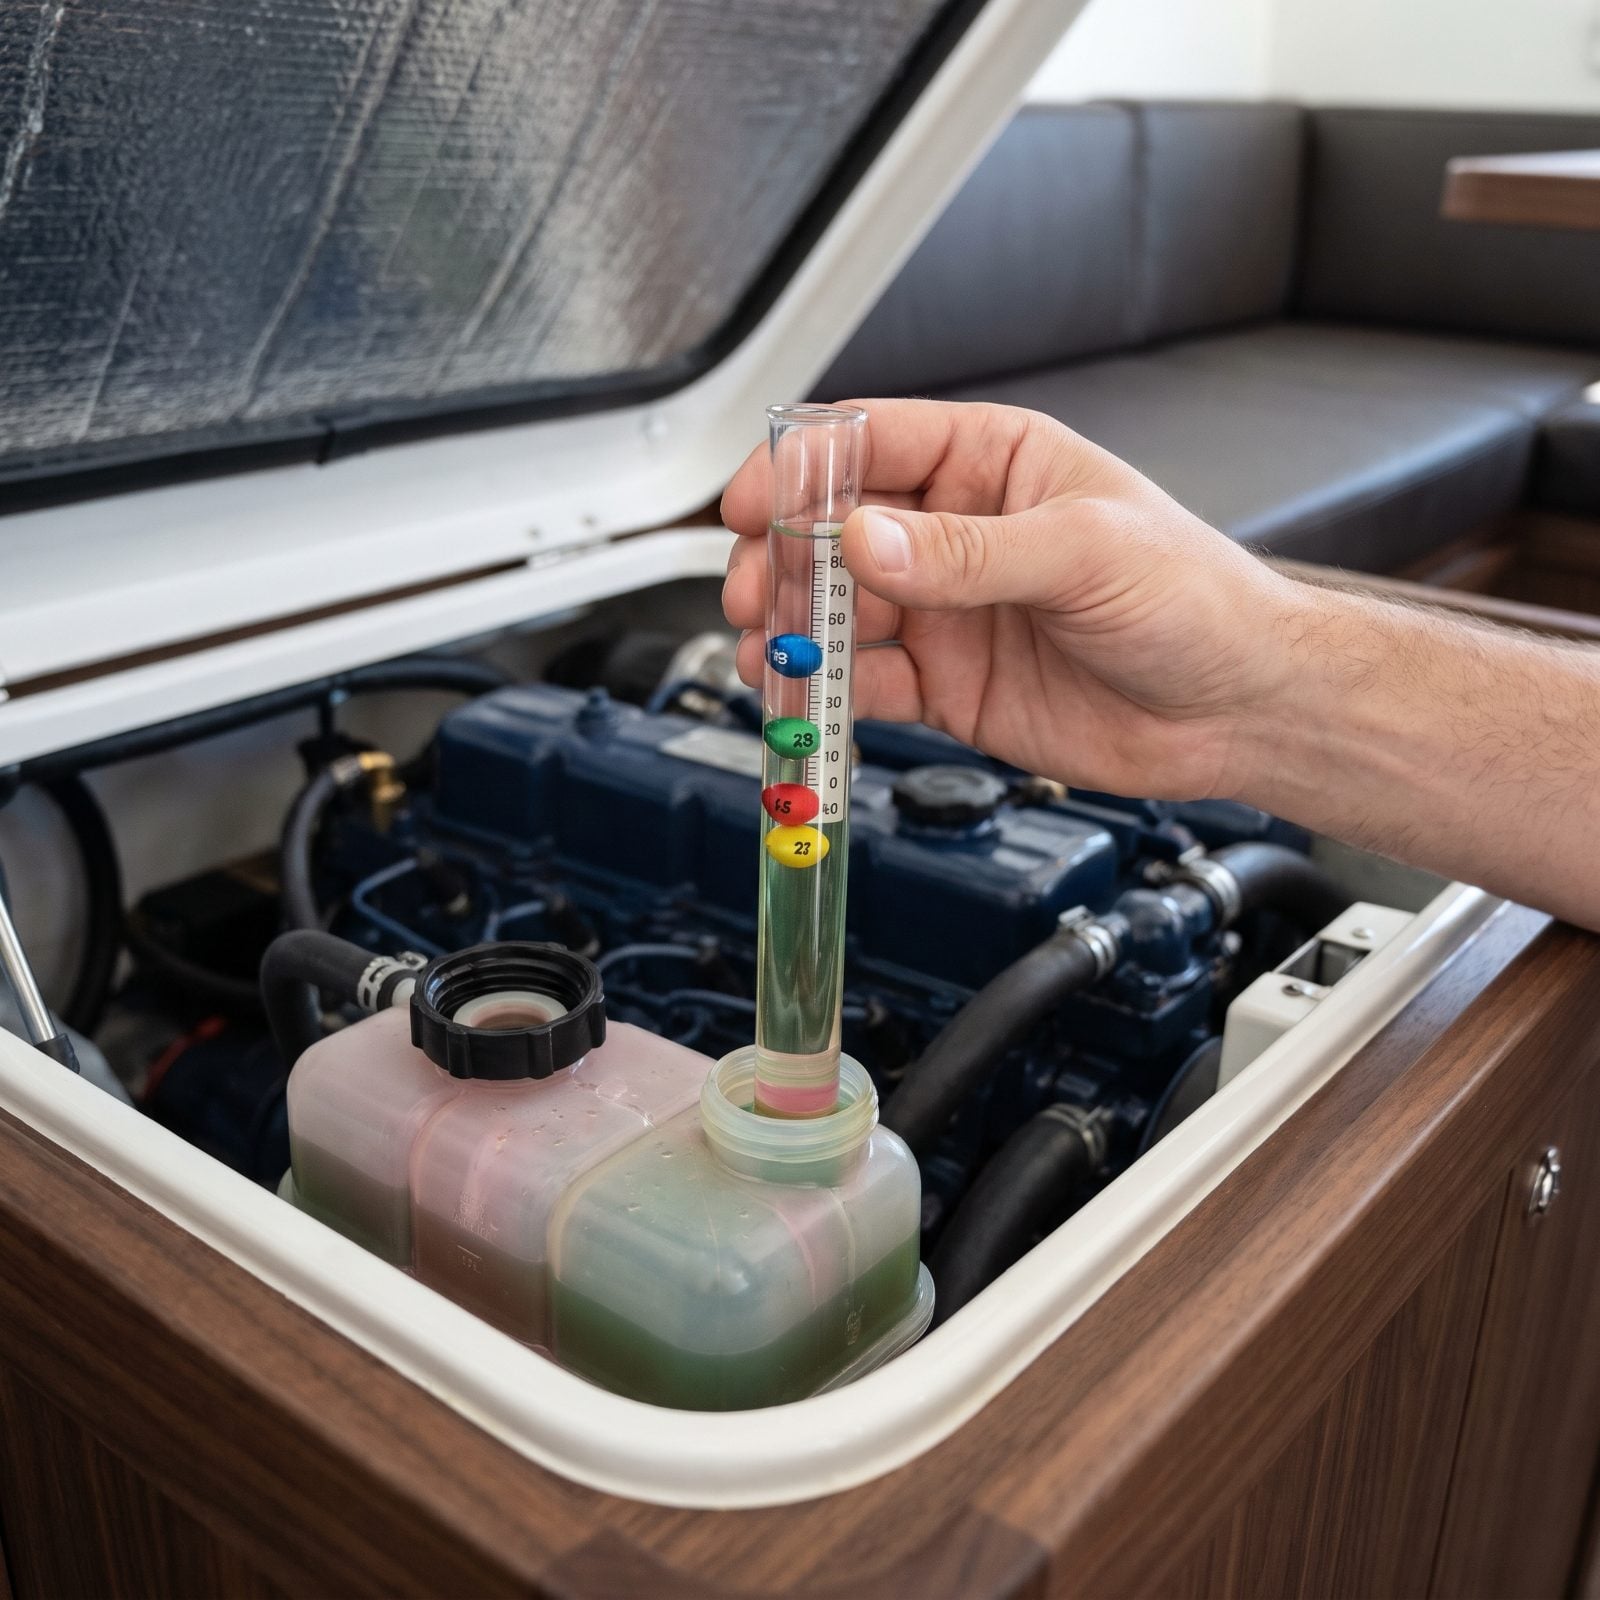
If your engine runs a closed-cooling system, the antifreeze on the engine side still has to be strong enough to survive your coldest night. Coolant breaks down over years and loses its freeze protection. A weak mix freezes, expands, and cracks the block you were trying to protect.
Test it with a cheap floating-ball hydrometer or a refractometer. Draw a sample, read the protection temperature, and compare it to the coldest it gets where the boat sleeps. Marginal? Drain and refill with the correct marine-grade coolant.
Don’t assume the factory fill is still good at year five. I’ve seen plenty test weak when they looked perfectly green.
39. Circulate Marine Antifreeze Through Engines
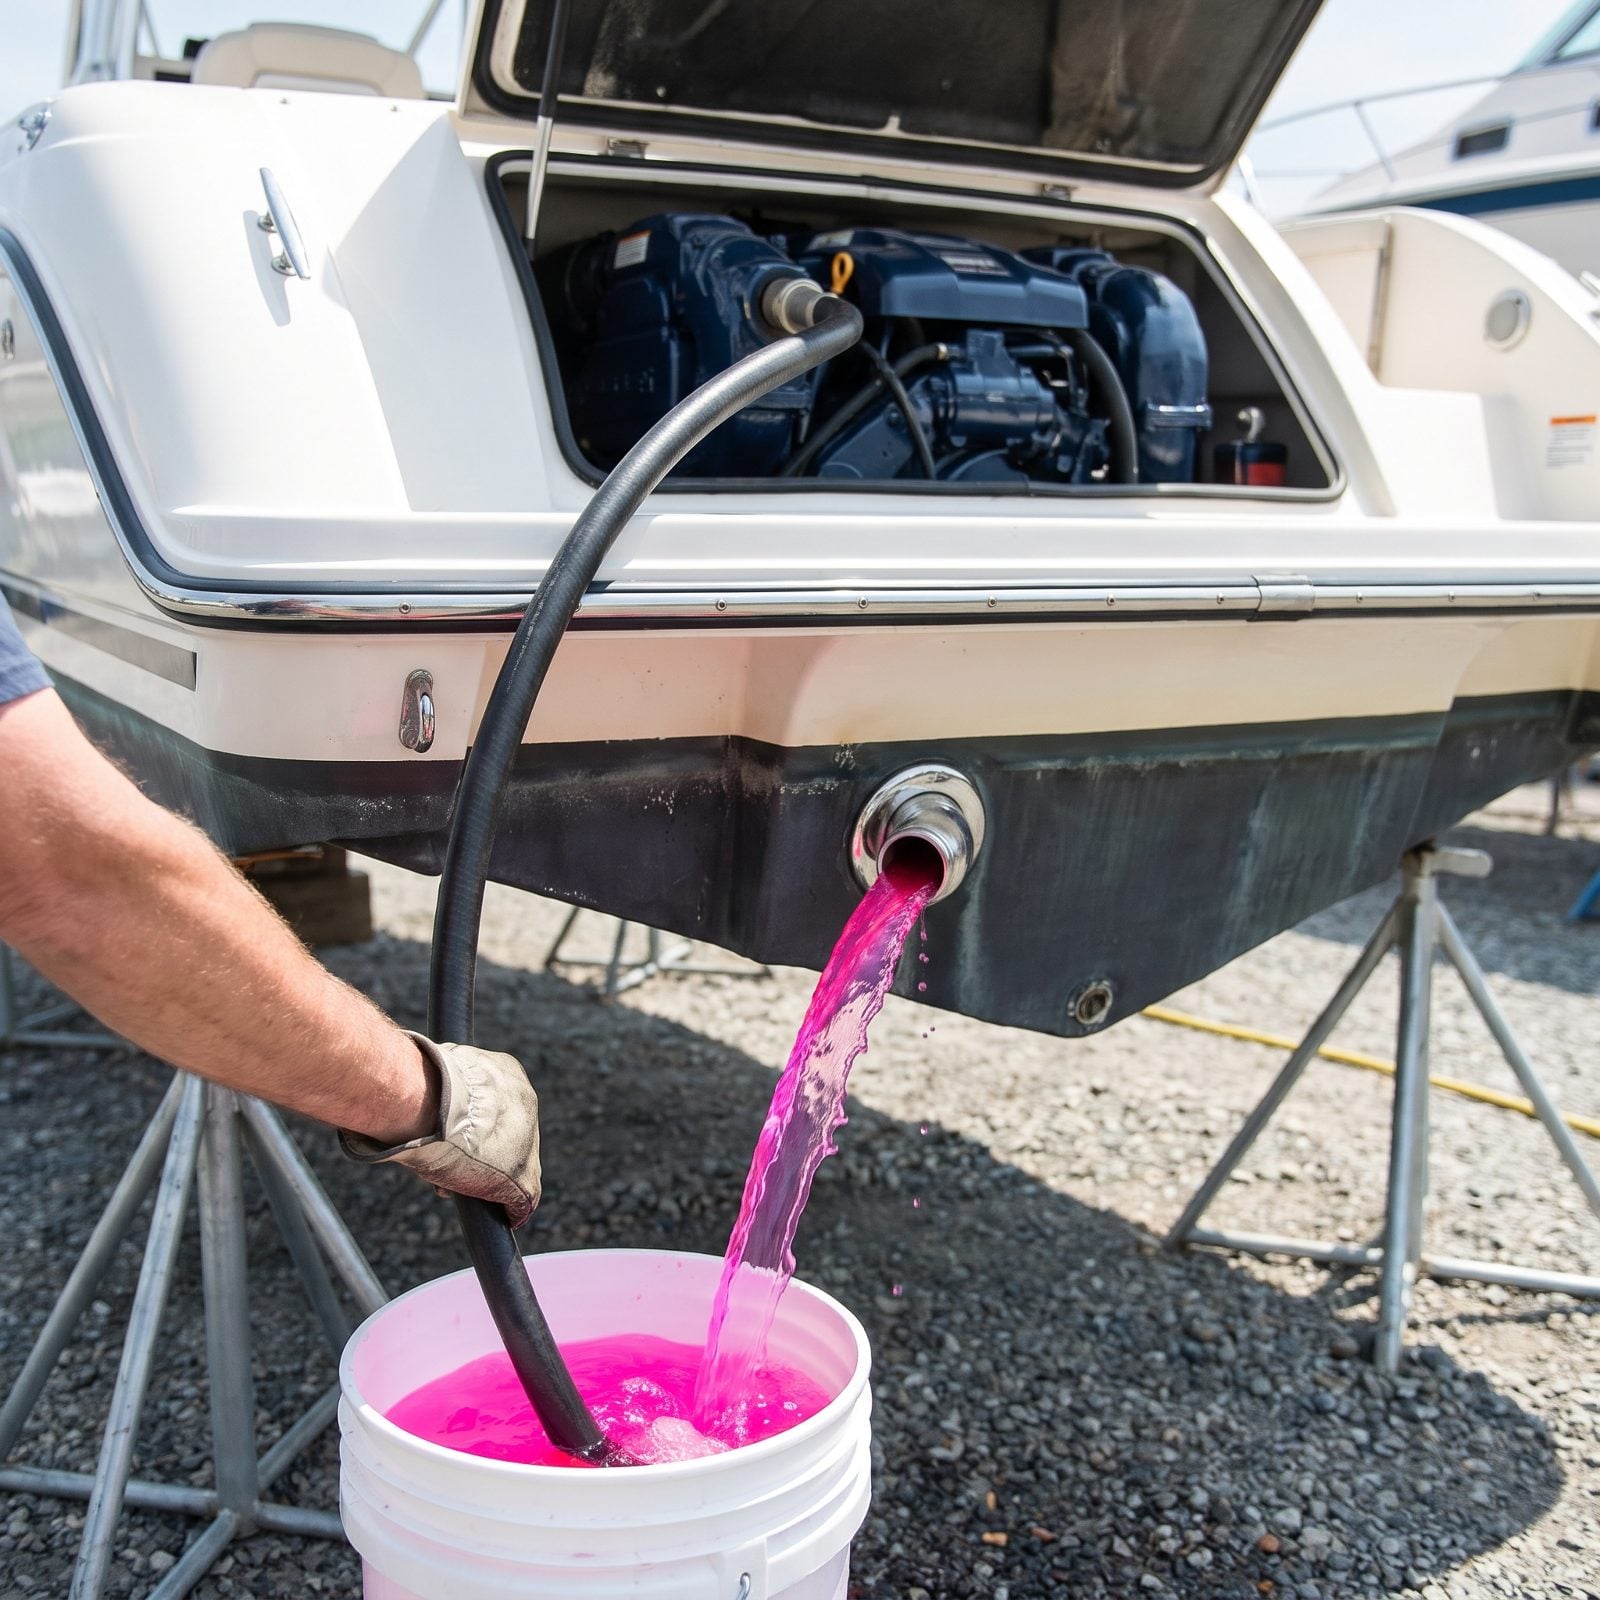
This is the step that saves the block. After flushing, you pull non-toxic marine antifreeze — the pink stuff — through the raw-water side so every low spot and passage holds freeze-proof fluid instead of plain water.
Drop the intake into a bucket of antifreeze, run the engine, and watch the exhaust. Keep feeding until it discharges solid pink, not diluted. That tells you the water’s been pushed out and the whole system is filled. Stop short and there’s still plain water hiding in a pocket somewhere, which is exactly where the crack starts.
Use enough. Running out halfway, sucking air, and sending water back in is the classic mistake. Have a gallon more than you think you need.
38. Fog Gasoline Engines Per Manufacturer
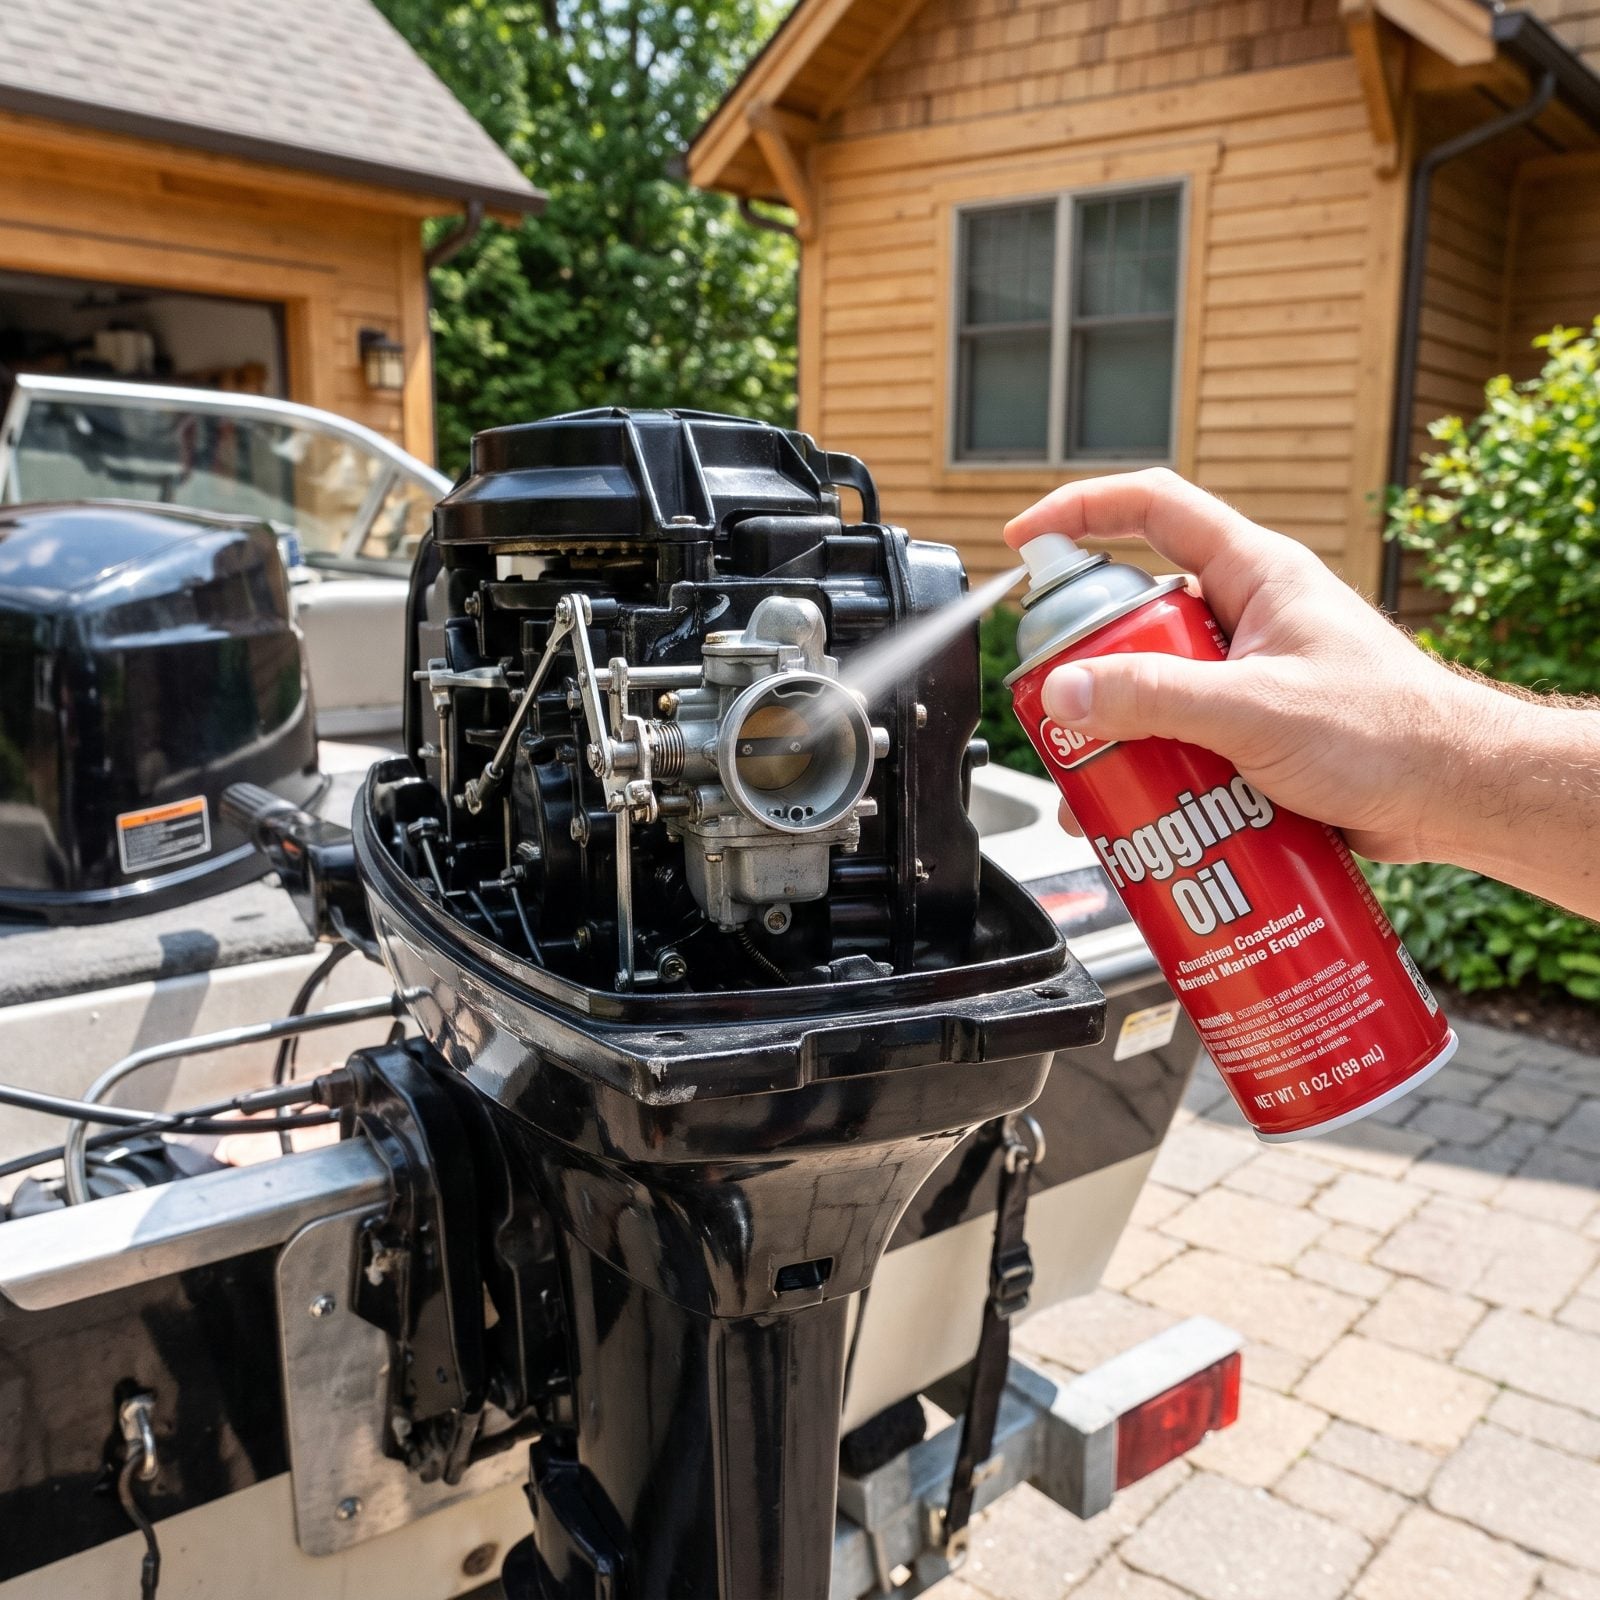
Bare cylinder walls rust. Over a damp winter the thin film of oil left on them drains away and moisture pits the metal, so the first spring start grinds dry across corroded surfaces. Fogging coats everything inside with a protective oil film that stays put.
Spray fogging oil into the intake or the spark plug holes per your engine’s method, either while it runs or as you crank it, until it bogs down and smokes. That smoke is the oil coating the cylinders, rings, and valves.
37. Inspect Belts for Cracks and Slack
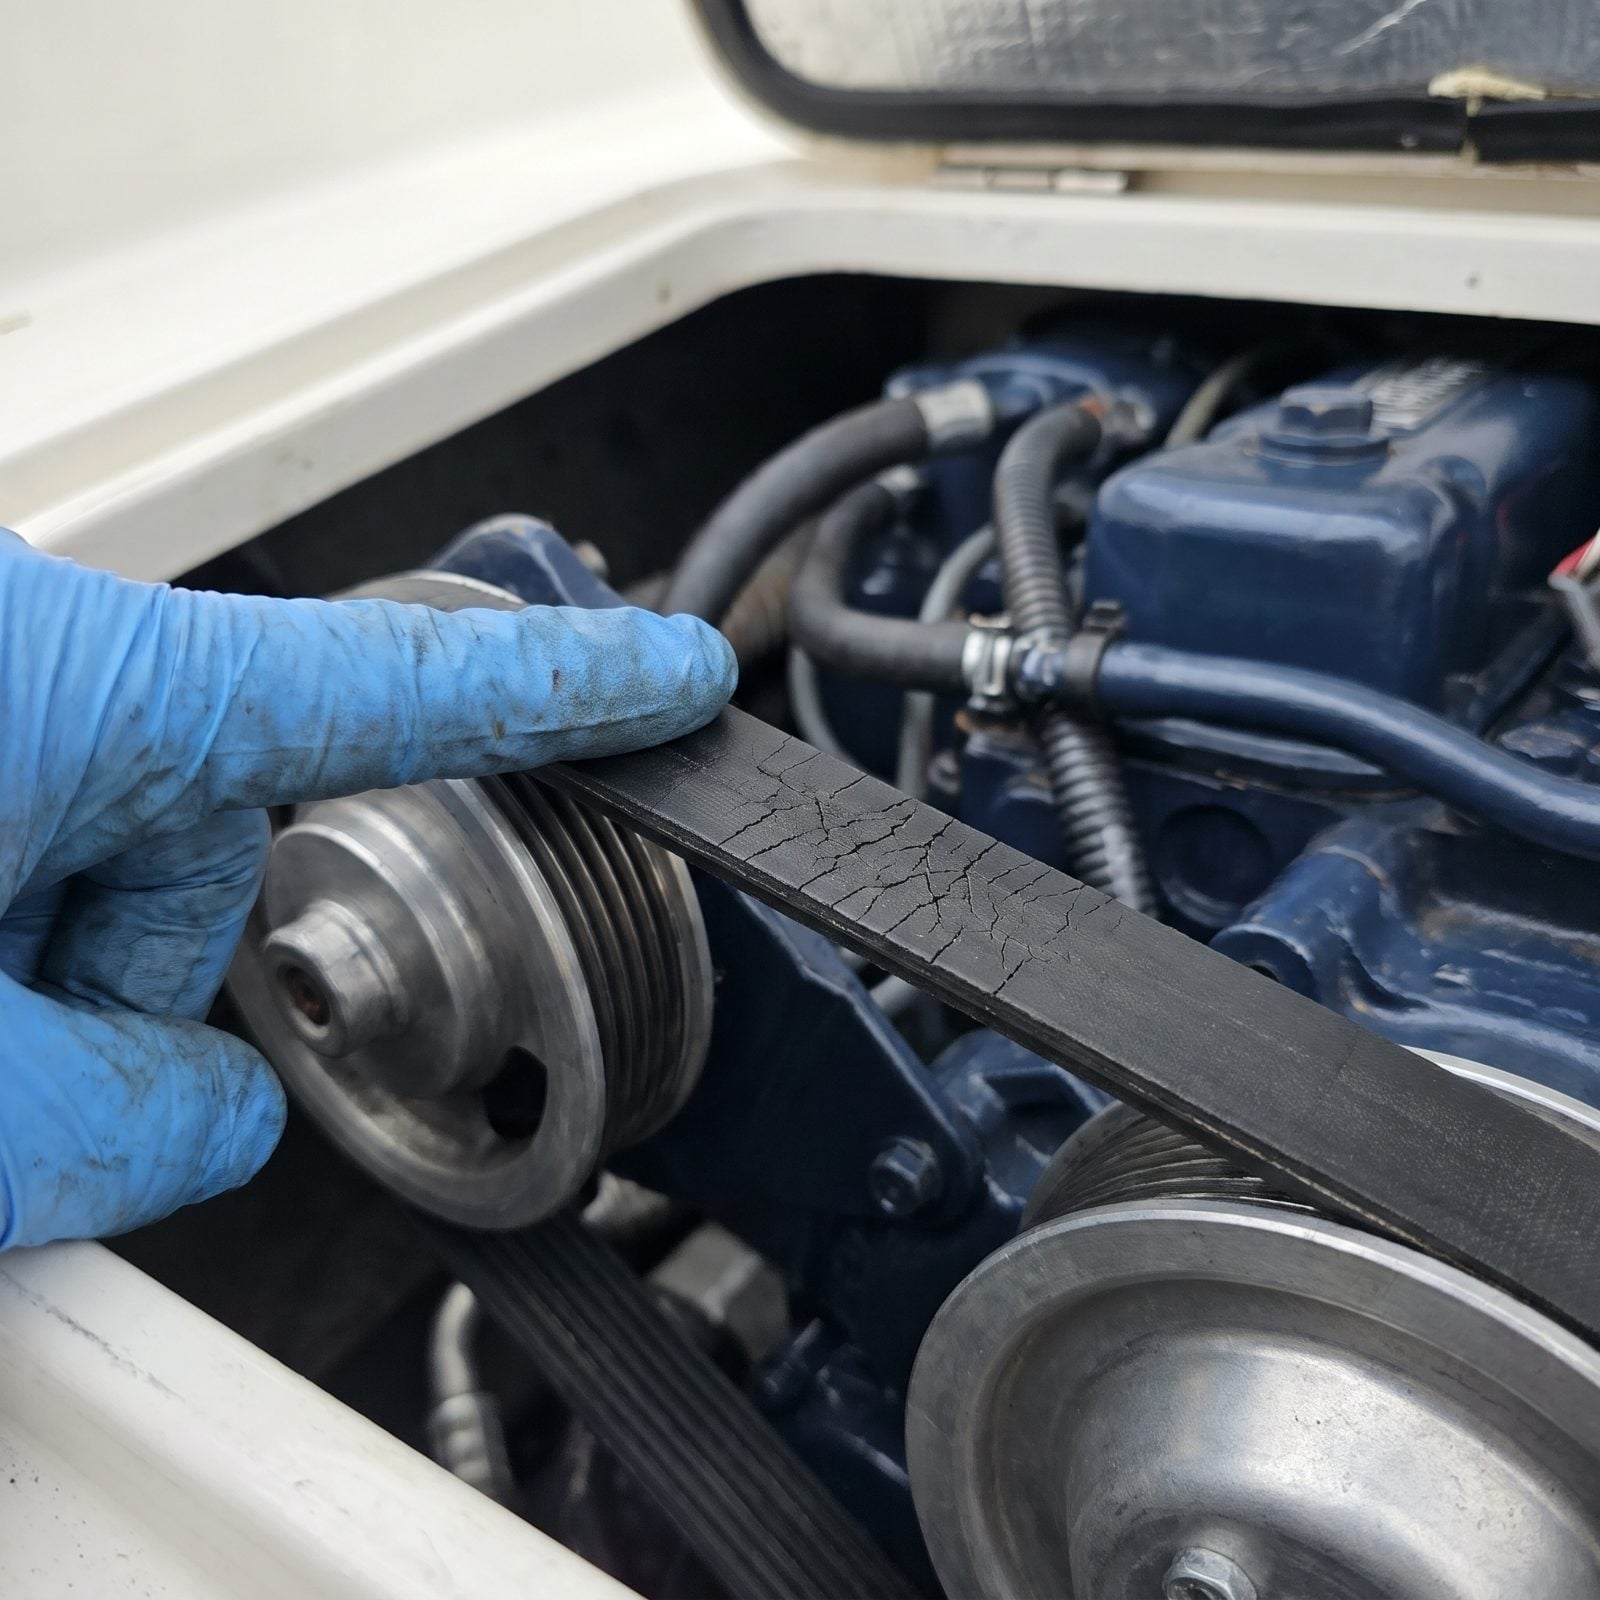
Here’s a quiet one that pays off in spring. Belts dry out and crack whether the boat runs or sits, and a storage season of cold does them no favors. Catch a bad belt now and you order the part over the slow winter, instead of waiting on it when you’d rather be on the water.
Twist the belt and look at the underside. Hairline cracks across the ribs, glazing, or fraying edges mean it’s done. Then press the longest span between pulleys — it should give about half an inch, no more, no less. Too loose and it slips the water pump, which is the last thing you want on a hot day in July.
Belts are cheap. A cooked engine from a slipped pump belt is not.
36. Inspect Cooling Hoses and Clamps
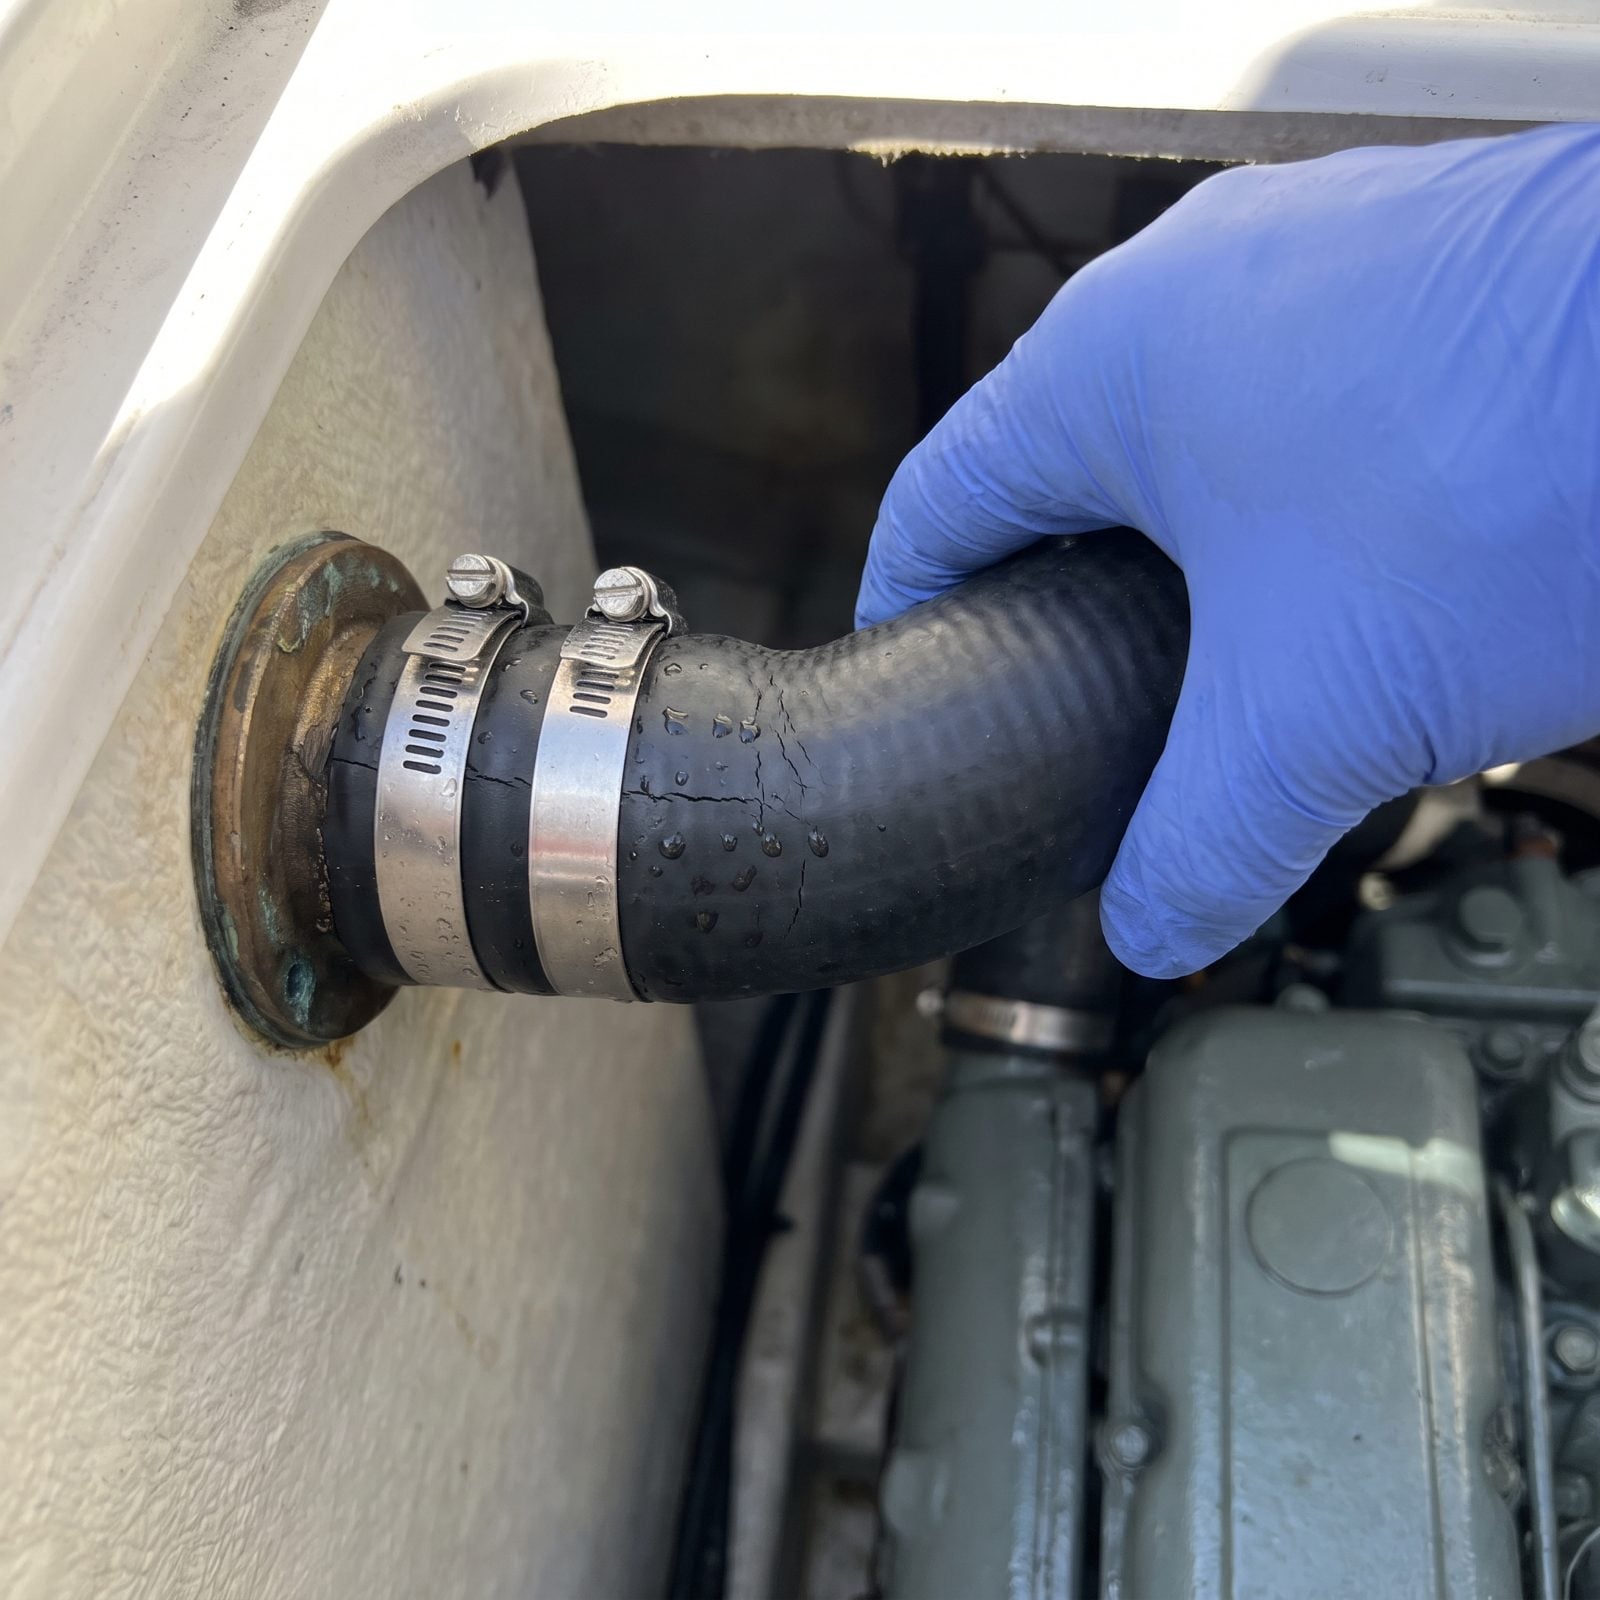
A cooling hose rarely fails on a calm day. It waits for the moment you’re three miles out and the temp needle starts climbing. Winter is when you catch it, because a cold hose tells on itself. Squeeze each one along its length — a healthy hose feels firm and springs right back, while a tired one goes mushy near the clamps or gives off a faint crackle, which is the inner liner breaking down where you can’t see it.
Now the part most people skip entirely: the clamp. Run a fingernail across the band and look for brown rust bleeding through the “stainless.” Cheap clamps are stainless on the band only, with a carbon-steel screw that rots from the inside out. Double-clamp anything below the waterline. No exceptions.
35. Service the Raw-Water Impeller
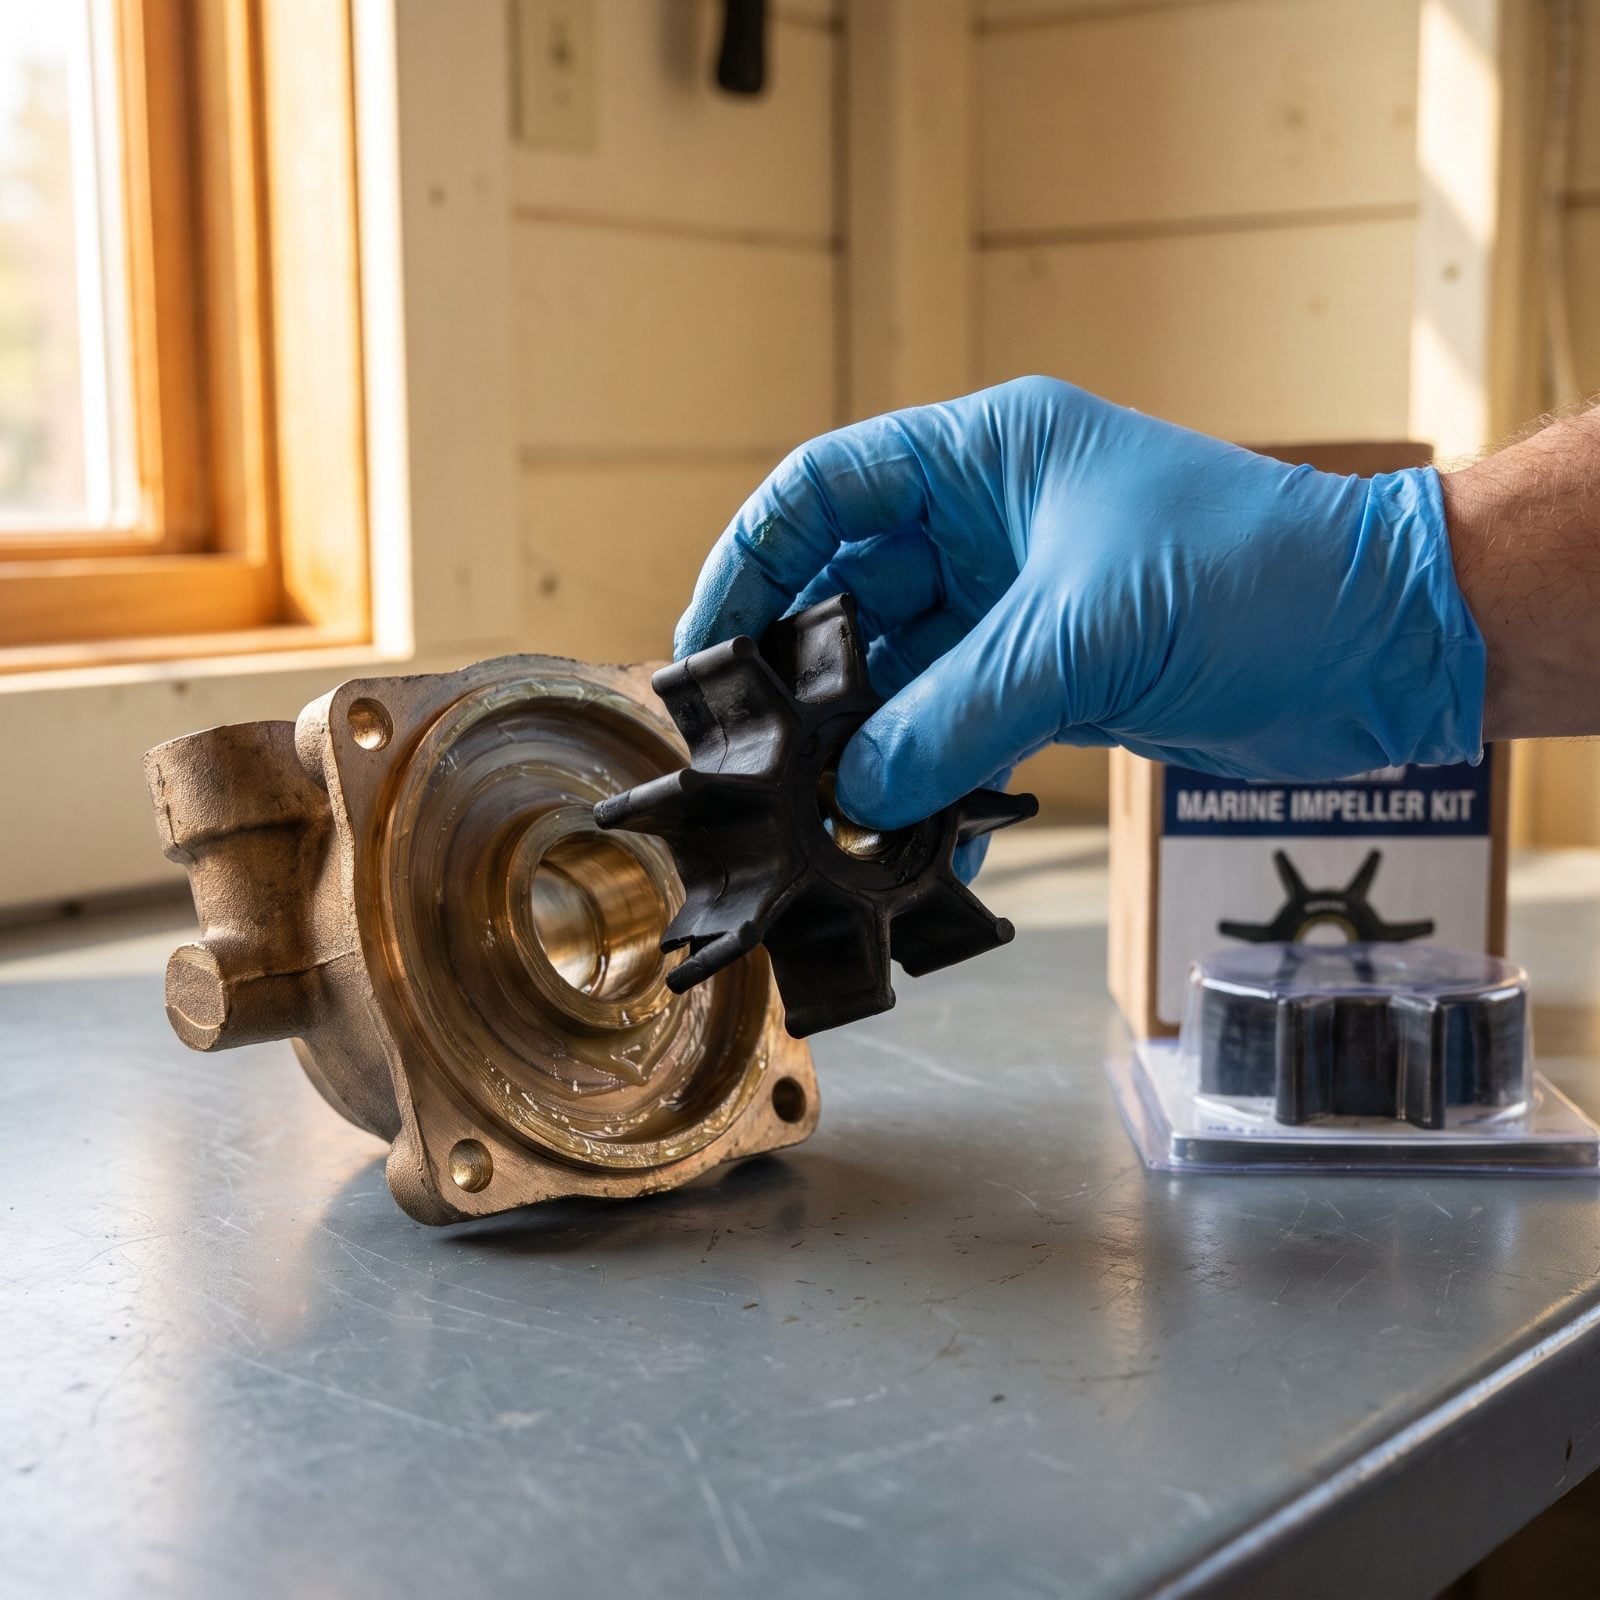
An impeller that looks fine is still aging in there. Rubber takes a set when it sits, and a pump that pushed plenty of water back in September can glaze over the winter and starve your engine come spring. Pull the cover plate and look at the vanes — you want them straight and flexible. If the tips have a permanent curl, or any look nibbled or cracked, swap it now and keep the old one in a zip bag as your get-home spare.
And here’s the one that really bites people. Go count the vanes against the new impeller. If one broke off and traveled downstream, it’s lodged in your heat exchanger choking flow, and you’ll chase that mystery overheat all season before you ever find it.
34. Inspect Exhaust Hoses and Risers
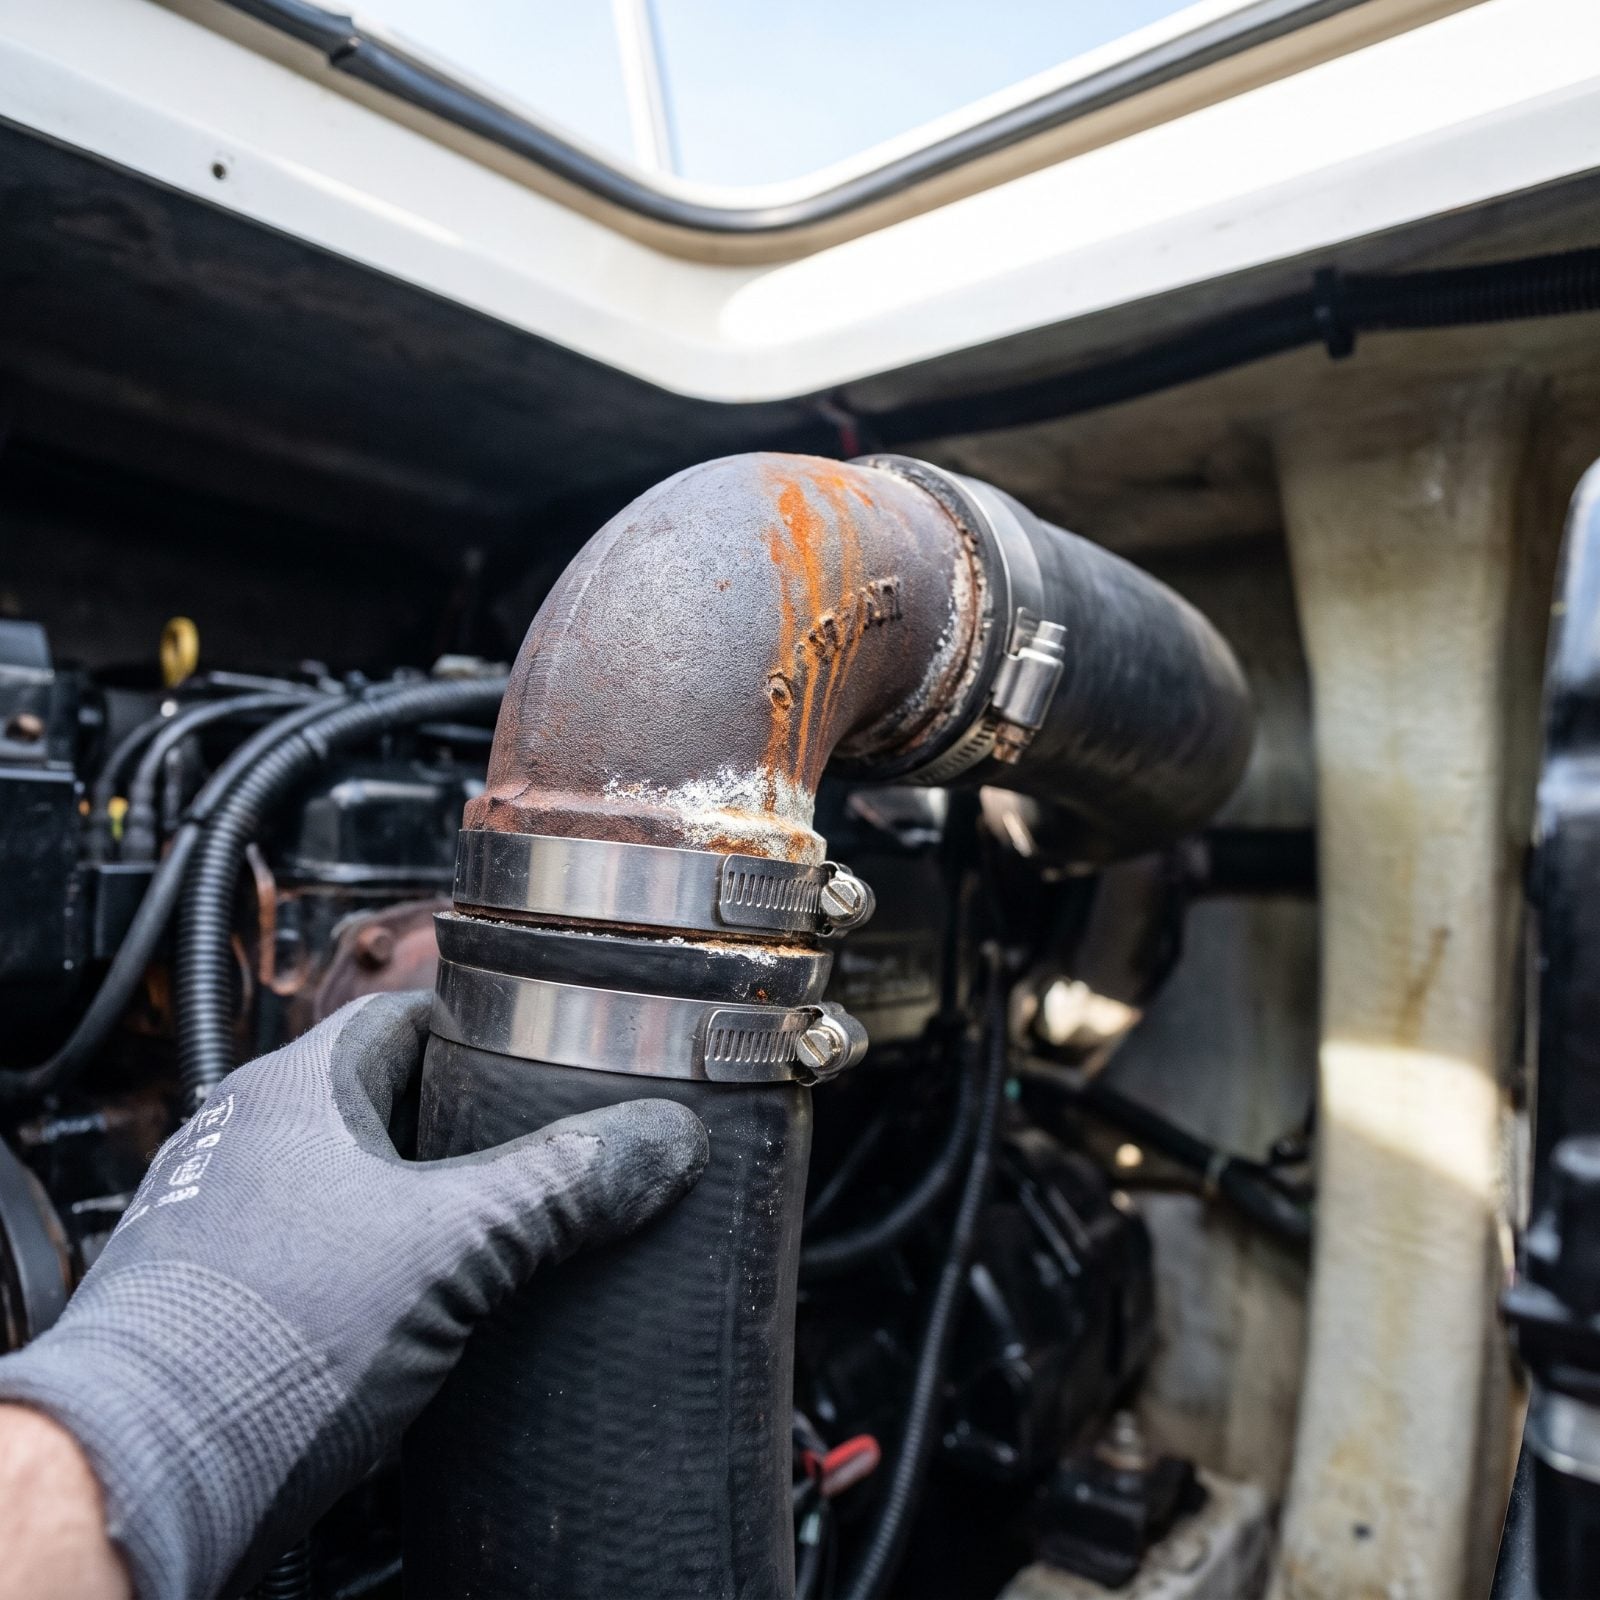
Exhaust risers are the quiet killers of inboard and sterndrive engines. They corrode from the inside where cooling water meets exhaust gas, and when they let go they dump water straight back into your cylinders. The hose that carries all that hot, wet exhaust lives a brutal life too.
Feel along the exhaust hose for soft or spongy spots near the riser, where the heat cooks it hardest. Check the riser joint for white salt crust or orange weep stains — both mean water is finding its way out where it shouldn’t. Tap a cast riser. A dull thud instead of a clean ring is bad news.
33. Change Sterndrive Gear-Case Lubricant
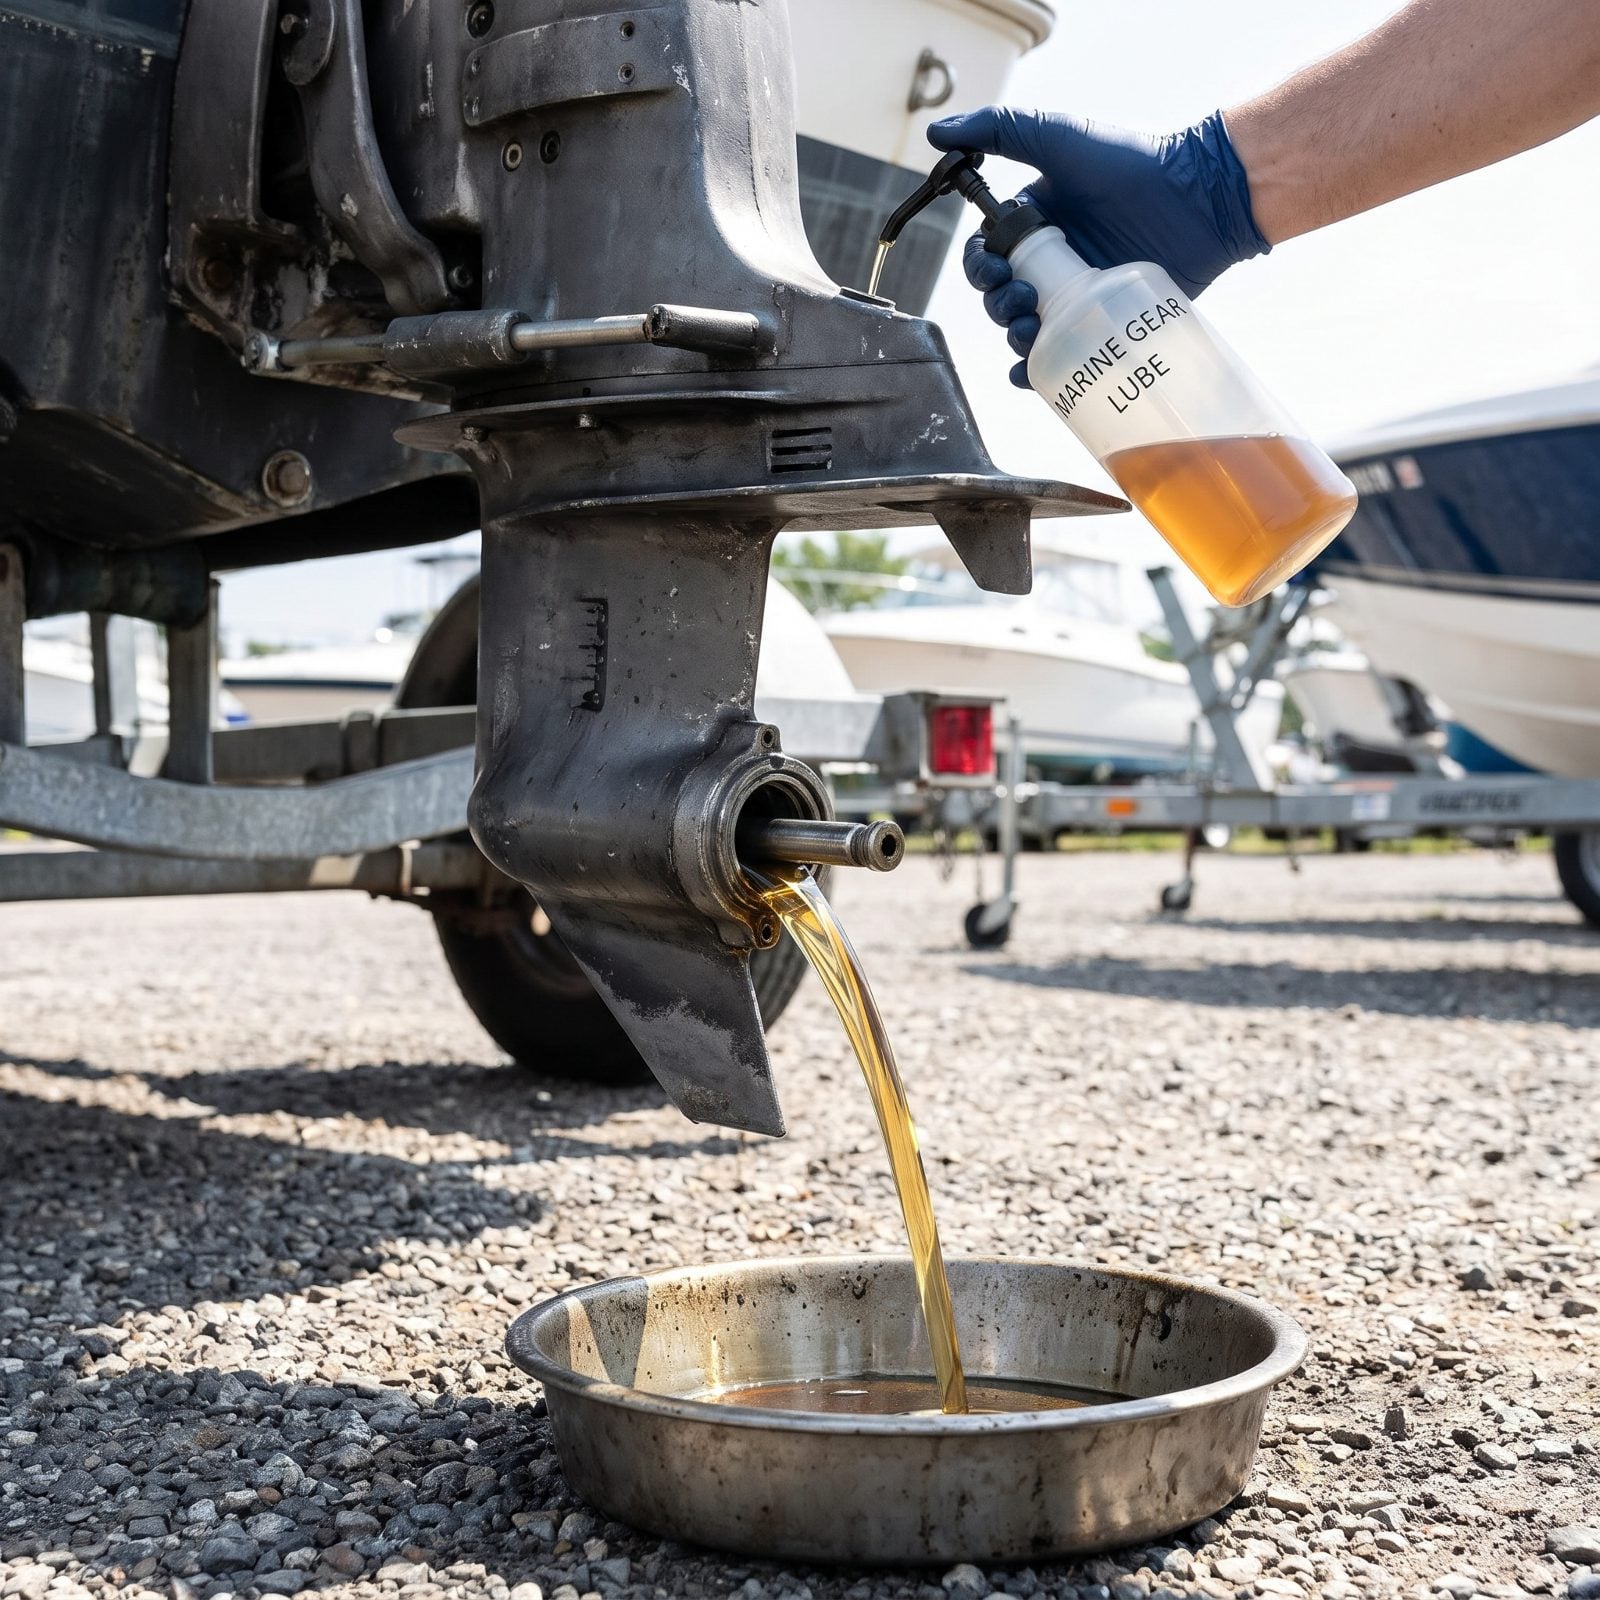
Changing the gear lube in fall isn’t really about the fresh oil. It’s about reading the old oil like a note the drive left for you. Pull the lower drain screw and the upper vent screw and let it run into a clean pan.
What you find tells you everything:
- Milky, coffee-with-cream color means water got past a seal — and that water will freeze and crack your gear case over winter.
- A faint metallic glitter means the gears are wearing.
- Clean amber means you’re fine.
The miss here is putting it off until spring. Water left in the case all winter freezes, expands, splits the housing. By the time you drain it in April the damage is already done. Fall is the only right time to do this — a case can look perfect right up until it cracks.
32. Store Outboards Fully Lowered
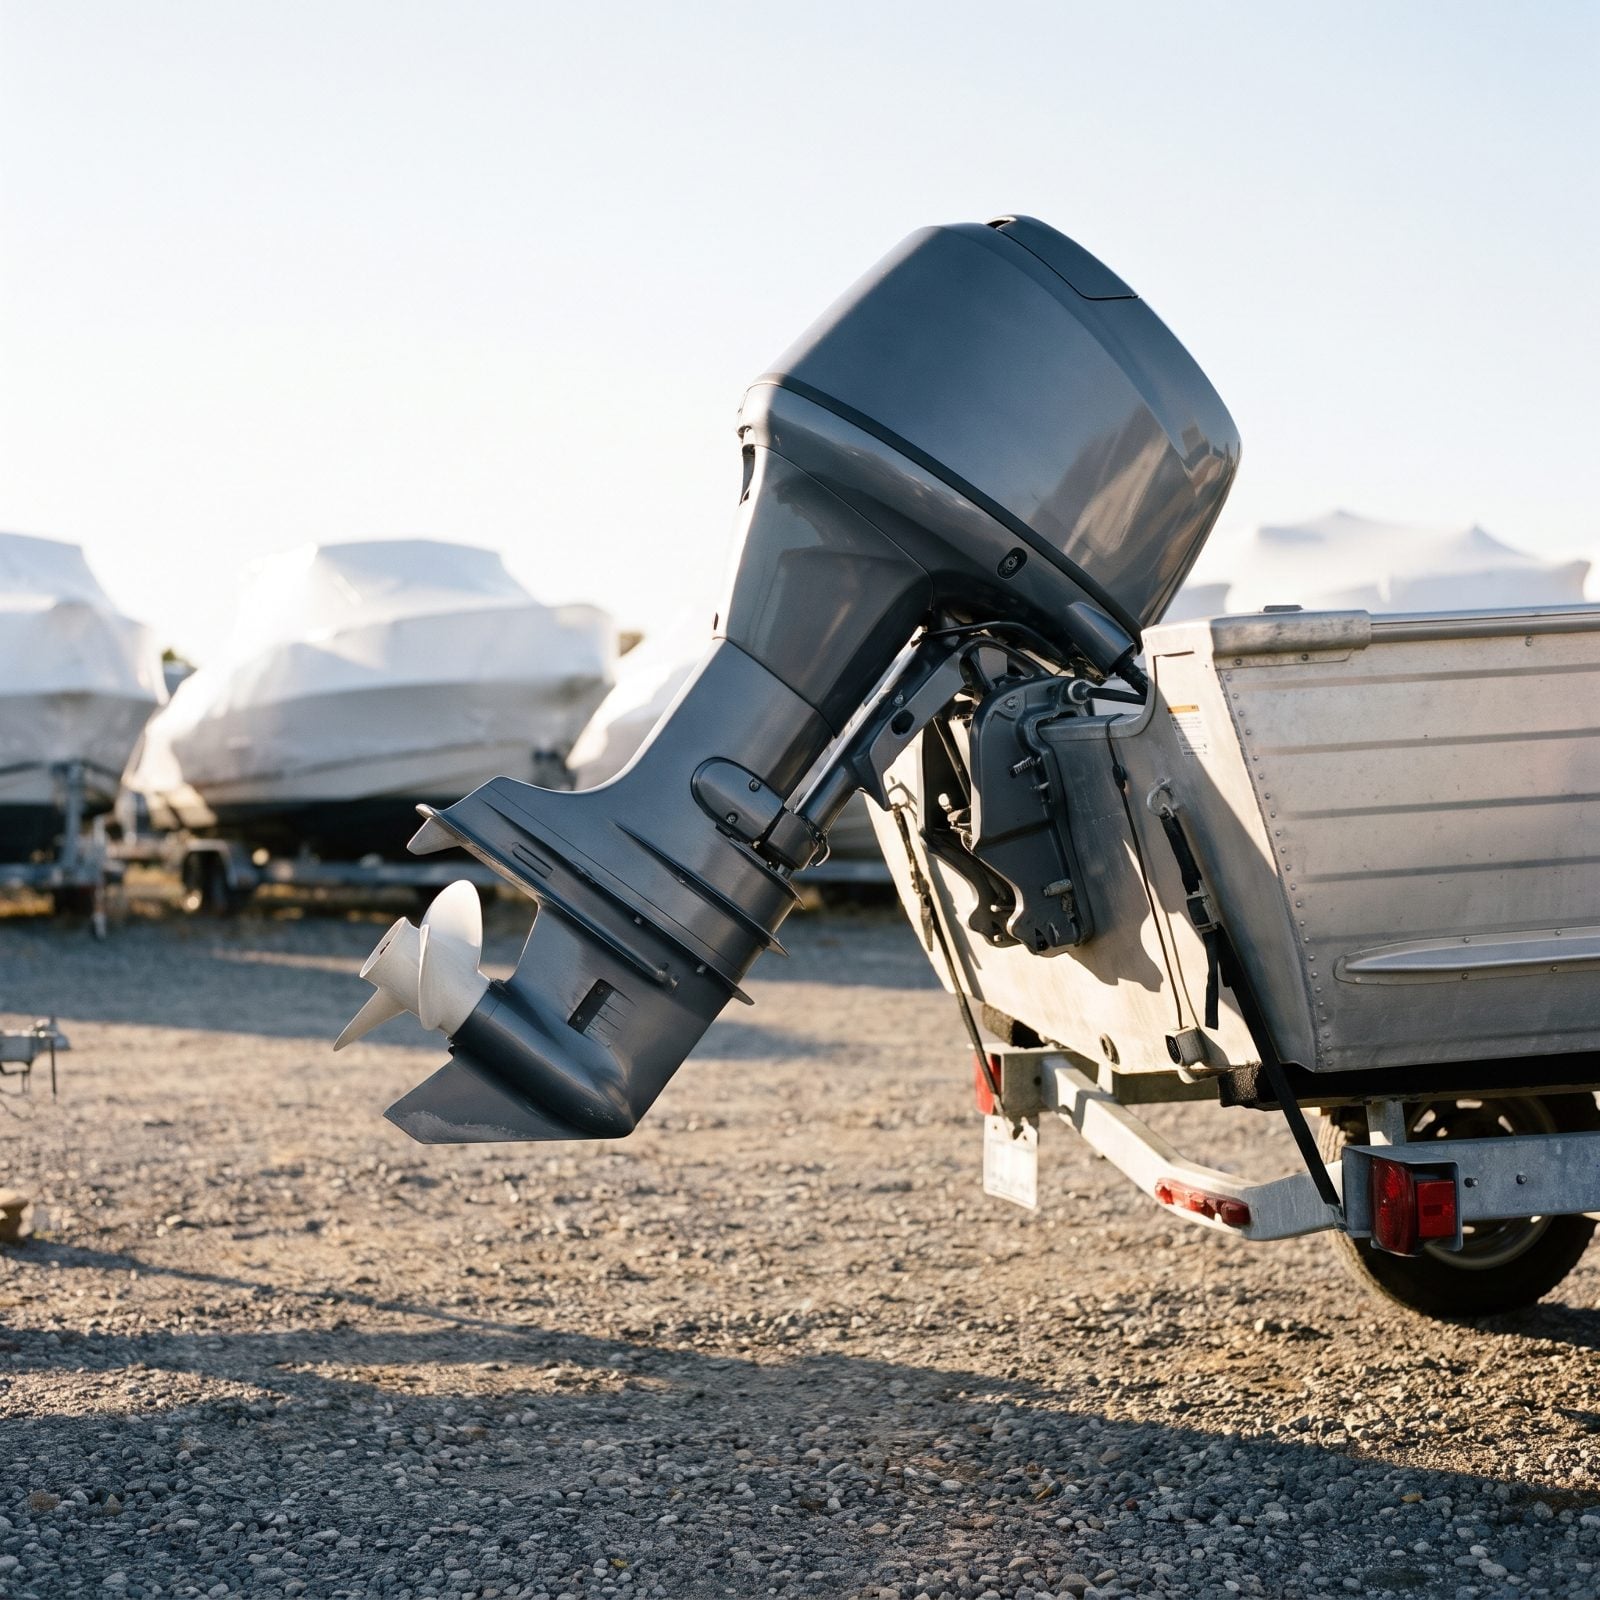
Everyone tilts the outboard up for storage, shaft angled and prop swung out, because that’s how it sits on the ramp. Wrong instinct for winter. Store it fully lowered — vertical, running position, not tilted like this.
Here’s why. Tilt a motor up and a pocket of cooling water stays trapped in the lower unit passages. When that freezes it expands and splits the housing, same sad story as the gear case. Lowered, the passages drain completely and gravity does the work for free.
Give it a minute after you drop it down, then watch for the last trickle out of the lower unit before you walk away. That trickle is the whole thing. If nothing drains, the passage may already be blocked — and that’s a conversation to have with your mechanic now, not in May when the ramp’s busy and your patience is gone.
31. Remove Propeller and Check Fishing Line
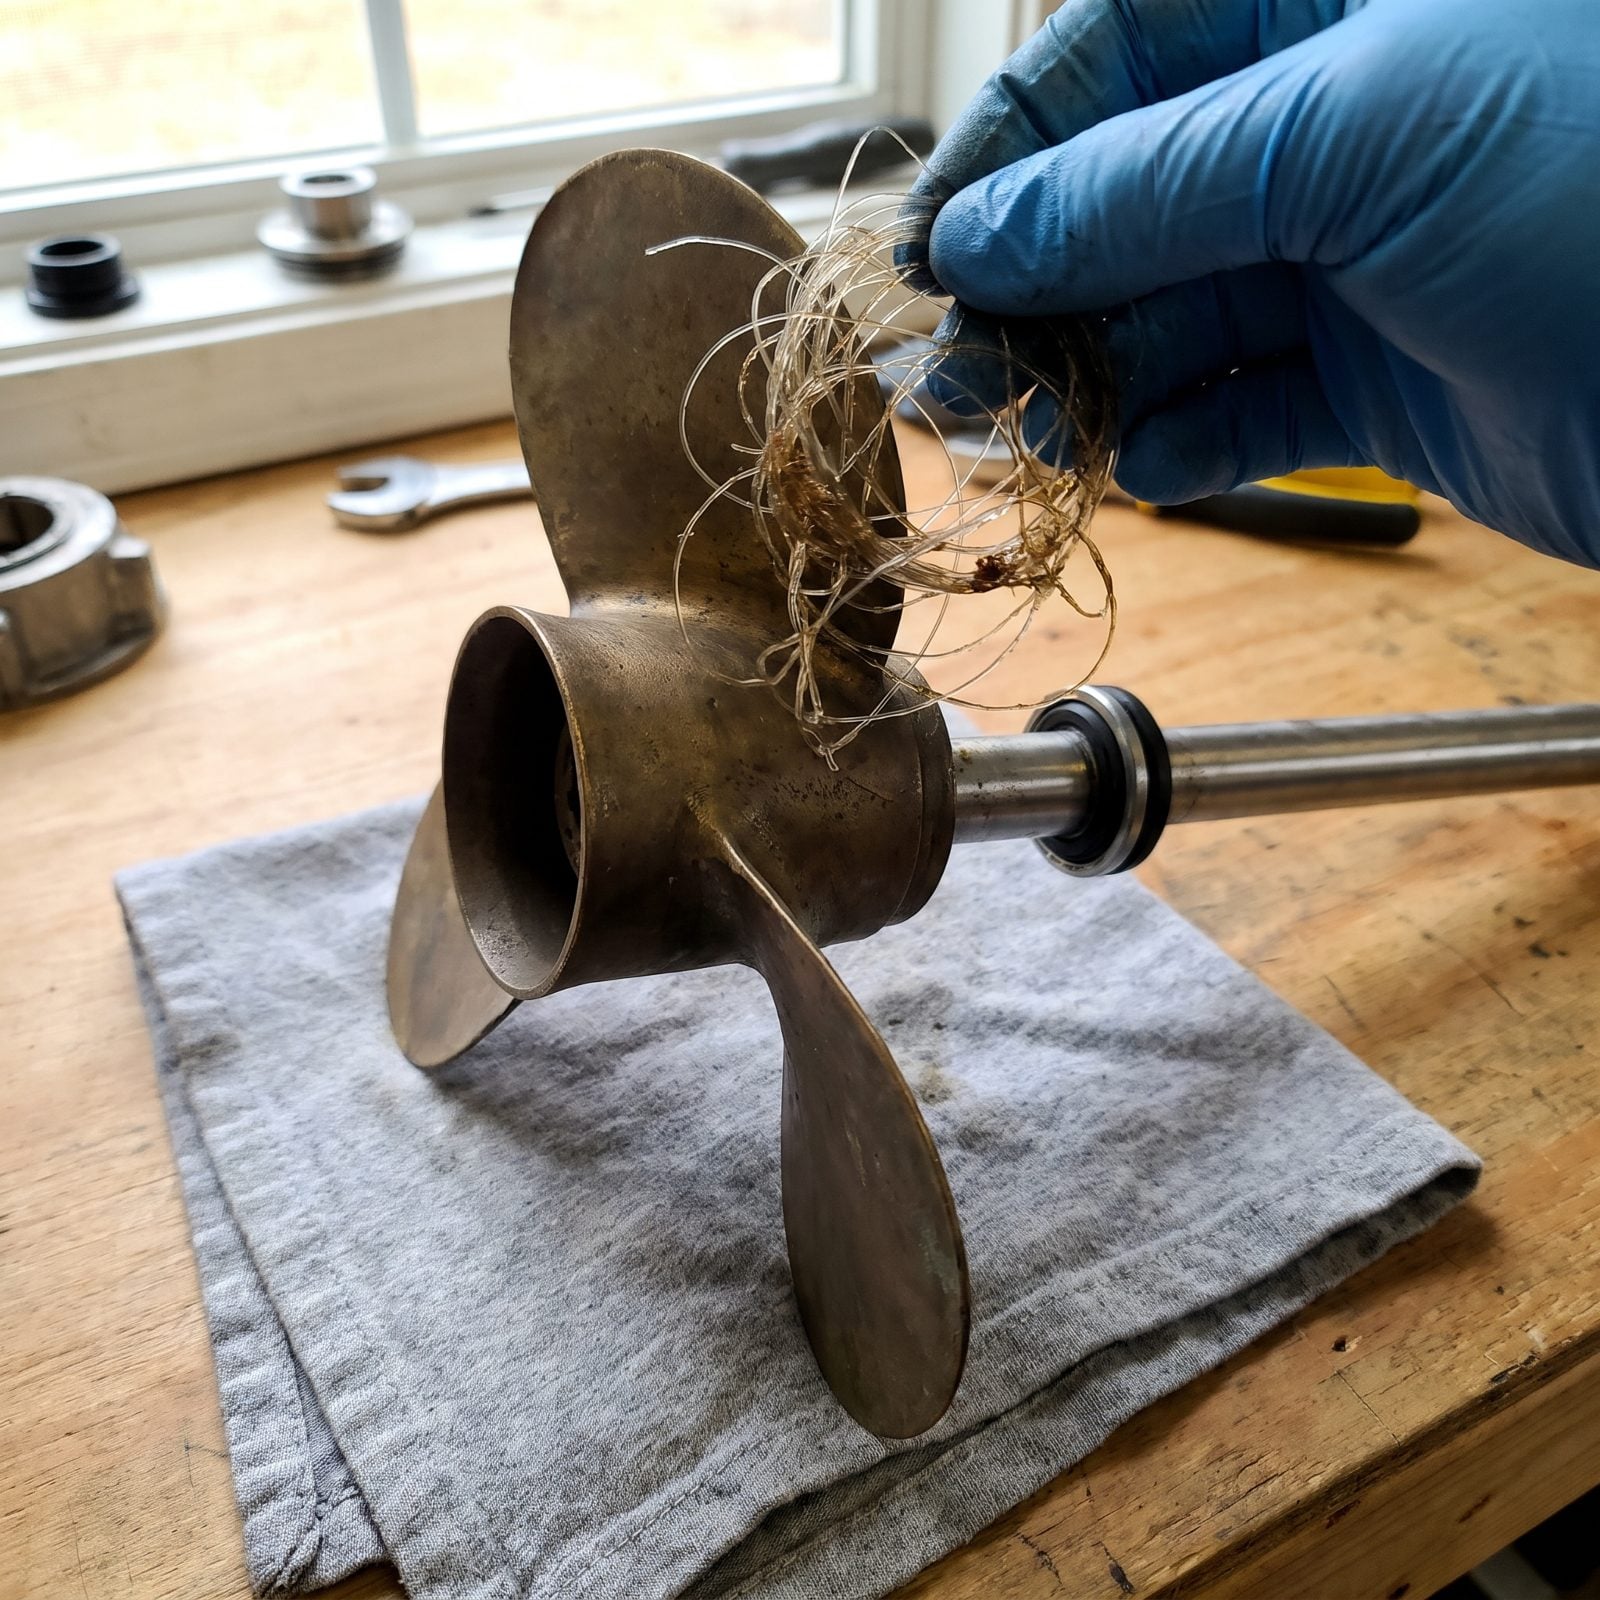
You’d be amazed what hides behind a propeller. Pull the prop off this fall and you’ll very likely find a wad of fishing line wound tight around the shaft, right up against the seal. It got there one invisible cast at a time all season long.
That line is not harmless. Wound tight, it saws into the prop shaft seal, and a cut seal lets water into the gear case — or lube out of it. Slide the prop off, pick every last strand out with a dental pick or a razor, and check the seal behind it for grooves.
30. Grease Propeller Shaft and Splines
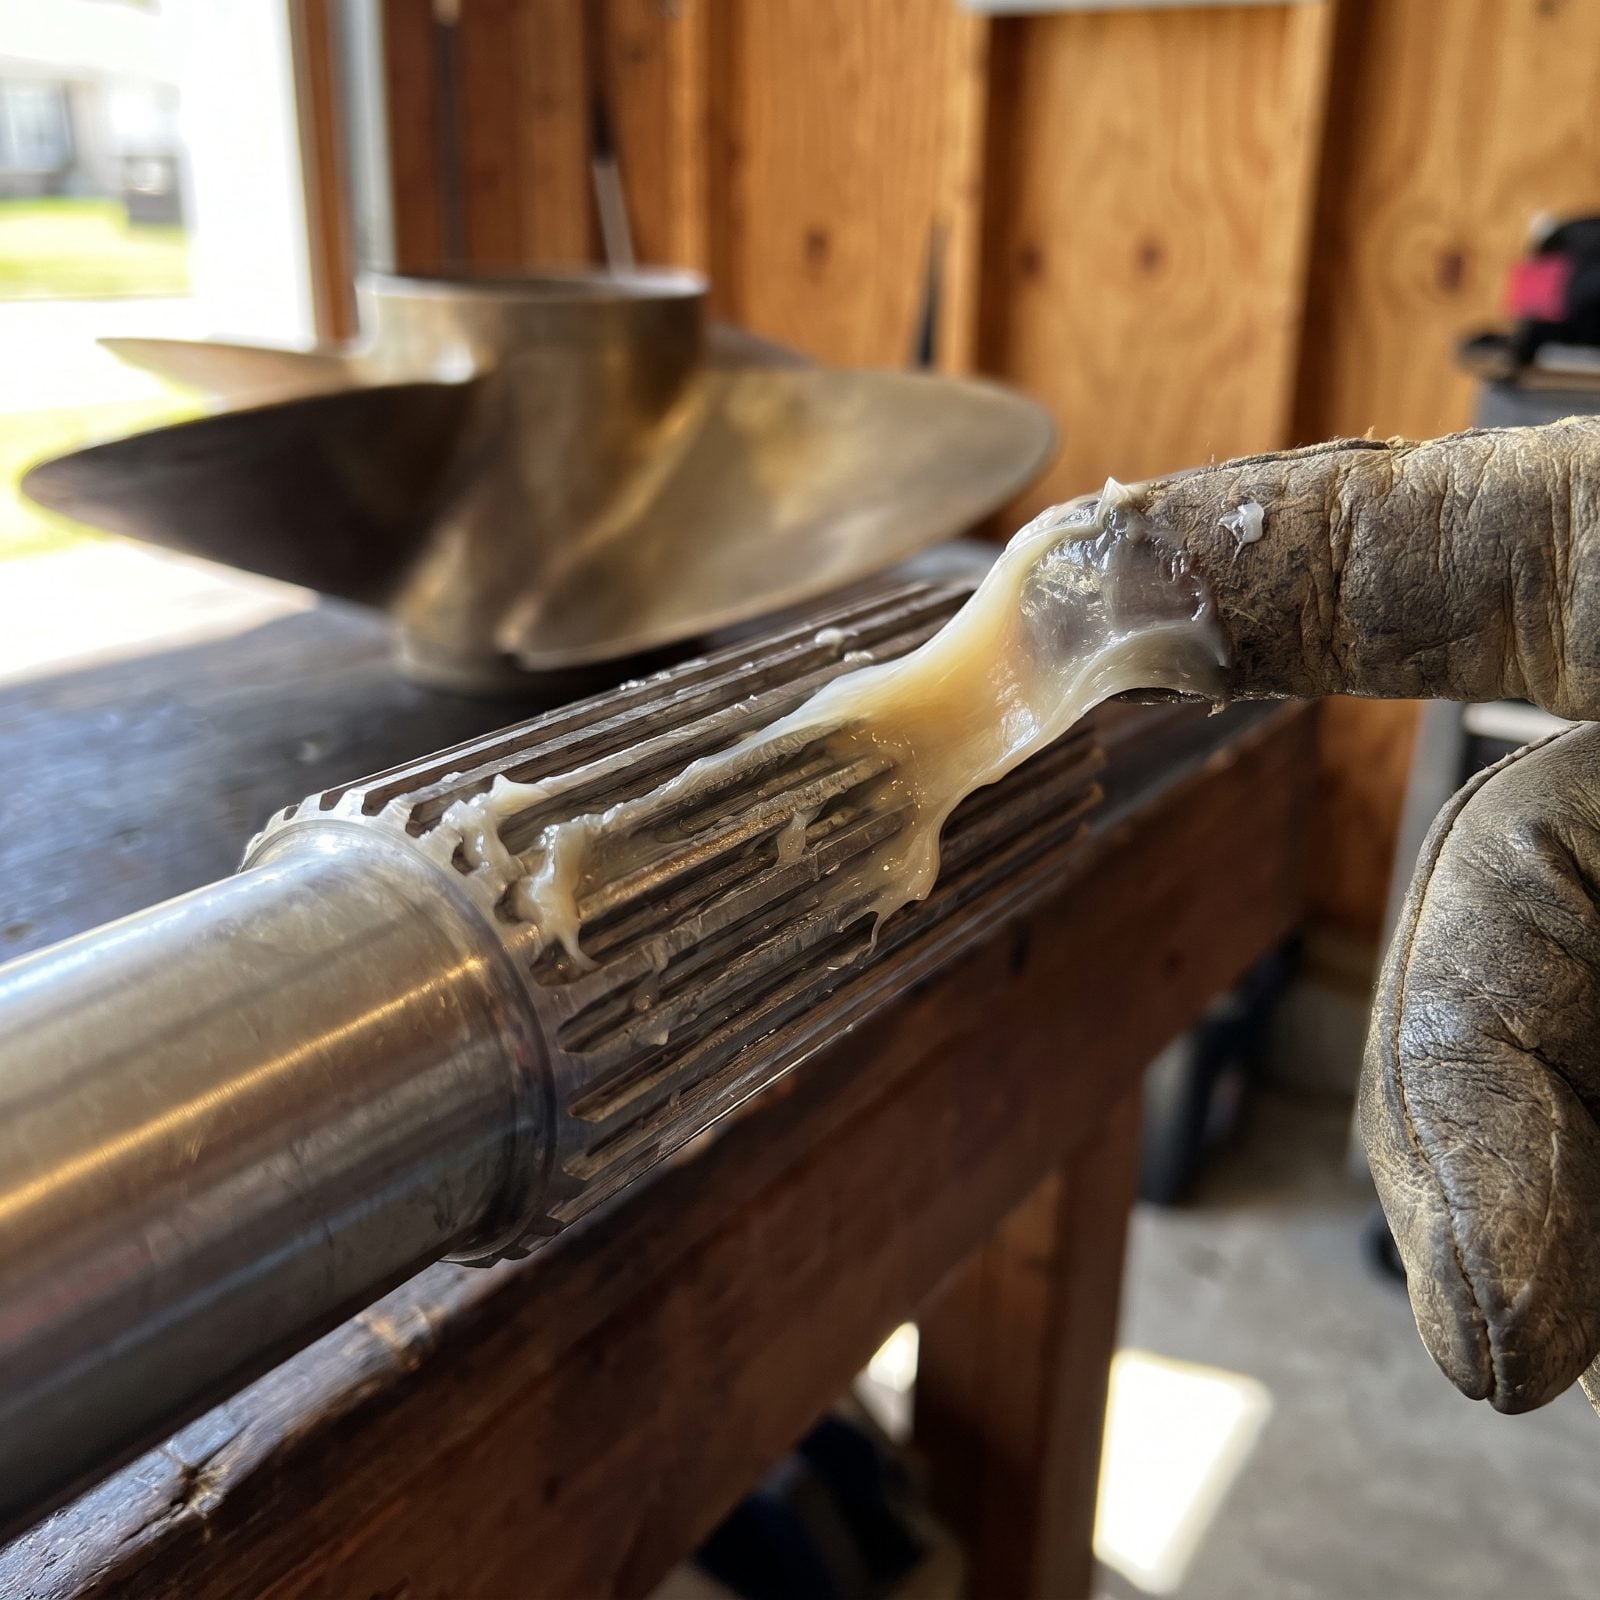
With the prop off, don’t just slide it back on bare. A dry spline shaft corrodes over winter and basically welds the prop hub to the shaft — and come spring you’ll be out there with a block of wood and a hammer, swearing at a prop that will not budge.
Lay a generous ribbon of waterproof marine grease into the splines and work it all the way down into the grooves with a gloved finger. Spin the prop a quarter turn as you reseat it so the grease spreads even. Done right, next time the prop pulls off by hand. Done wrong? A seized hub and a ruined afternoon.
29. Inspect Sacrificial Anodes for Replacement
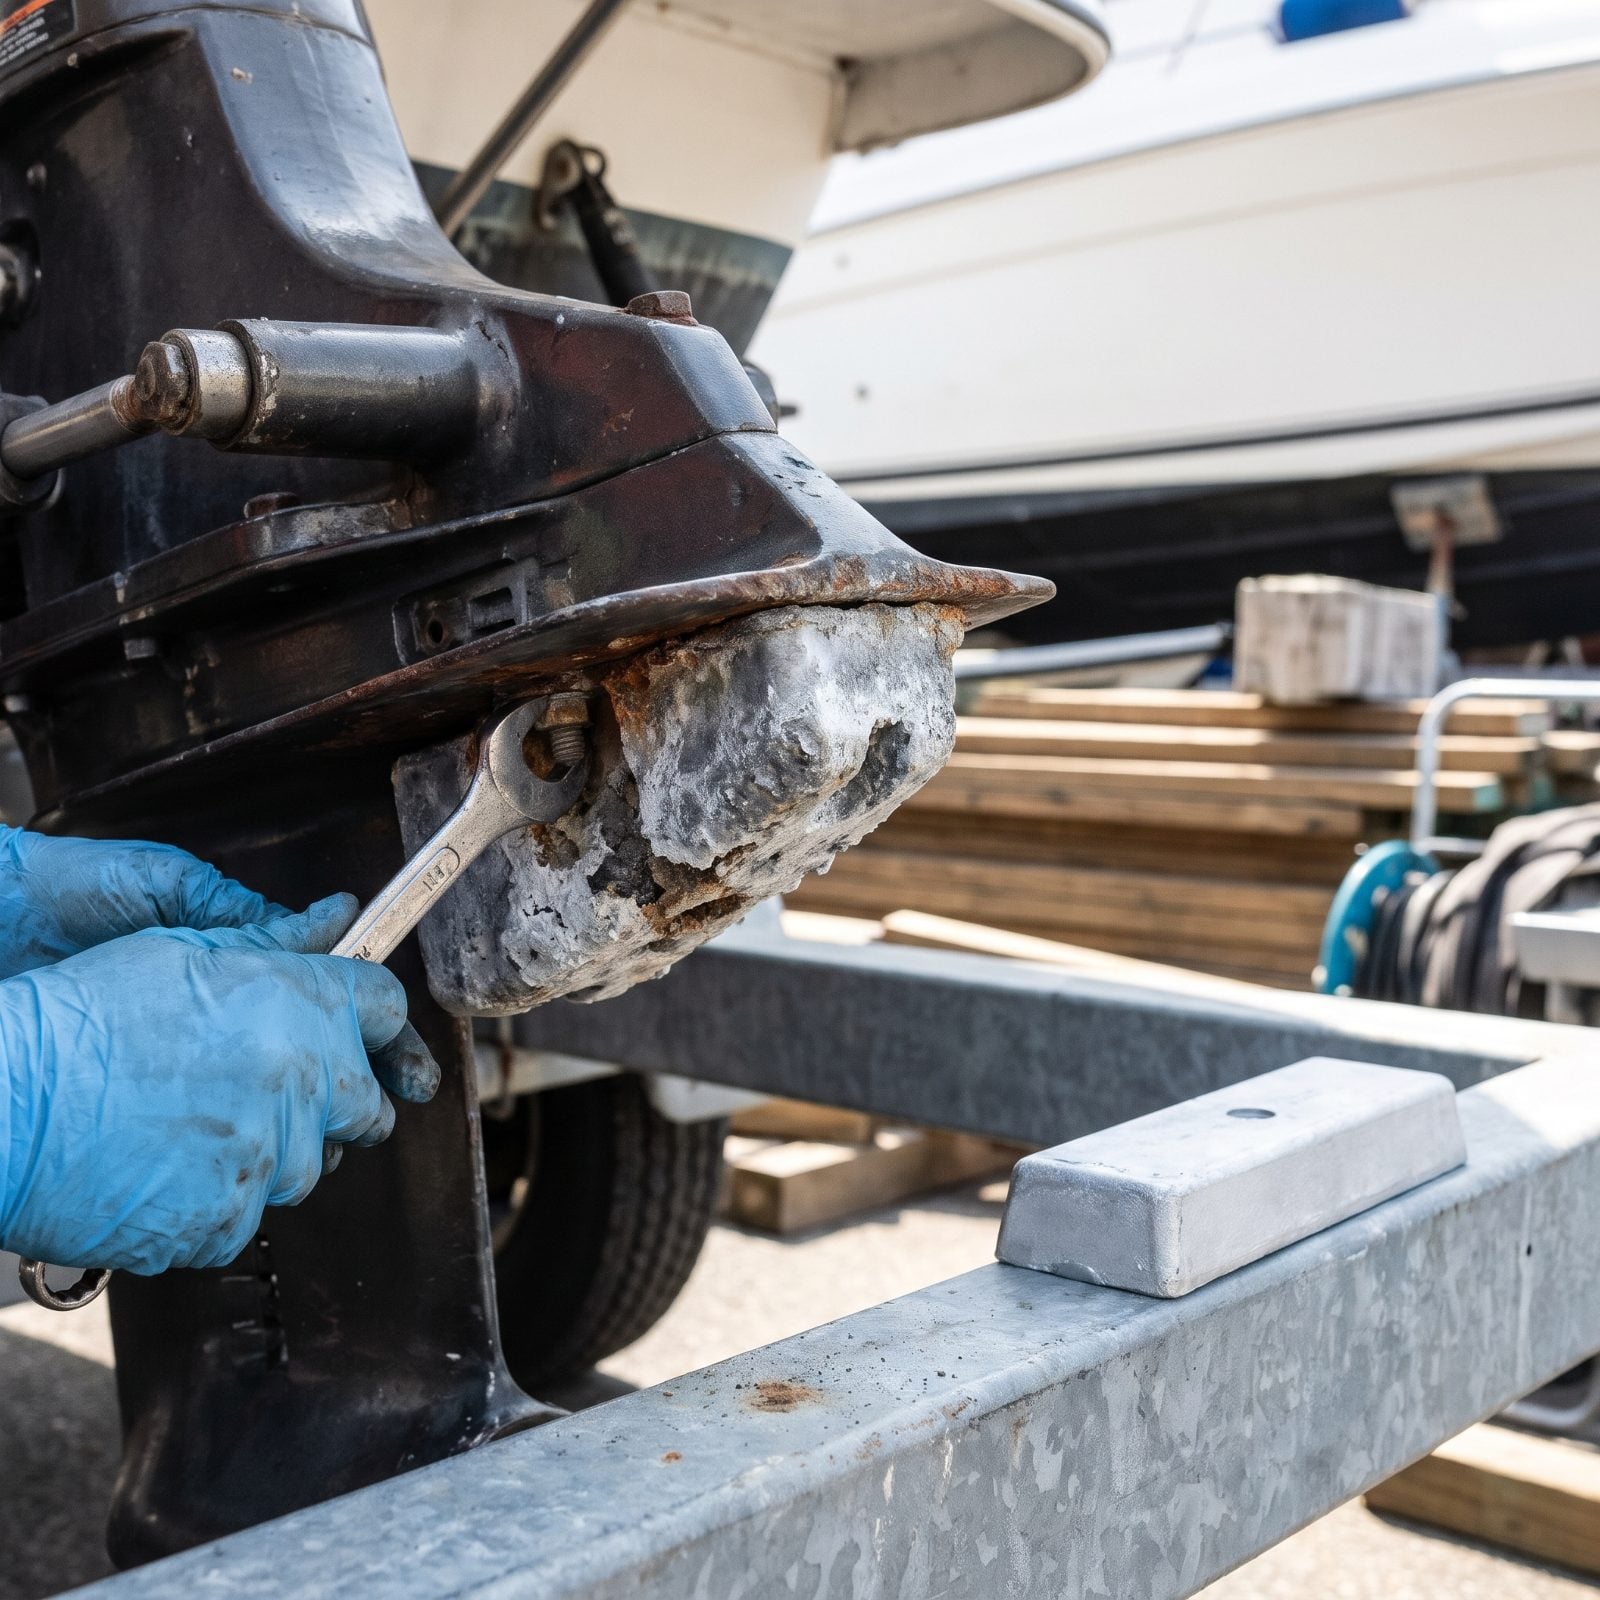
Anodes are supposed to disappear. That’s the job. They corrode so your drive, shaft, and metal fittings don’t. The mistake is waiting until they’re gone before you bother to look.
The rule the yards go by: replace any anode that’s lost roughly half its mass. Past the halfway point, galvanic protection weakens fast, and whatever it was guarding becomes the next thing to corrode. Run your thumb over the surface — a good anode is bright and slightly rough, a dead one goes chalky white and crumbles under your nail.
Check that it’s actually making metal-to-metal contact, too. A painted-over or loose anode looks perfectly fine and protects absolutely nothing, which is the sneakiest failure of the bunch.
28. Test Bilge Pump and Float Switch
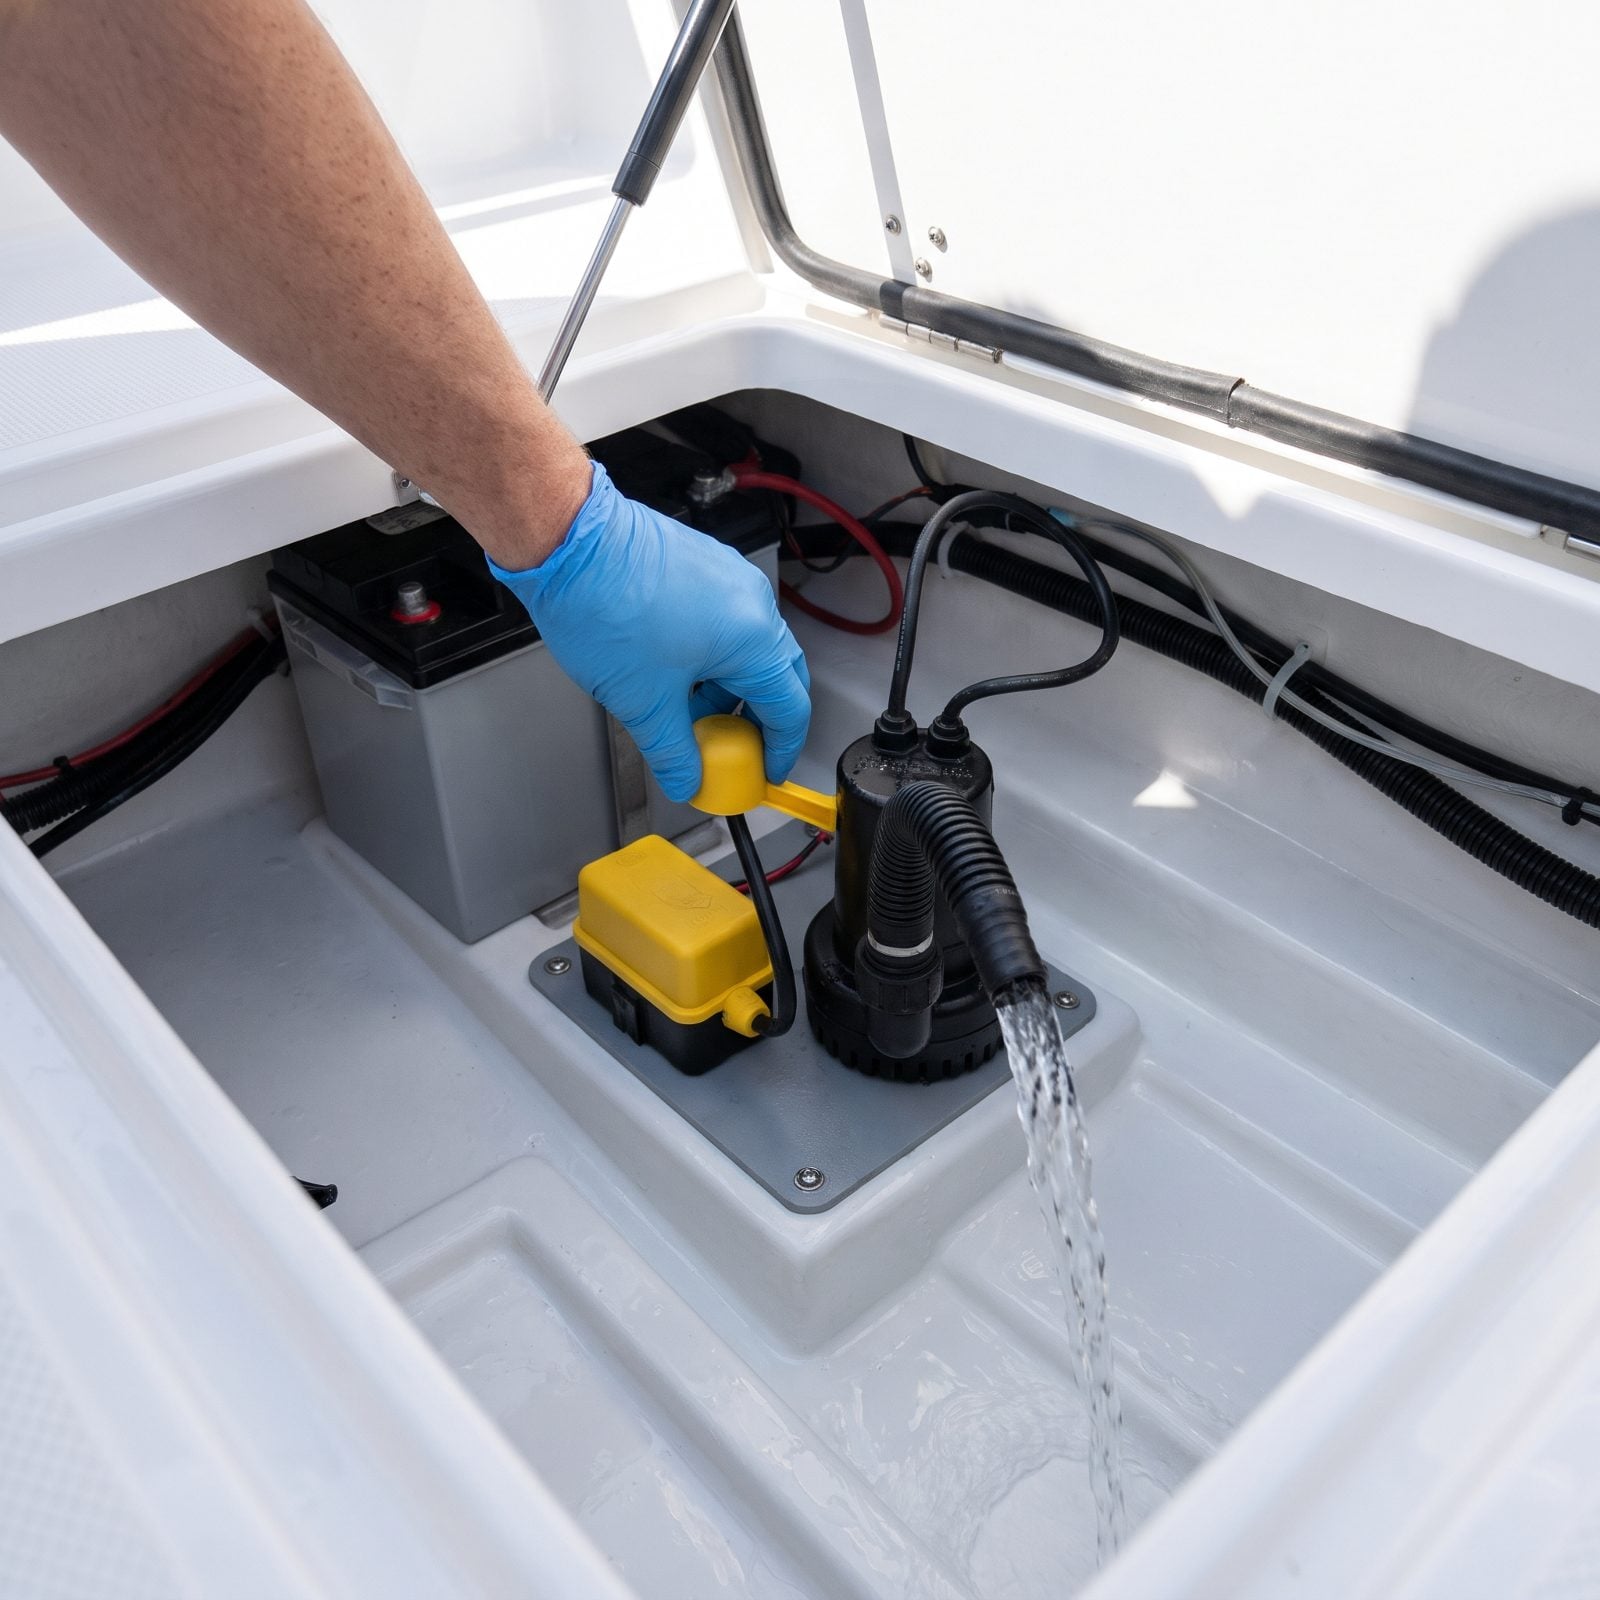
A bilge pump that worked in August is not a bilge pump that works today. The float switch is the part that quits — usually gummed up or corroded at the contacts — and a stuck float means the pump never kicks on when a hose weeps or a cover pools water all winter.
Pour a bucket of water into the bilge, or lift the float arm by hand, and watch what happens. The pump should fire the instant the float rises and shut off cleanly when it drops back down. Listen for a pump that runs but moves no water, which means the impeller is spinning dry or the discharge is blocked. Then trace the discharge hose to its outlet and make sure it runs to a through-hull. A hose that ends loose in the bilge just pours the water straight back where it came from. The whole test takes two minutes and it’s the two minutes that save a sunk boat.
27. Clean and Dry the Bilge
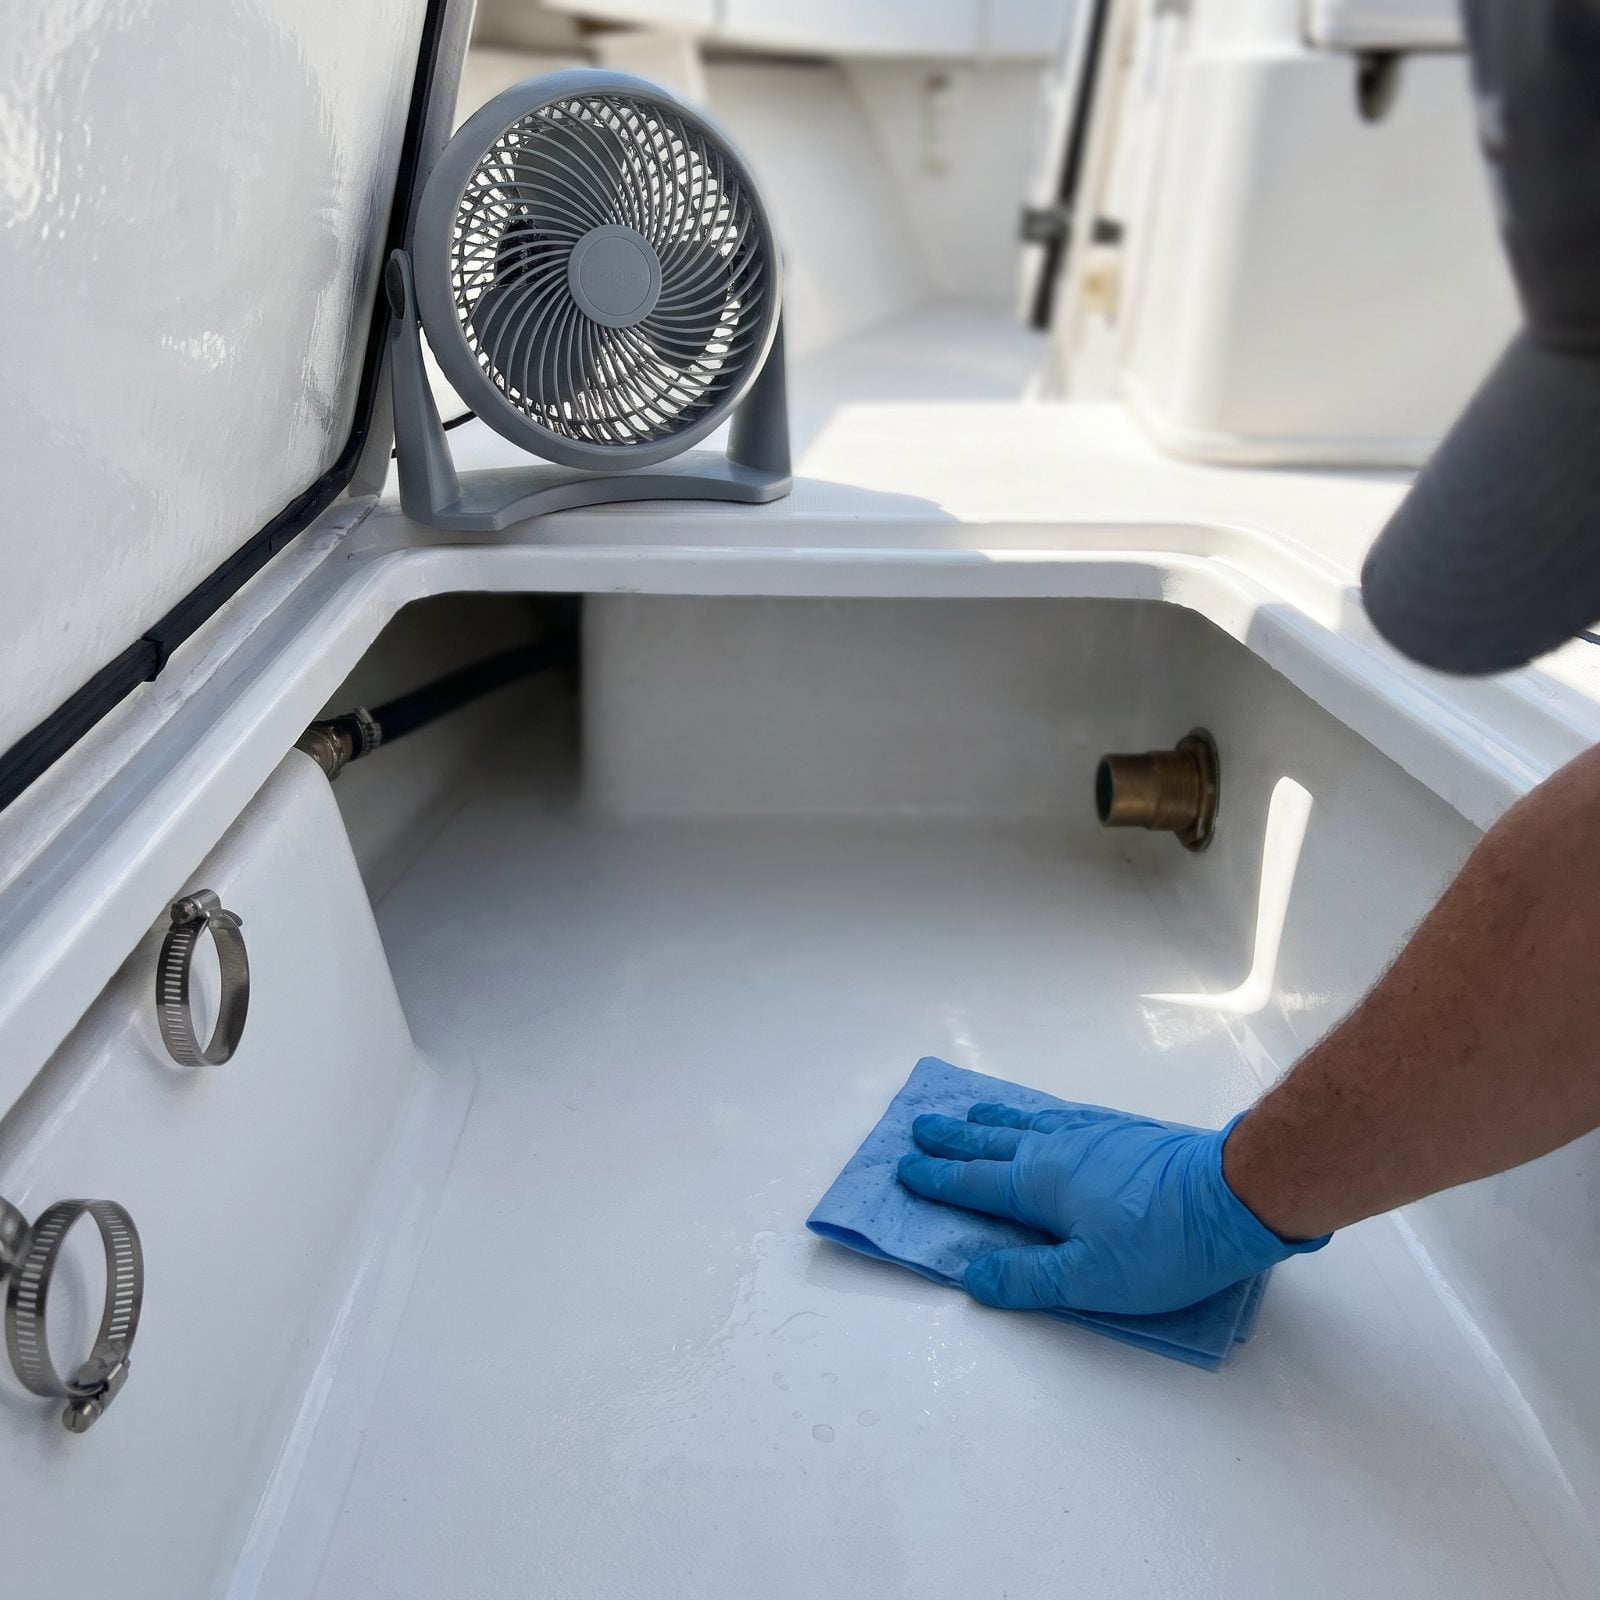
A wet bilge over winter is how you open the cover in spring to that smell. You know the one. Mildew and old oil and standing water that’s been quietly fermenting down there since October.
So scrub it out now. Sponge up every bit of standing water, wipe the oil film away with absorbent pads, and get it genuinely dry — not just drained. A small fan run for an afternoon with the hatch open does far more than you’d think. Any water left down there freezes, and freezing water has split more than one bilge seam and killed more than one pump.
Leave it clean and dry and you start the season with a bilge you can actually smell a new leak in. Alright. Cover it up.
26. Clear Water From Bilge Discharge Lines
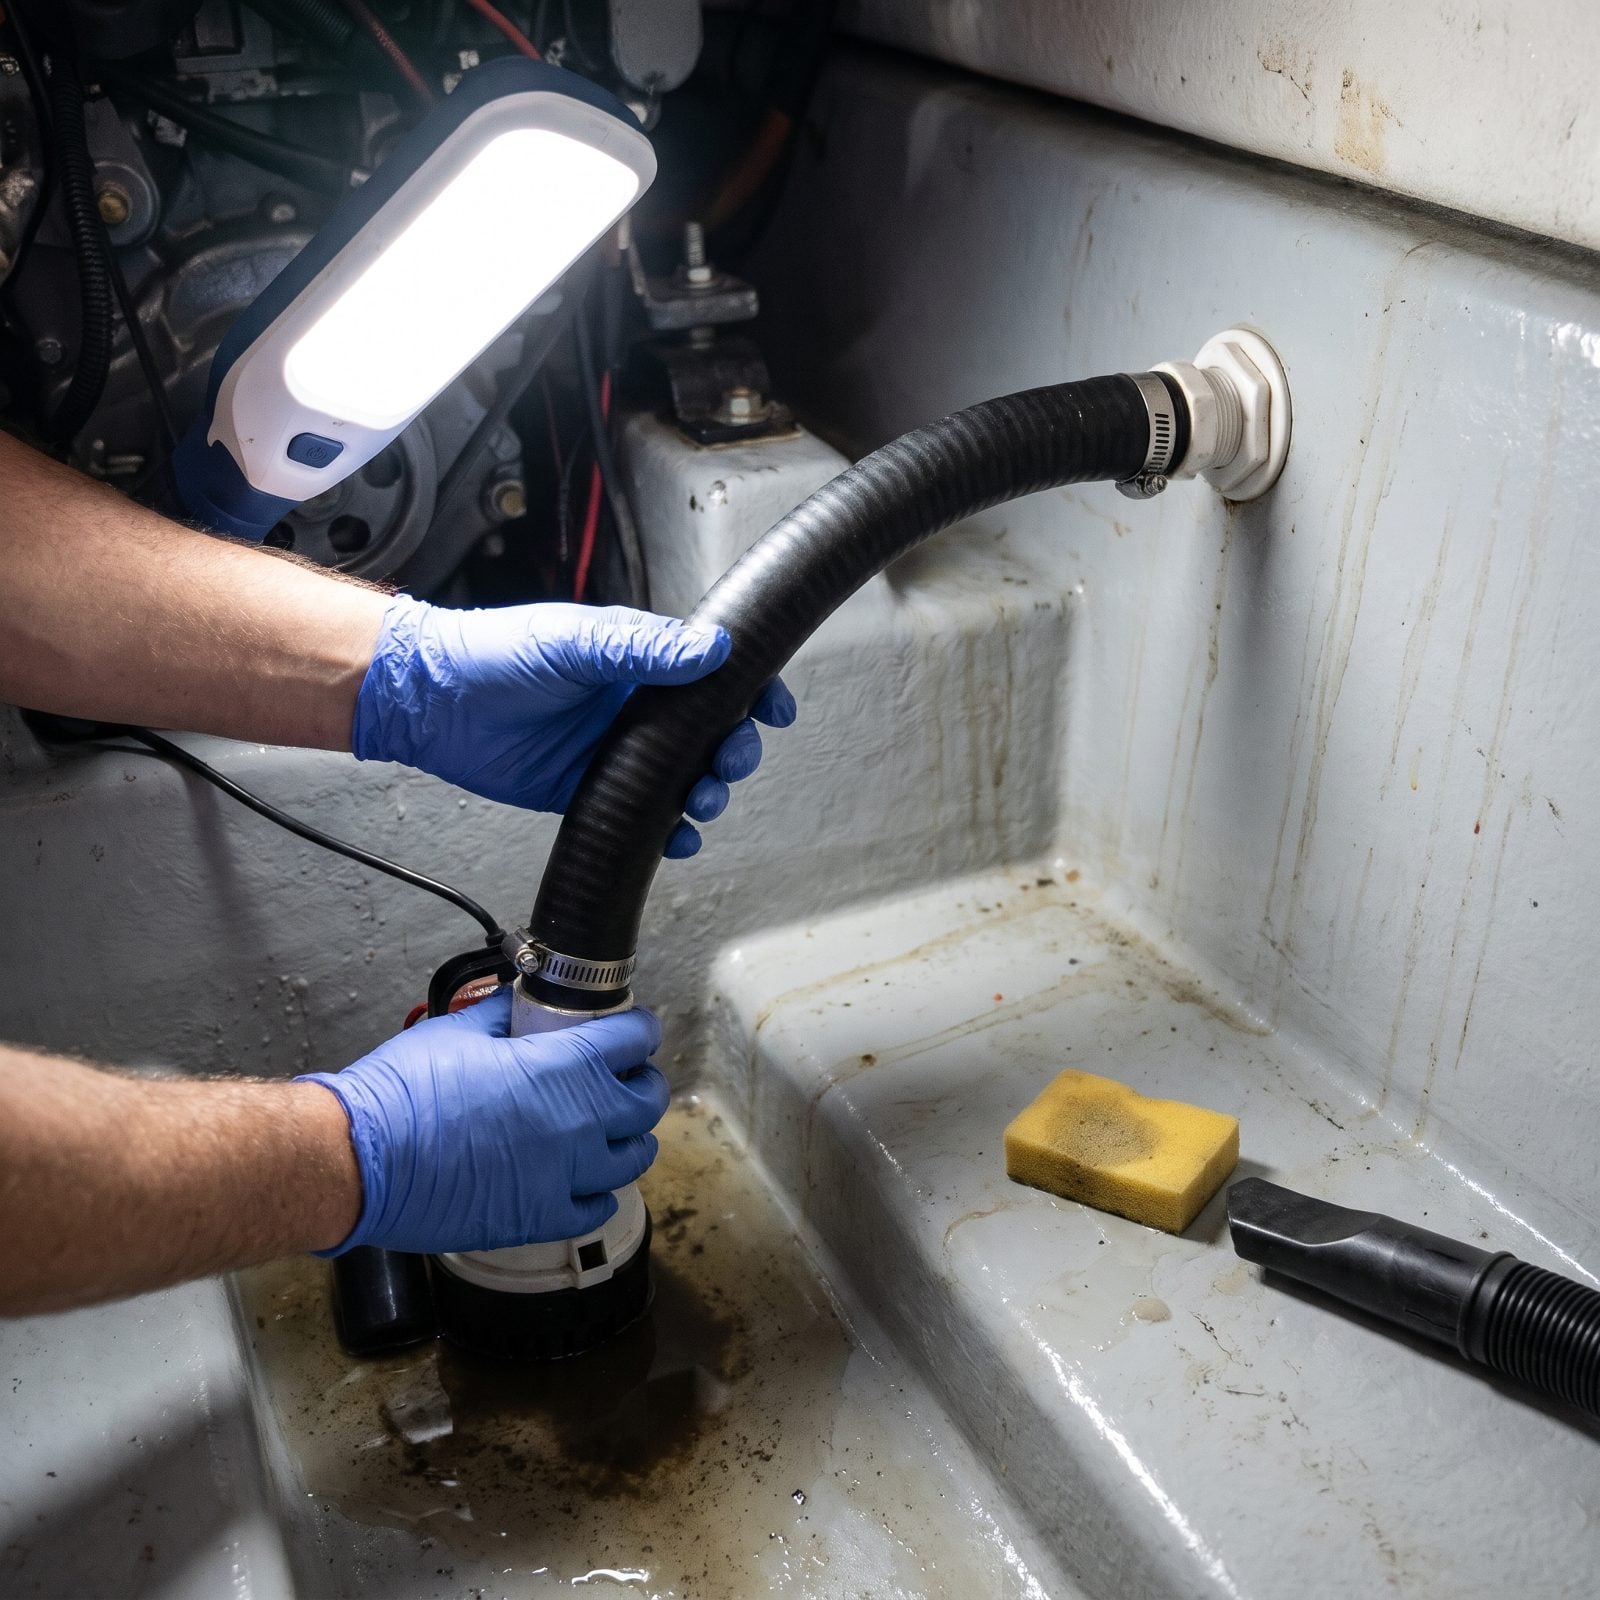
The bilge pump moves water out, but it never gets all of it. There’s always a low spot the float switch sits above, plus a hose loop holding a cupful more. Let that freeze and it can crack the pump housing or split the discharge hose at a bend you’ll only find in April.
Run the pump until it sucks air, then sponge out the last of the bilge by hand. Lift and flex the discharge hose so any trapped loop drains back toward the low point, then vacuum it dry. And while you’re down there, check that the float switch moves freely.
25. Pump Out and Rinse Holding Tank
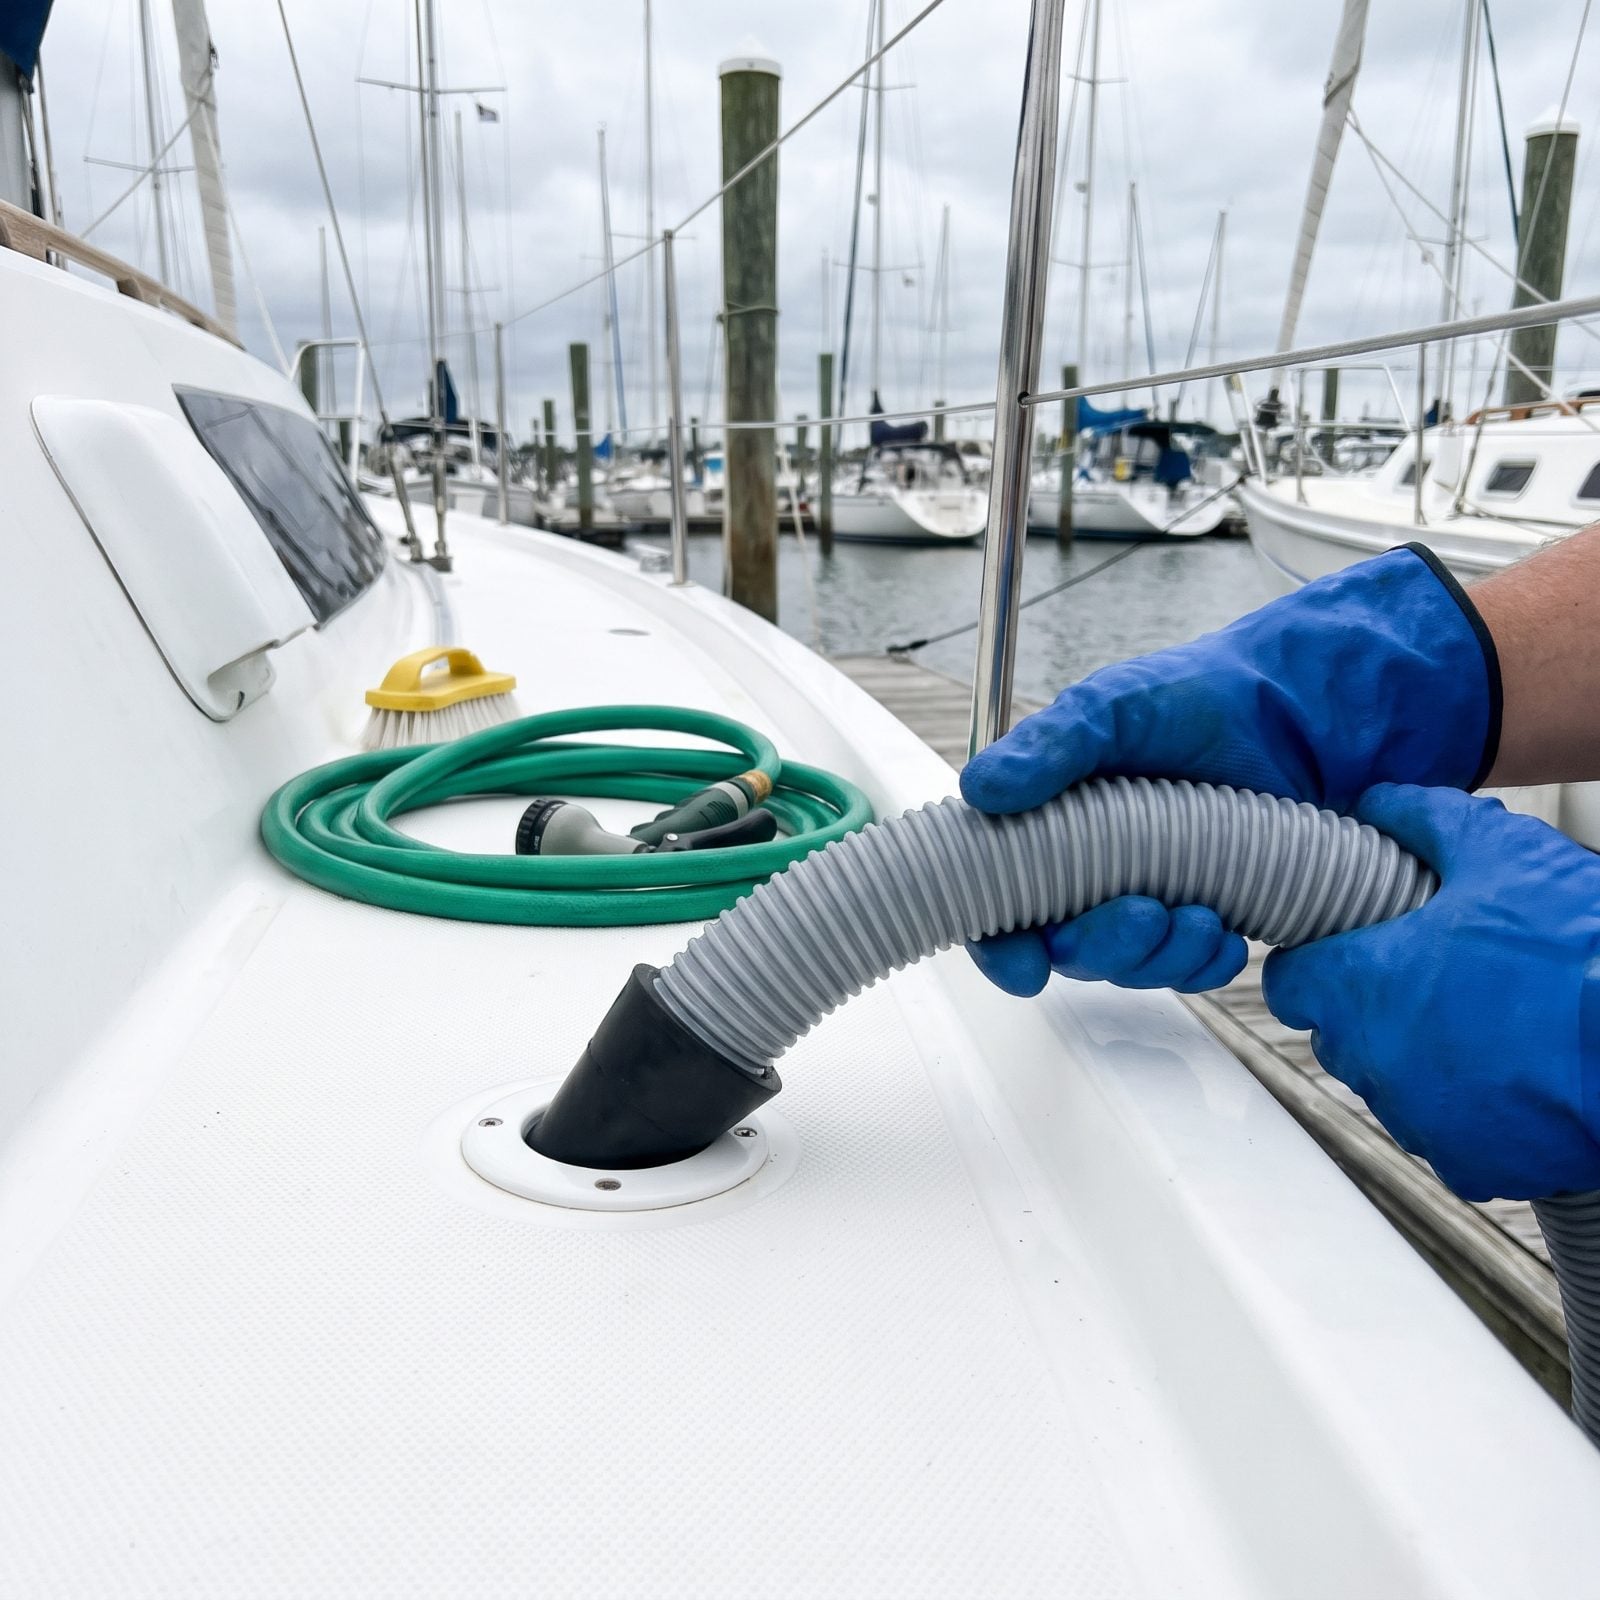
A half-full holding tank that freezes becomes a solid, straining block pressing on every seam and fitting it touches. Even if it survives the winter, waste sitting for months turns the tank and vent line into something you’ll smell every warm day next season.
Pump it out fully at a station, then add fresh water through the deck fill and pump again. Two rinse cycles is the standard — three if it’s been a rough summer. Finish by pouring a dose of holding-tank treatment plus antifreeze down the bowl so the residue left in the tank won’t freeze or sour.
24. Winterize Toilet and Sanitation Lines
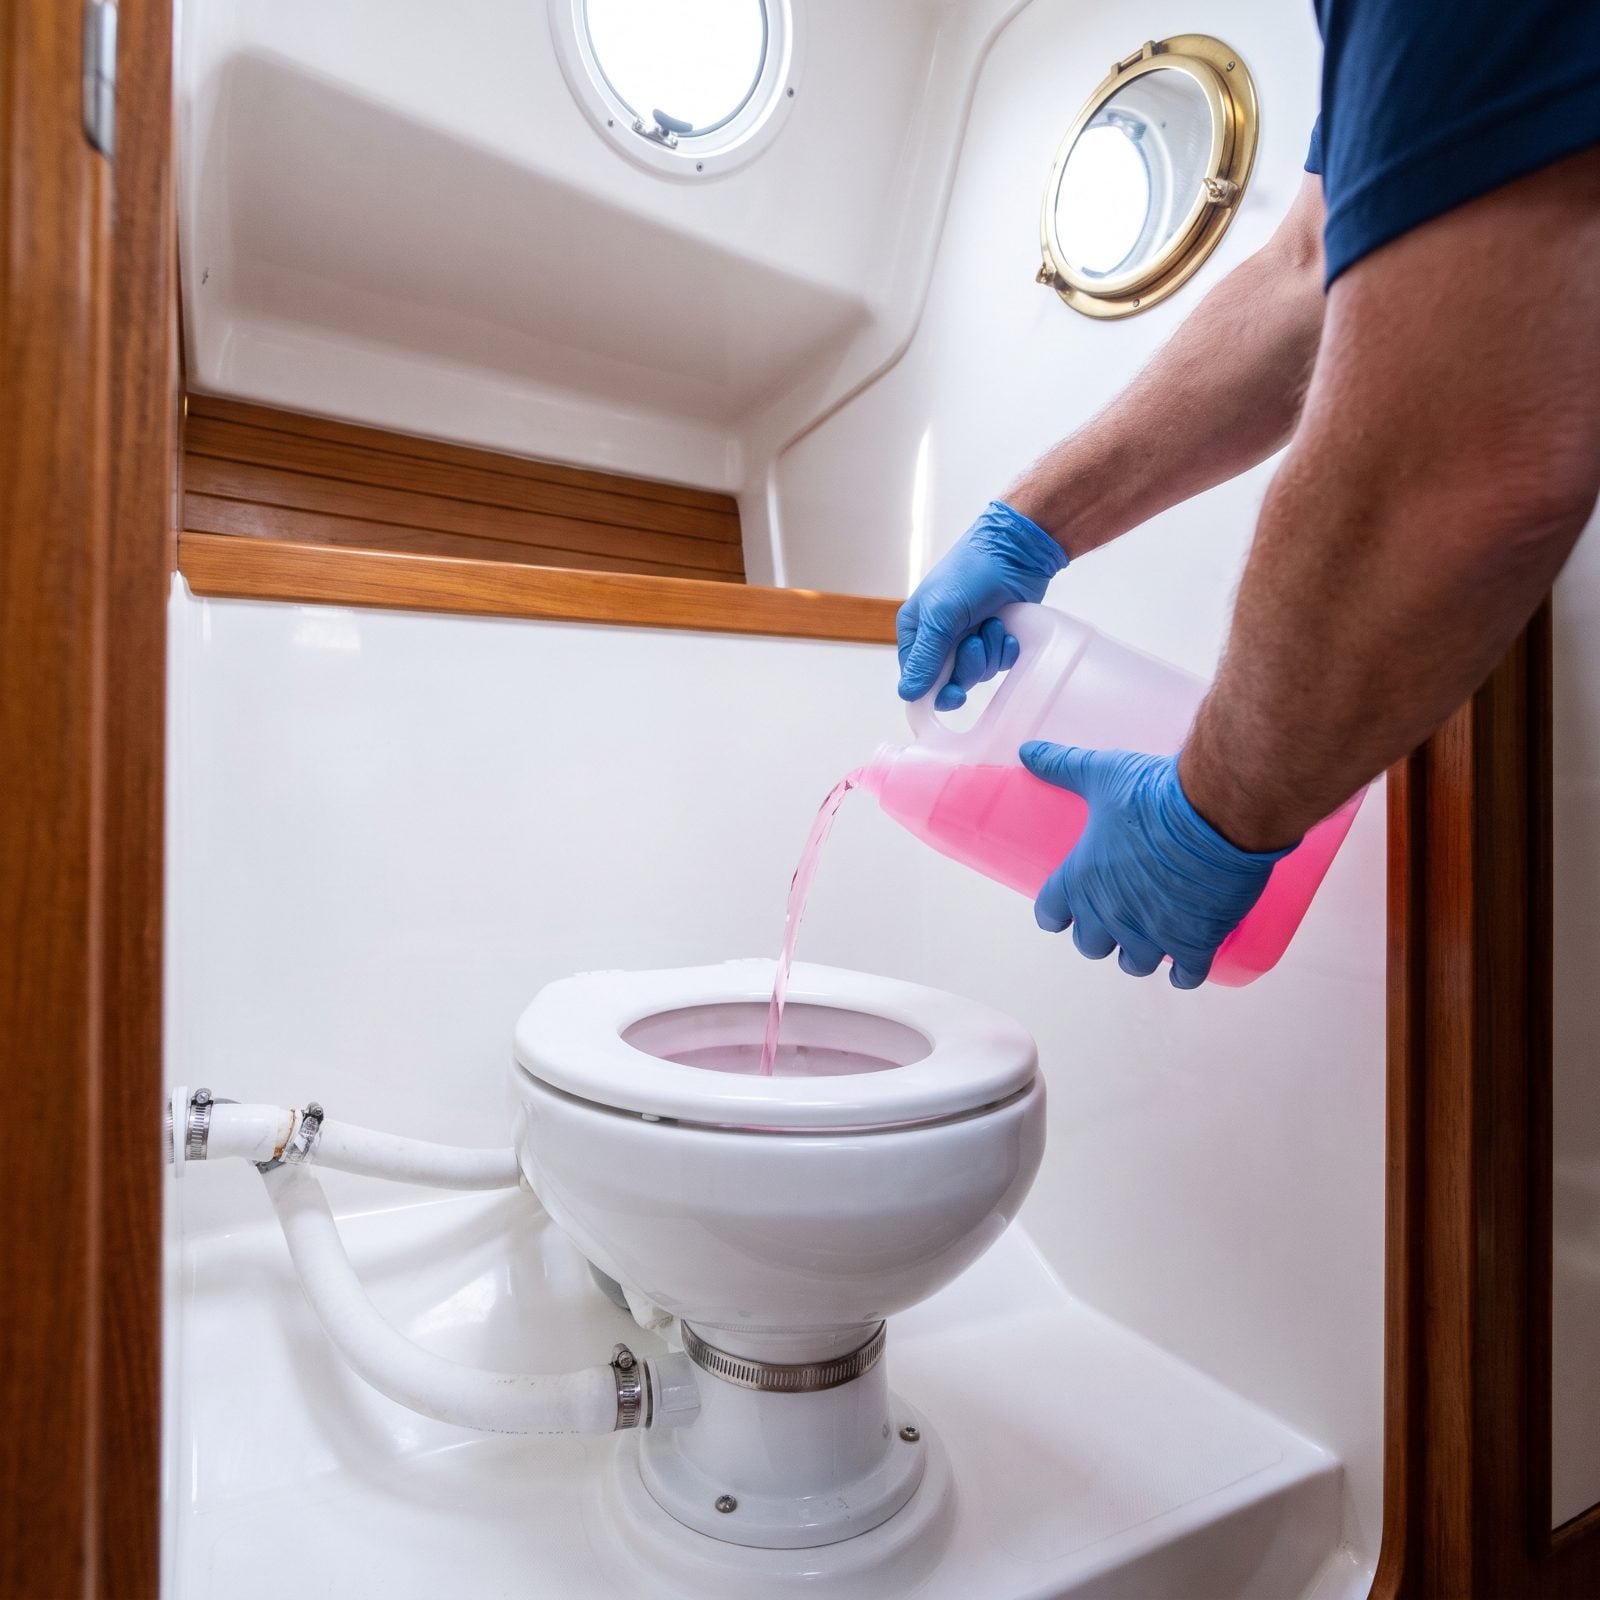
The sanitation hoses between the bowl, the pump, and the holding tank are full of water you can’t see. Trapped in those long runs and tight elbows, it freezes and splits the hose — and replacing sanitation hose is one of the worst jobs on a boat. Ask anyone who’s done it in a cold shed.
With the seacock closed, pour nontoxic antifreeze into the bowl and work the pump until pink liquid moves all the way through to the tank. Keep pumping until you see solid color, not a hint of it. For electric heads, run the flush until the discharge shows that same strong pink. Then leave the seacock closed for the season.
23. Drain Freshwater Tank Completely
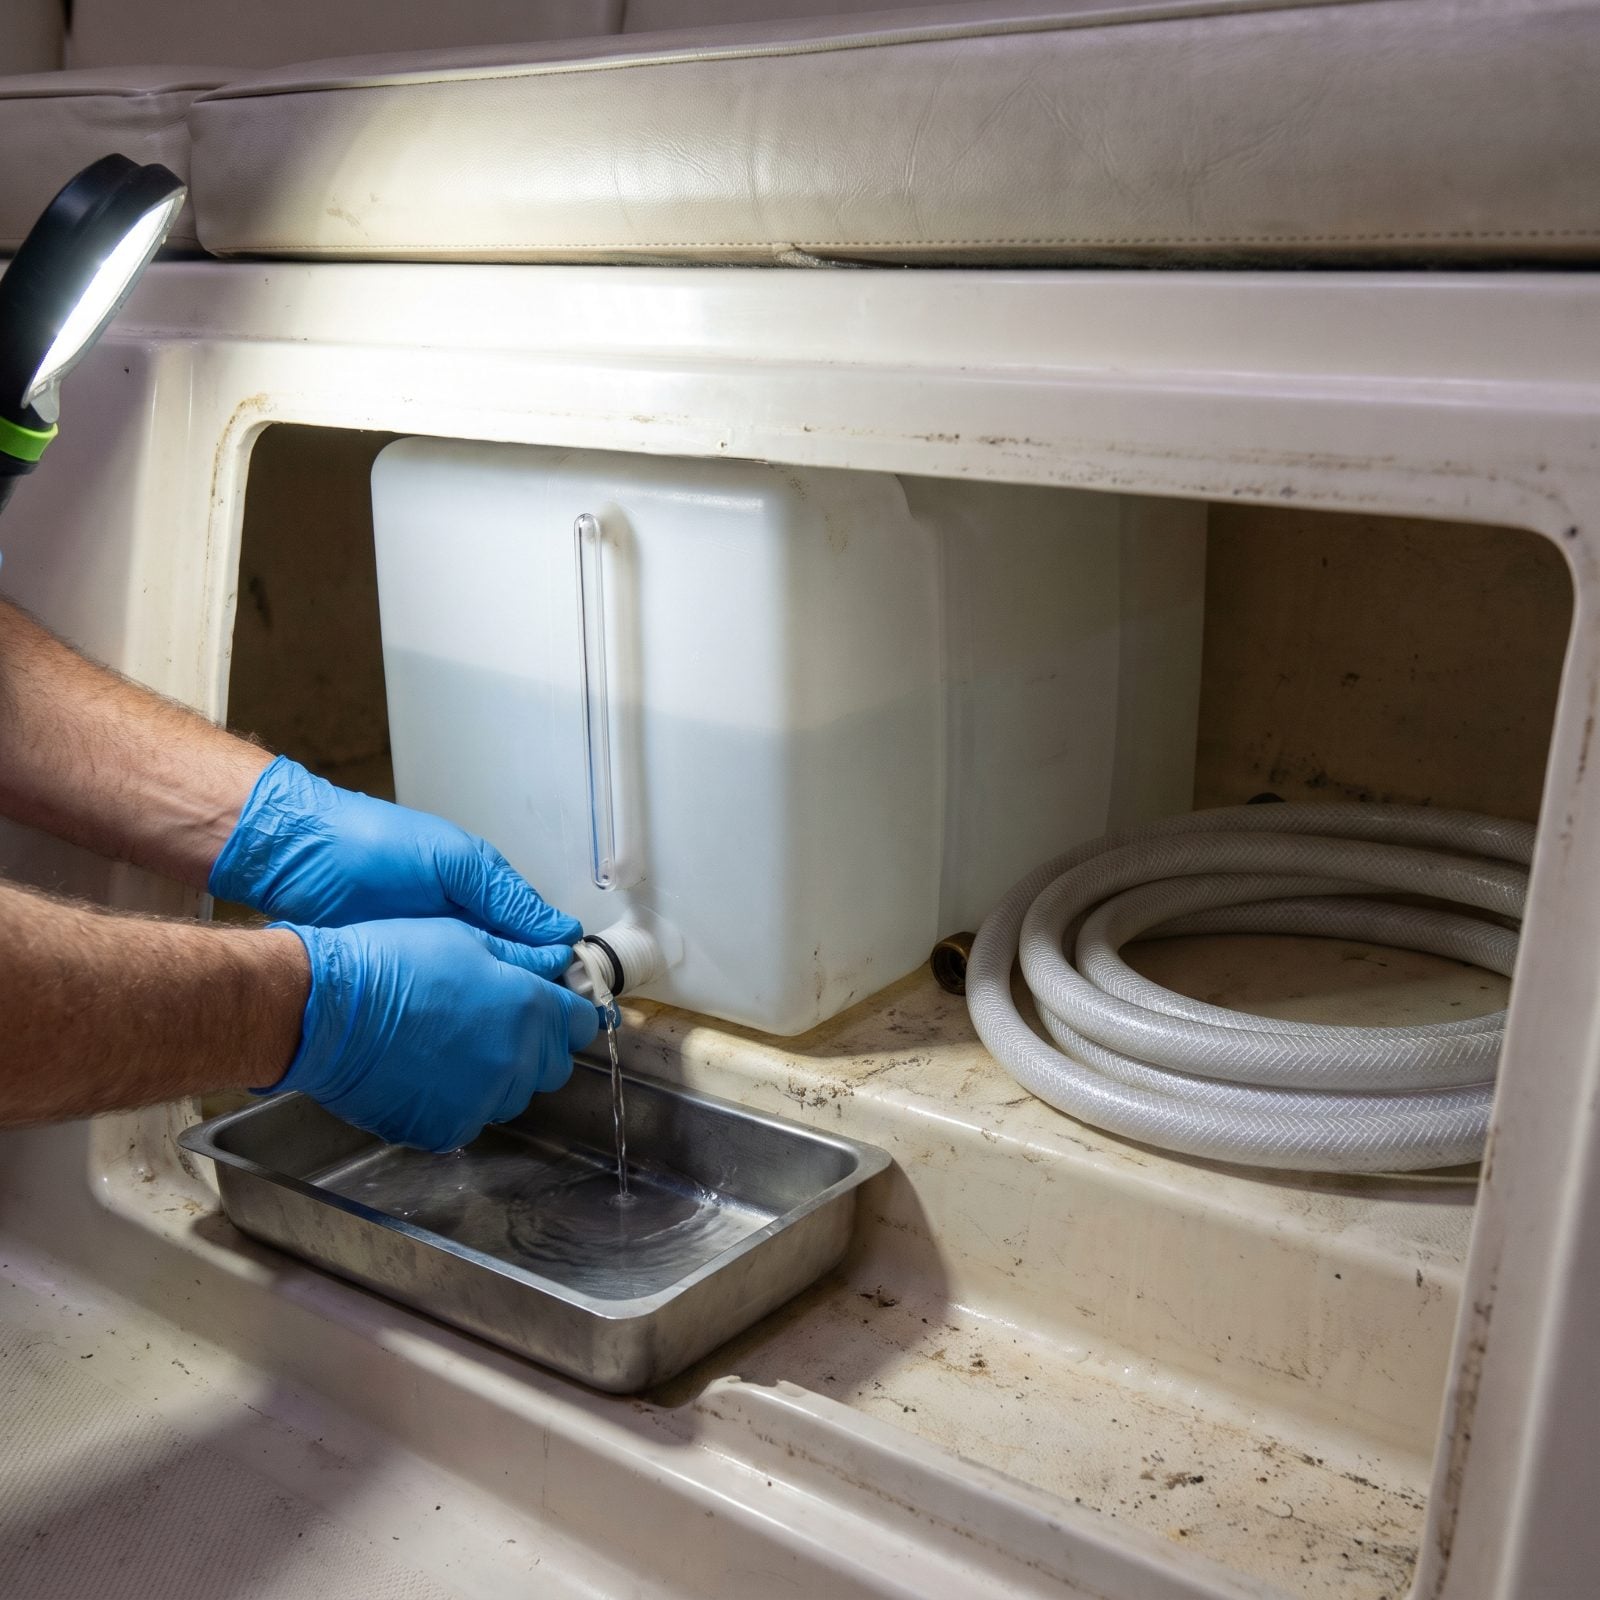
A full freshwater tank is a lot of expanding ice. Even a plastic tank can bulge, crack a seam, or pop a fitting when the water inside turns solid against the baffles.
Open the tank drain if it has one and let it run out, or run every faucet until the pump loses prime and the sight tube reads empty. Pull the fill cap and leave it off so the tank can breathe and any last water evaporates. Don’t leave standing water hiding behind the baffles — tip the bow or stern a little on the trailer, if you can, to coax it toward the drain.
22. Bypass and Drain Water Heater
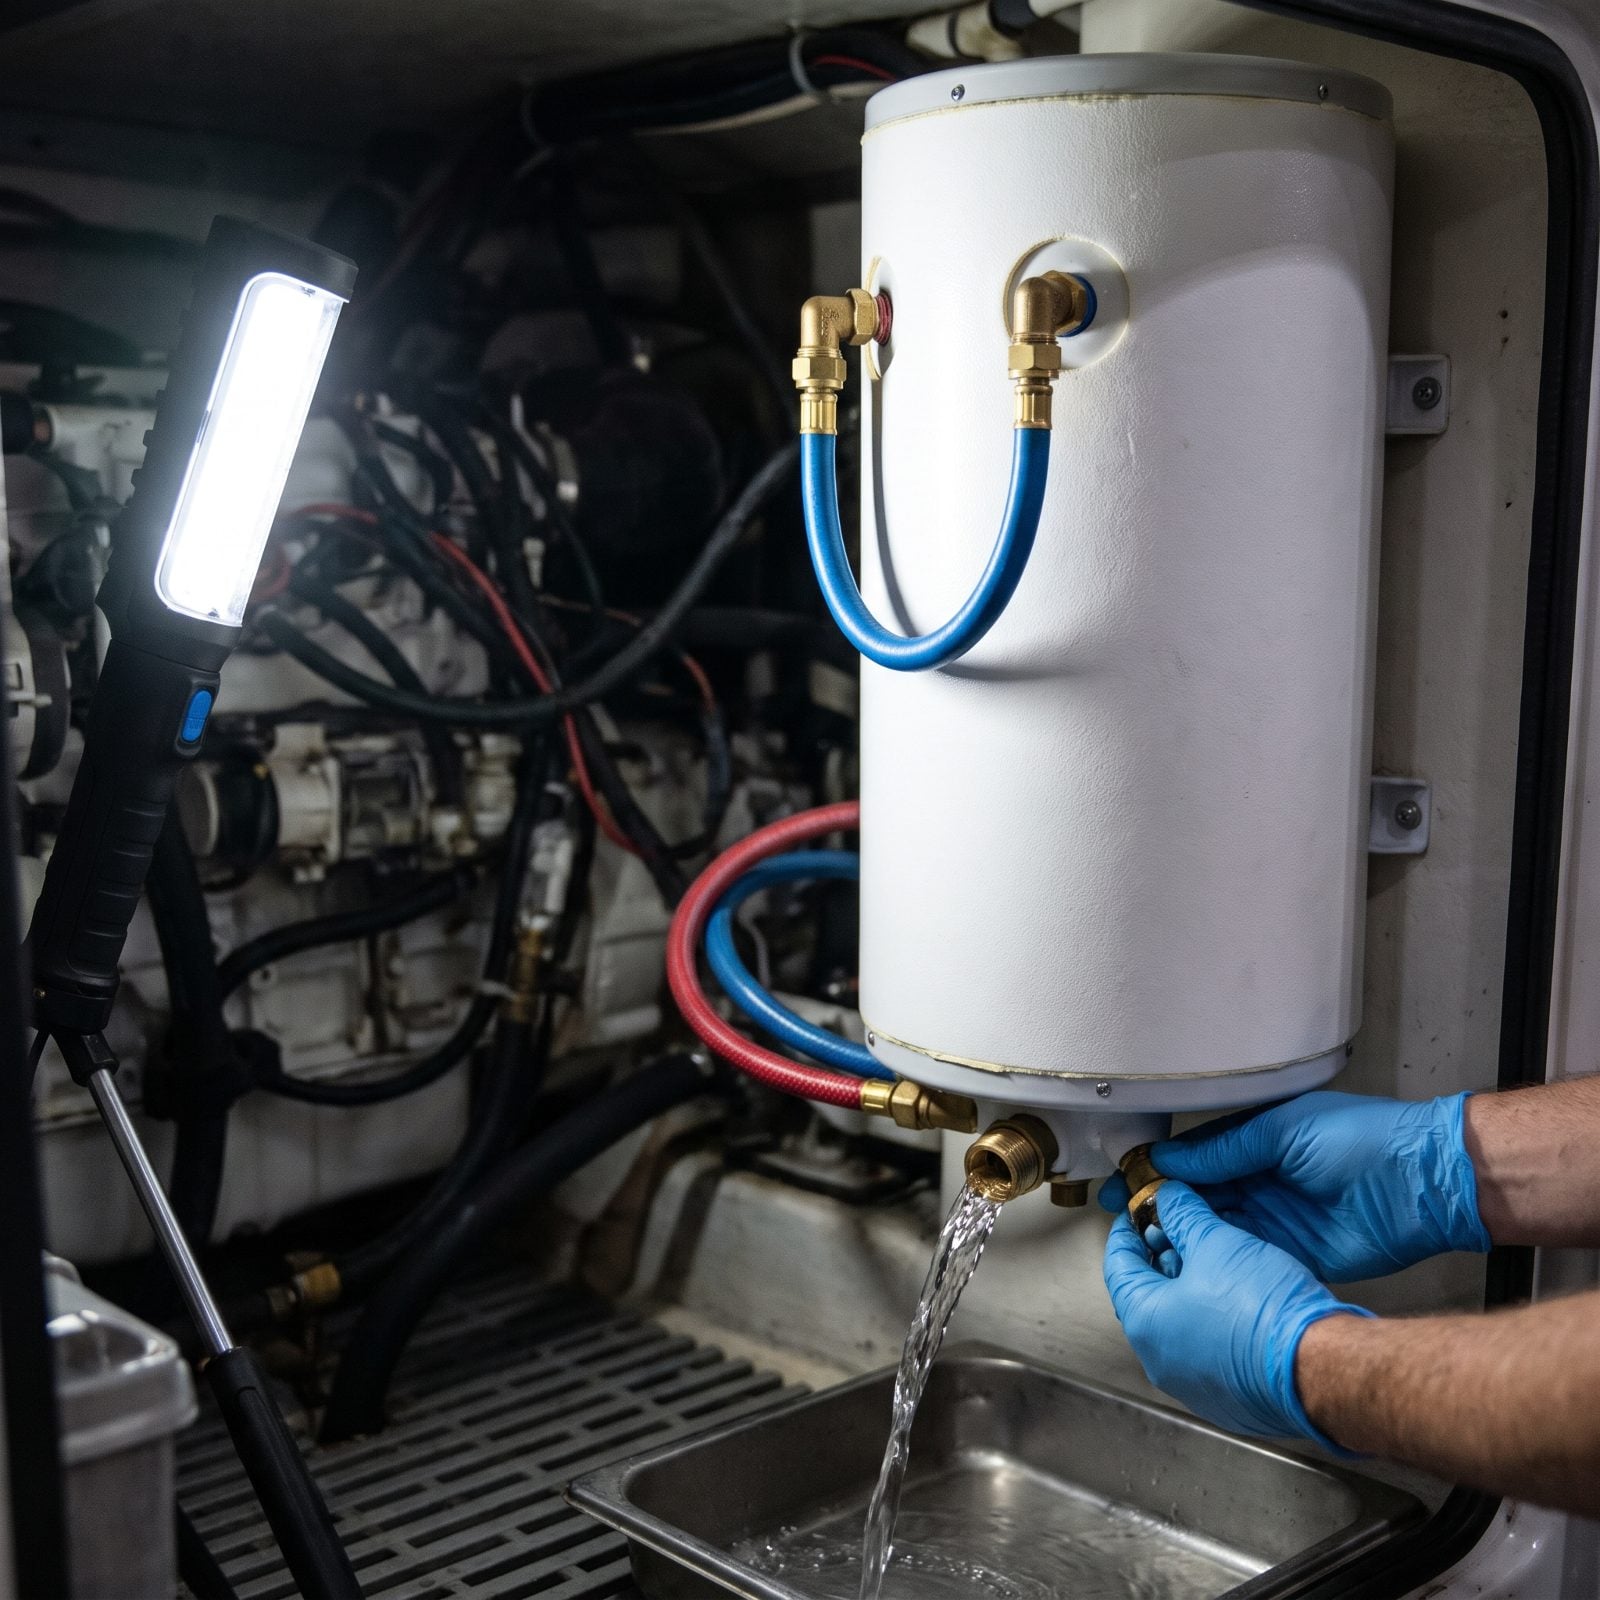
The water heater holds several gallons. Pump antifreeze straight through it and you’ll empty two jugs just filling the tank before any pink reaches your faucets — and leaving it full of plain water risks cracking both the tank and the element.
Drain it first. Shut off power, open the pressure relief valve to break the vacuum, and pull the drain plug at the base. Let it empty all the way. Then set the bypass: either a built-in valve set or a loop of hose connecting the hot and cold ports so antifreeze skips the tank entirely. Confirm the heater stays empty before you move on. A half-drained heater holds plenty to split.
21. Pump Nontoxic Antifreeze Through Faucets
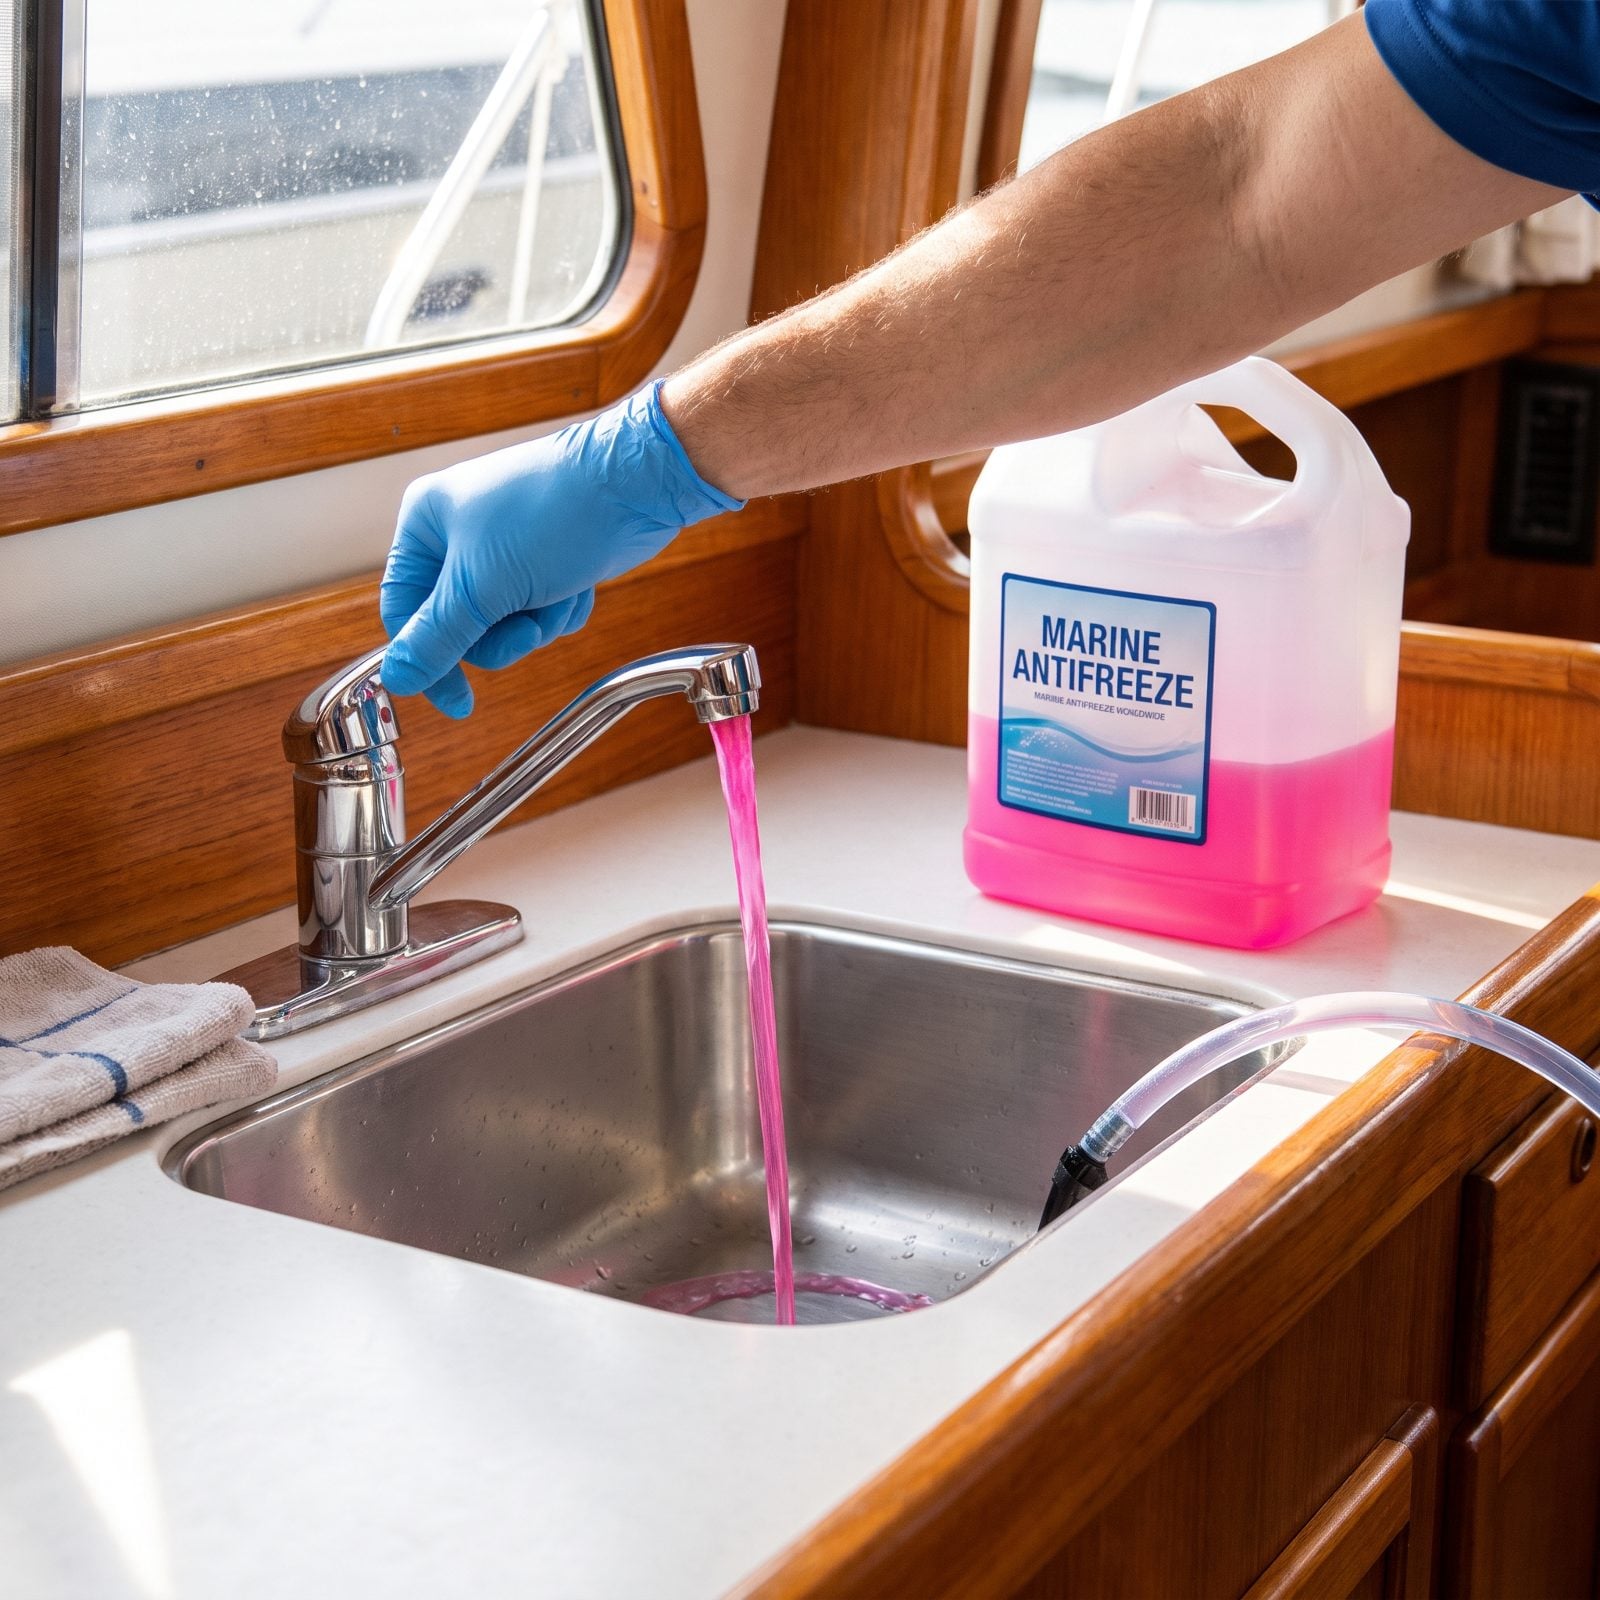
This is the step that protects the pump, the lines, and every faucet at once. With the tank drained and the heater bypassed, drop the water pump’s intake into a jug of nontoxic antifreeze and run each fixture until it flows solid pink.
Do them one at a time: galley hot, galley cold, head sink hot and cold, shower, any spare tap. Run each until the color comes through strong, not pale. Pale pink means you’re still pushing a slug of water ahead of the antifreeze. And don’t forget the pump’s own strainer or the cold side of the heater bypass.
Use the pink marine stuff rated for potable systems, never automotive antifreeze. One is nontoxic and one will poison your water for the life of the boat.
20. Winterize Transom Shower and Washdown
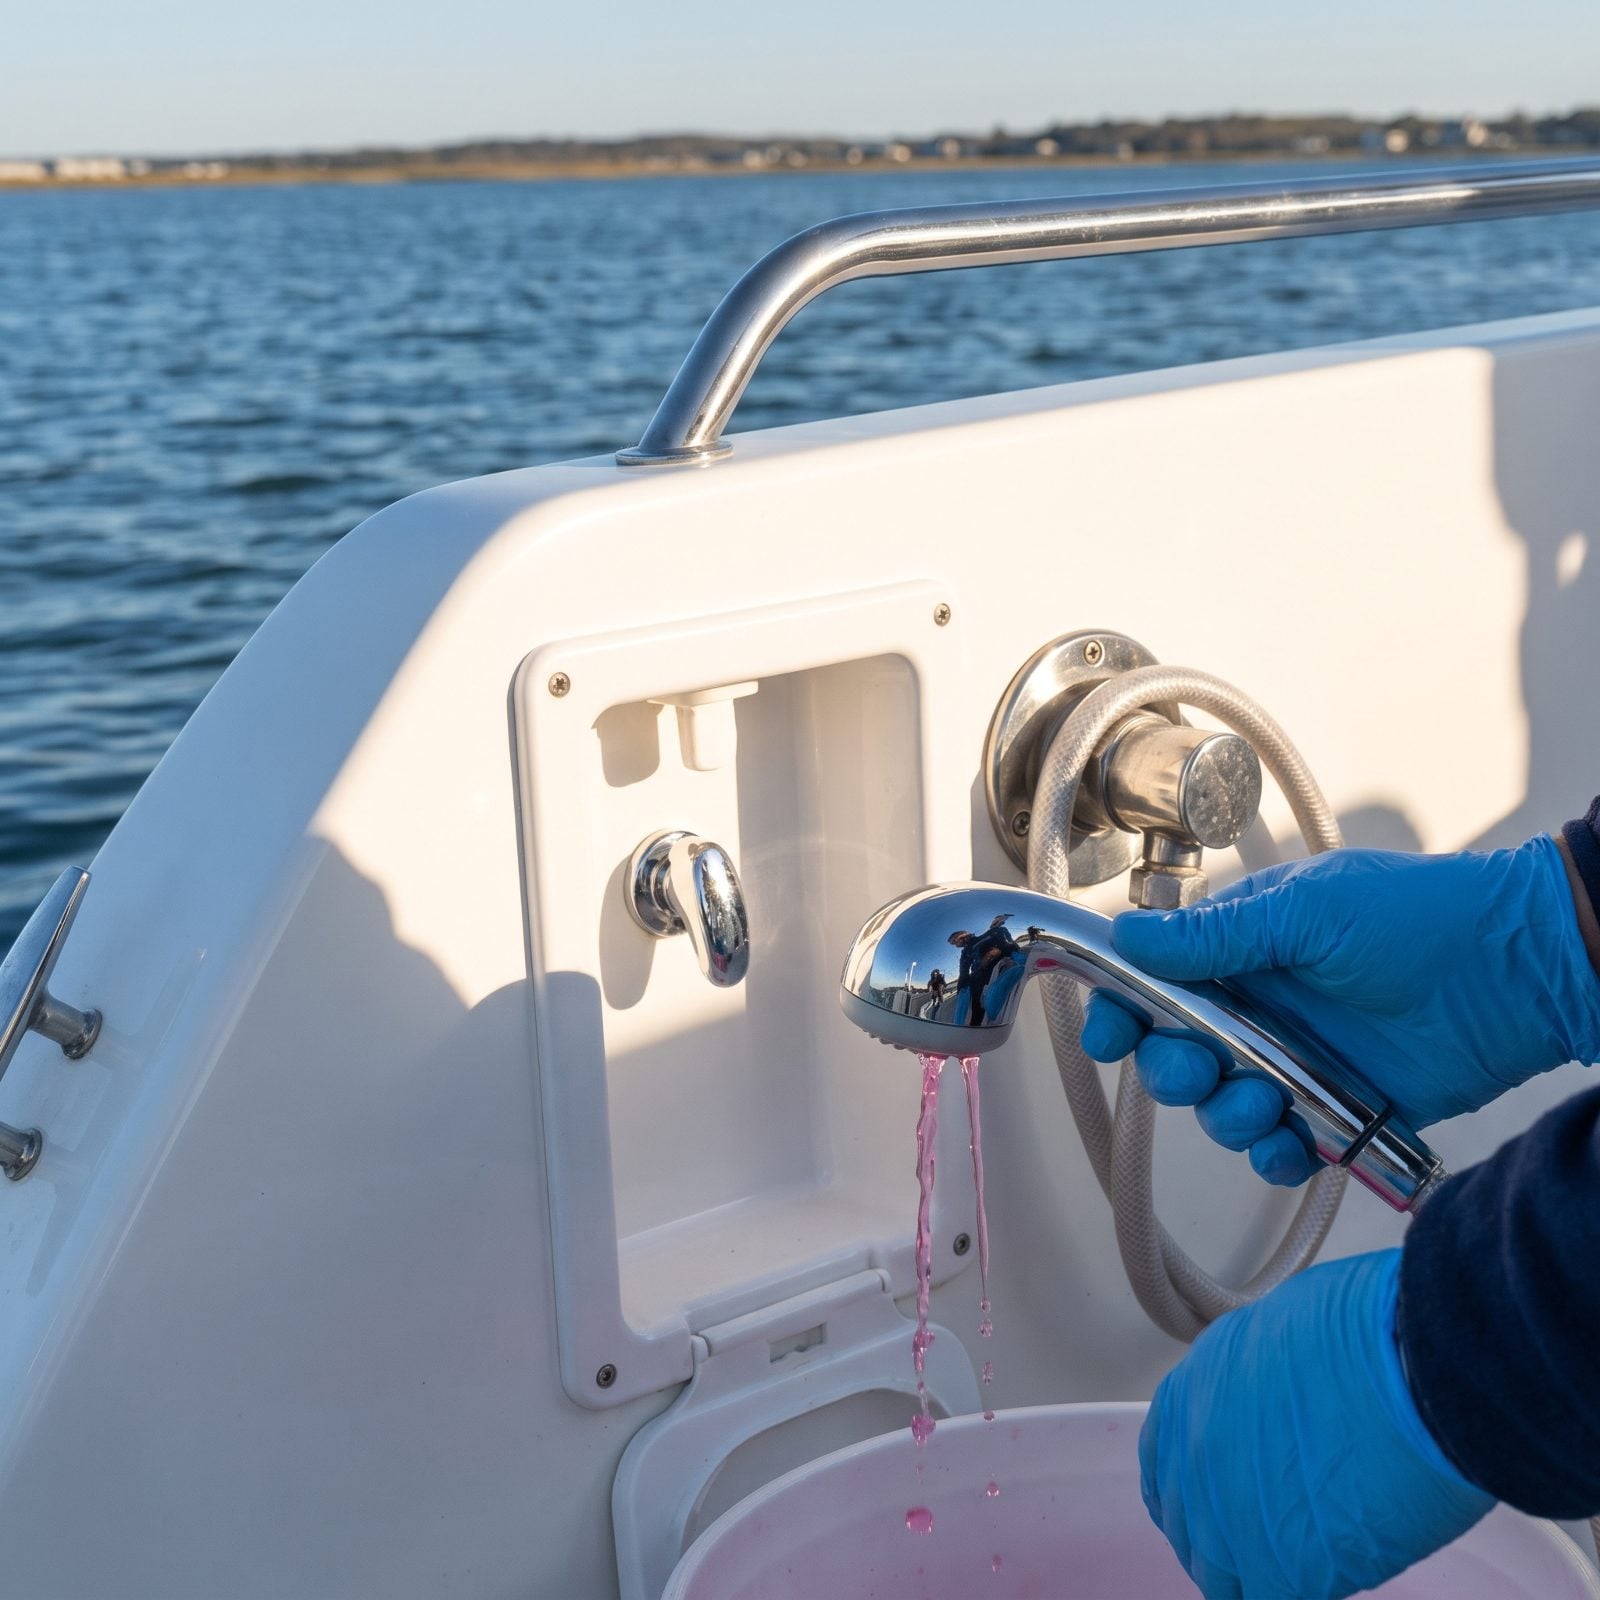
These are the fittings people forget, and they’re the ones that split. The transom shower and the raw-water washdown both run long hose lengths out to the stern — full of water, exposed, easy to overlook.
For the freshwater transom shower, run it on the antifreeze pump until the wand sprays pink, both hot and cold. For the raw-water washdown, close its seacock, then either blow the line out with low air pressure or draw antifreeze through the pump intake until the nozzle flows color. Pull the shower wand fully out of its housing and coil it loose, so no water hides in a tight bend.
19. Drain Livewells, Baitwells, and Pumps
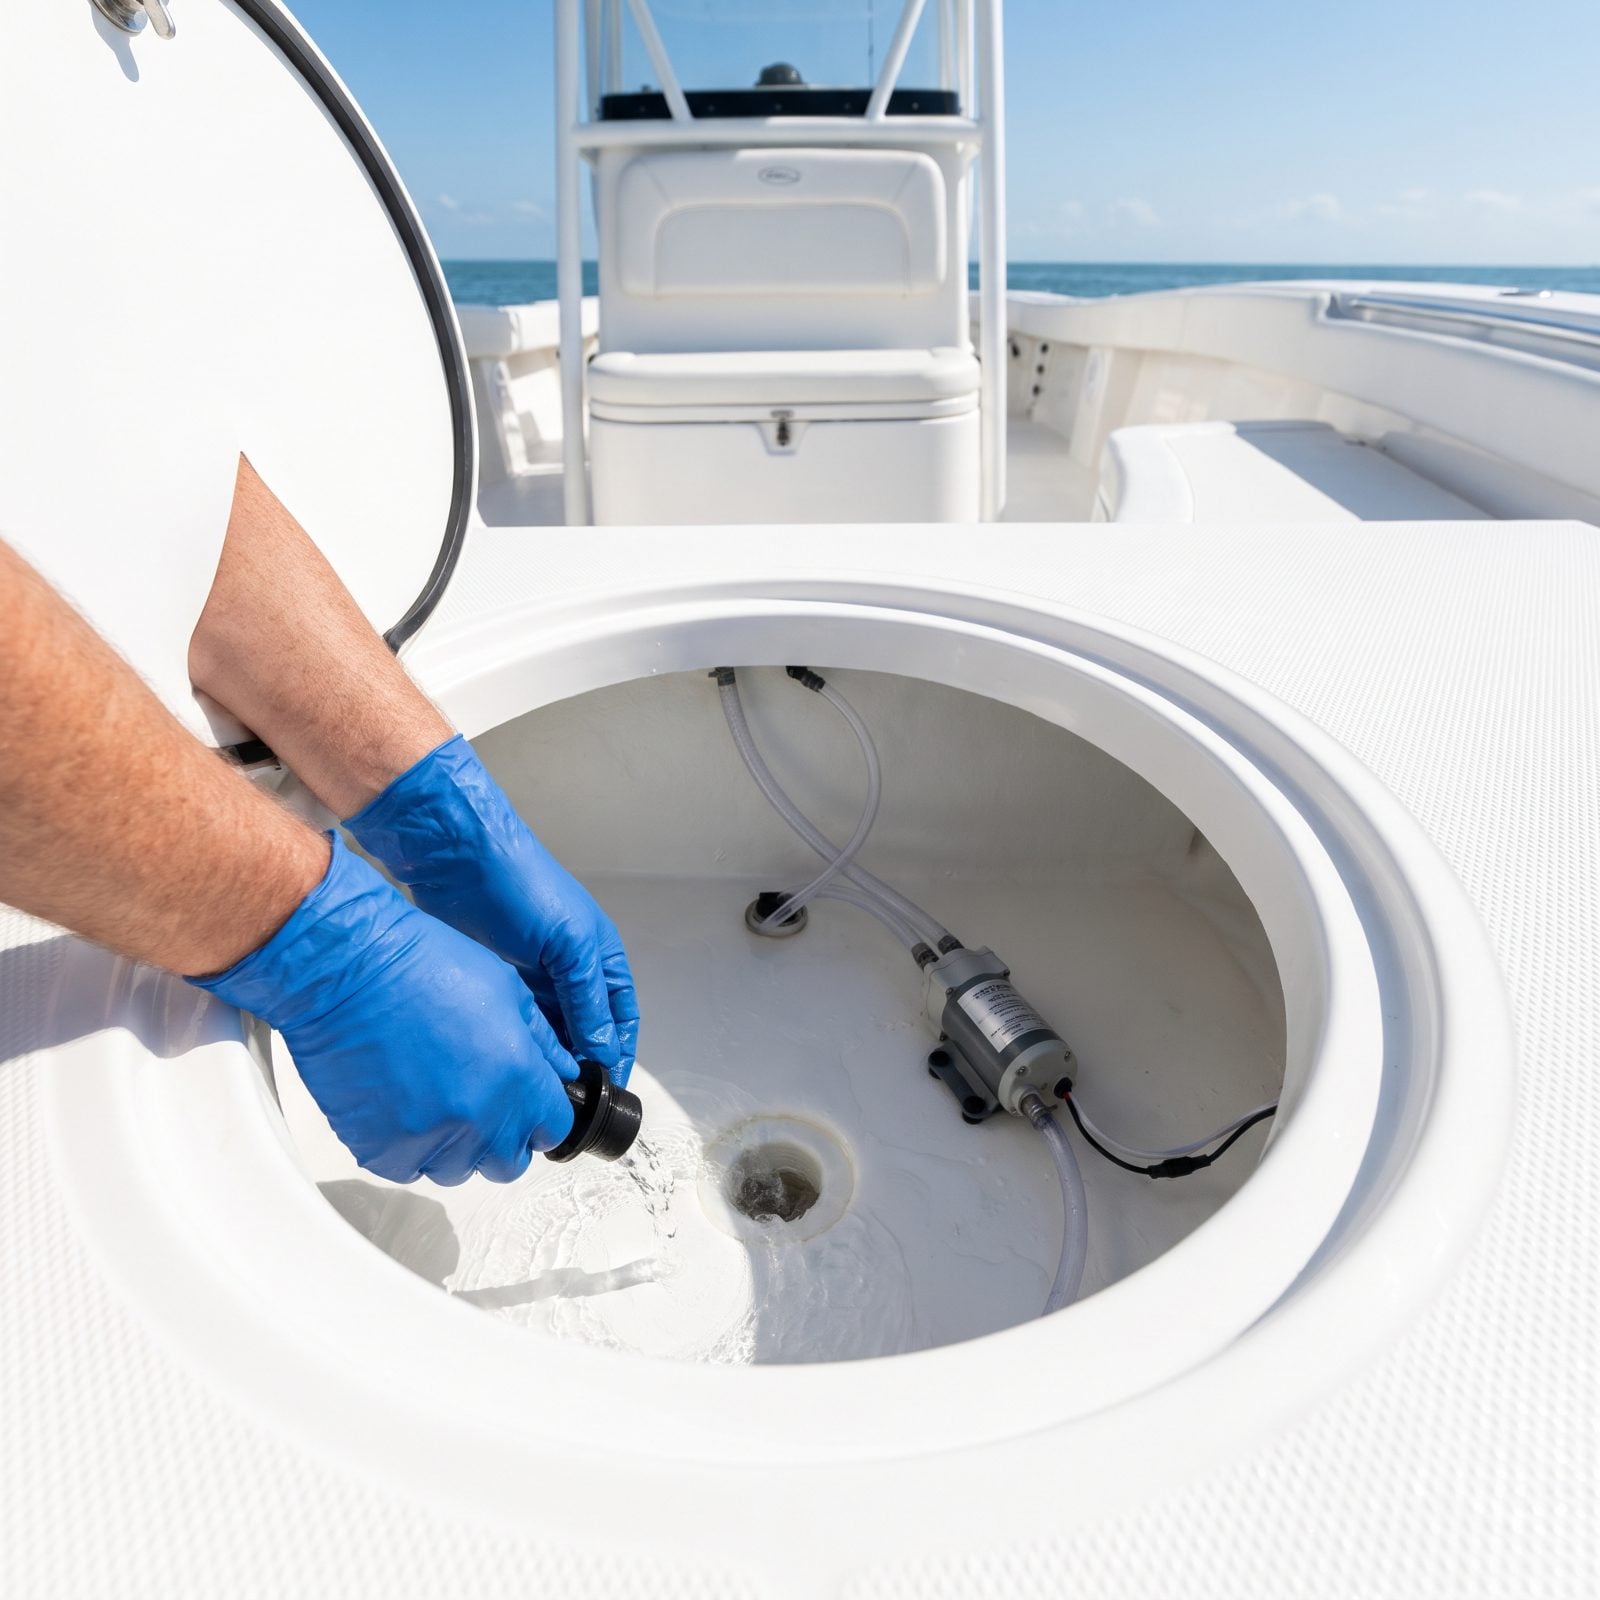
Livewell and baitwell plumbing is a maze of small-diameter hose, aerator pumps, and recirculation fittings, all of it holding water in spots gravity won’t empty. The aerator pumps crack easily when the water in their housings freezes — cheap to buy, annoying to replace.
Pull every drain plug and let the wells empty fully. Run each pump dry for a few seconds to clear the impeller housing, then draw antifreeze through the raw-water intake until pink shows at the well outlets. Leave the plugs out and the lids propped open all winter so condensation can escape and nothing sits in the bottom.
18. Winterize Air-Conditioning Seawater Loop
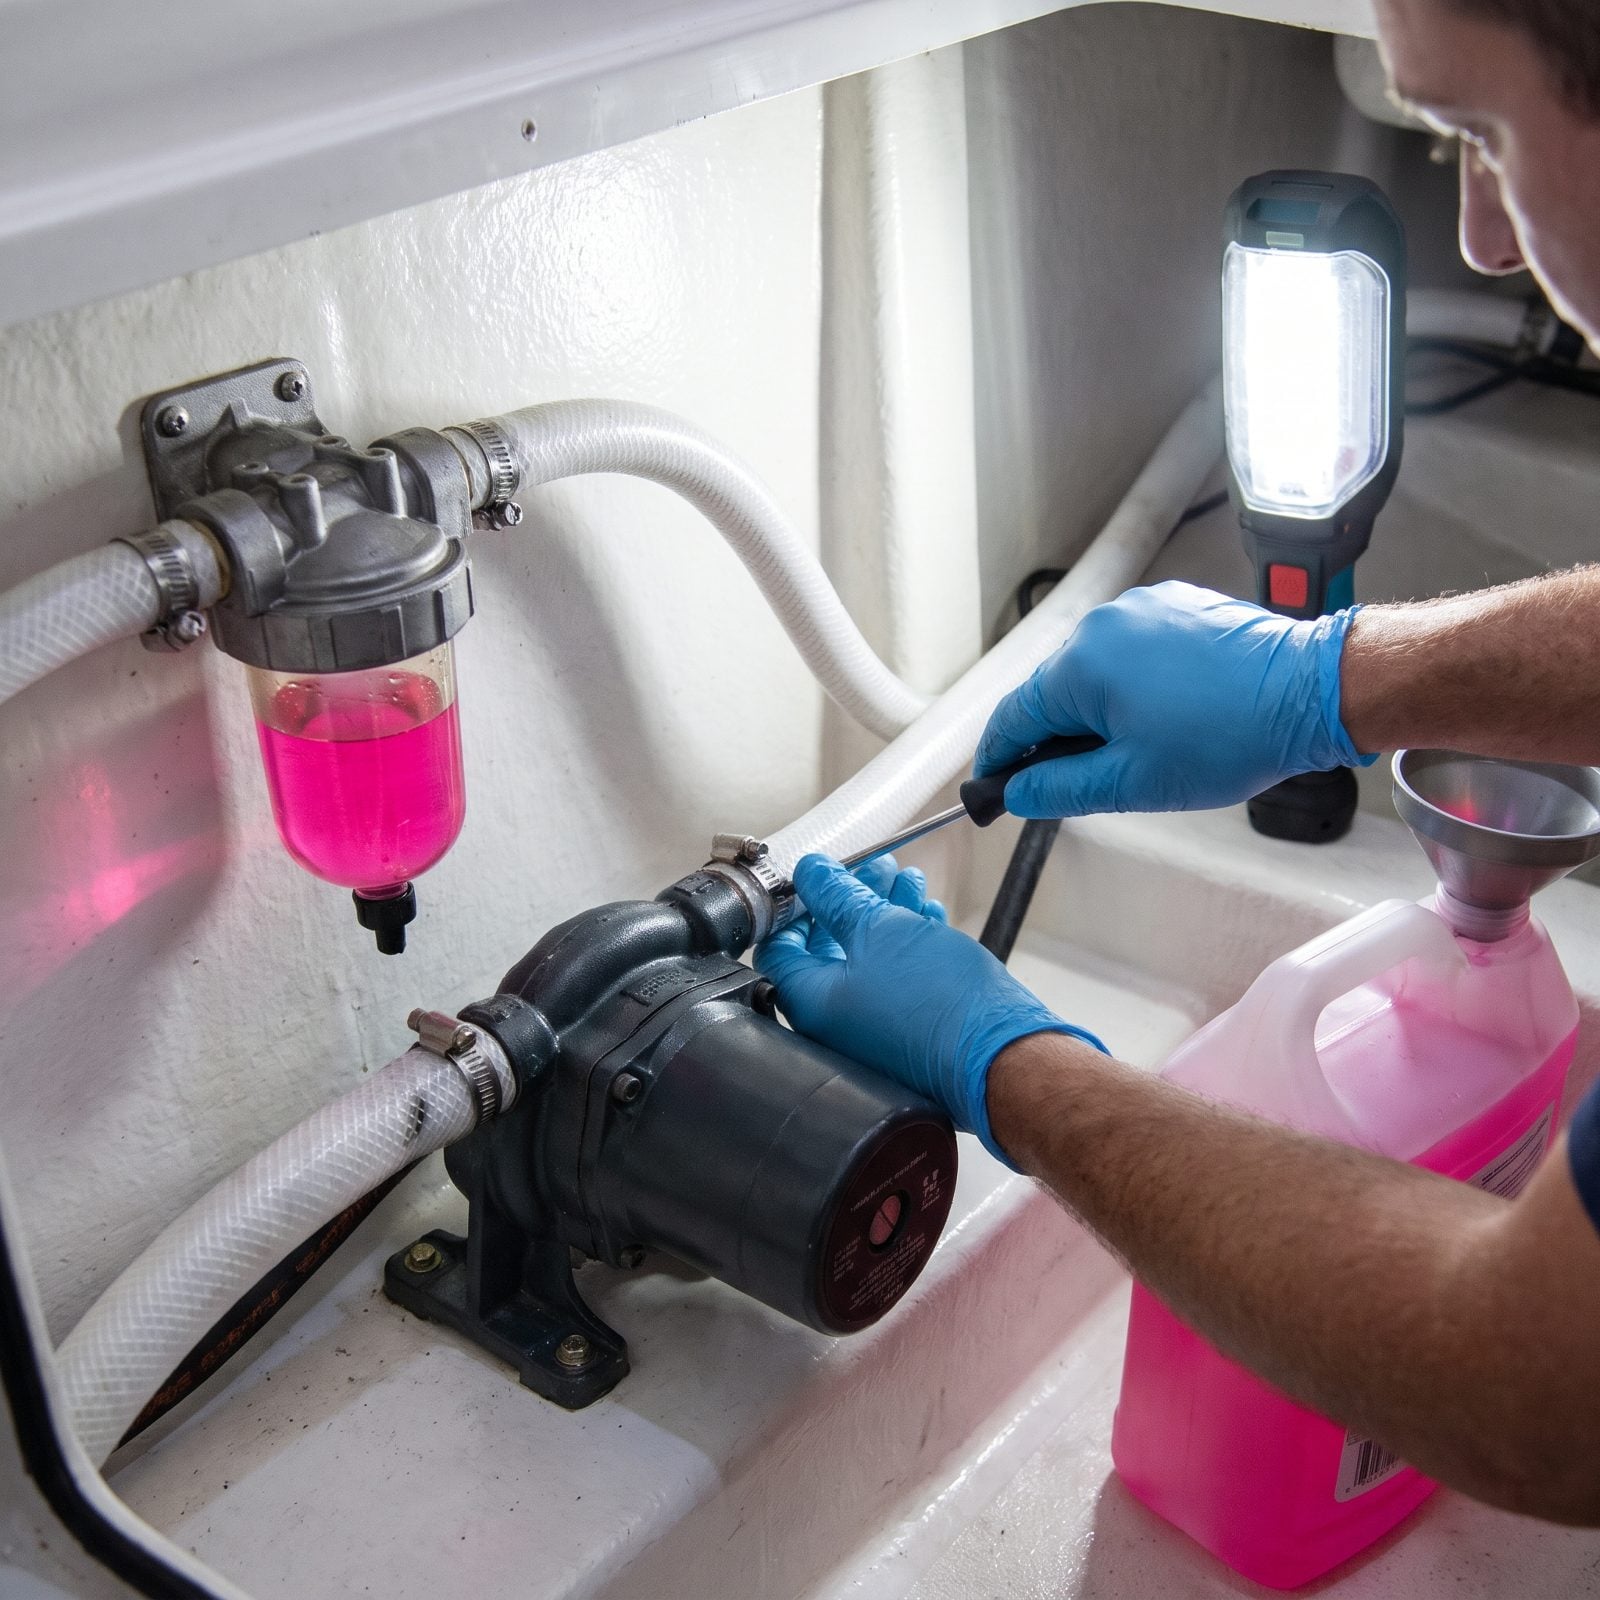
If your boat has air conditioning, it pulls seawater through a pump, a strainer, and a condenser coil to shed heat. That whole loop sits full of water, and the condenser coil in particular hates freezing — repairing one is expensive enough to make you careful.
Close the AC seacock. Open the raw-water strainer and clean it. Then disconnect the intake side and draw nontoxic antifreeze through the system with the pump running until pink flows out the overboard discharge. Watch the clear strainer bowl fill with color so you know the loop is full. Clean the strainer basket again before you button it up — debris left over winter corrodes the housing.
17. Winterize Generator Cooling and Fuel Systems
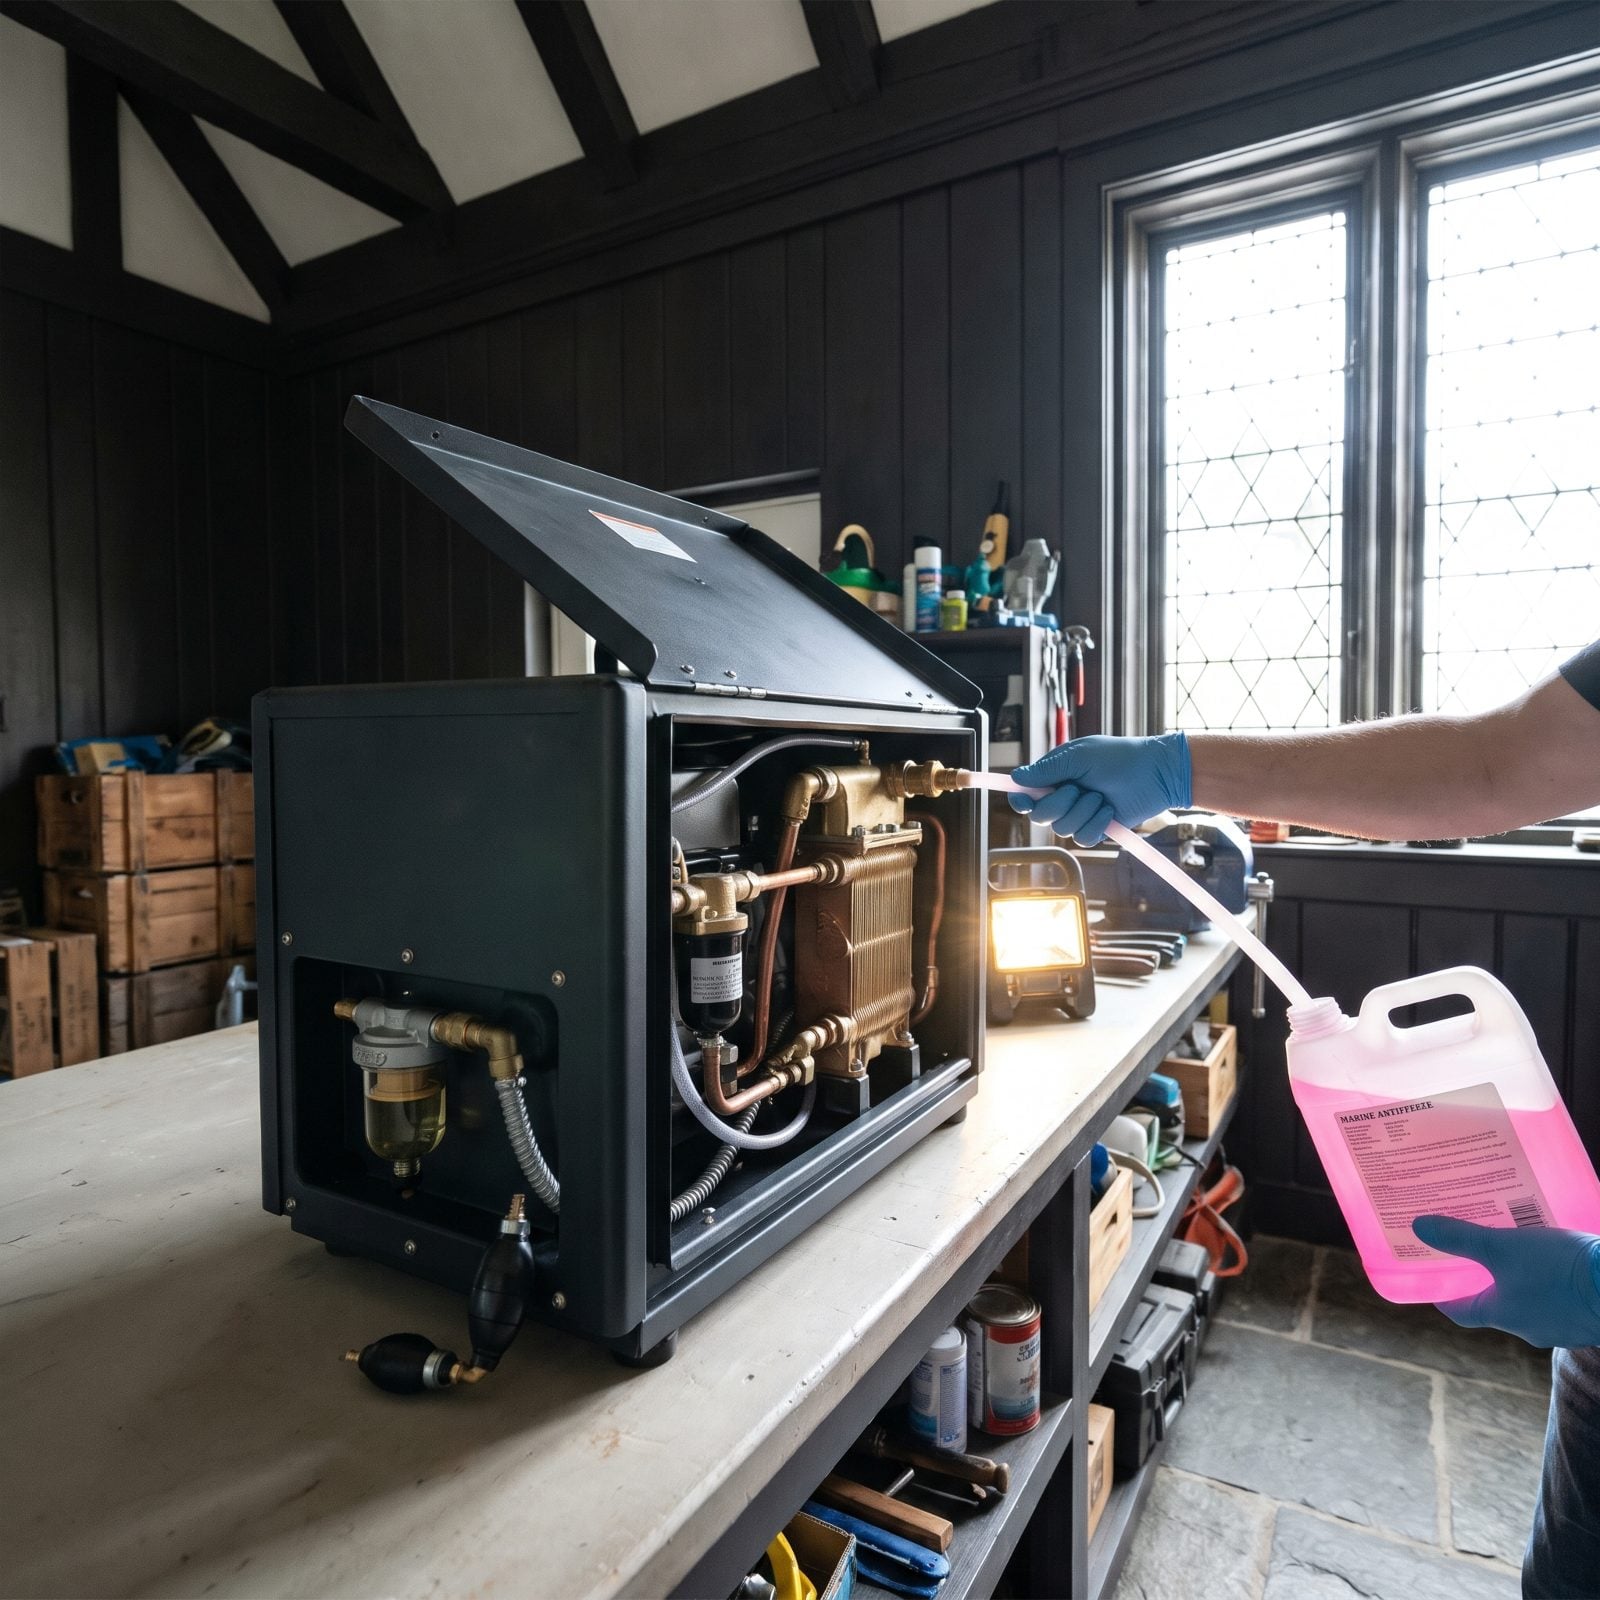
A generator is a small engine, and it needs the same two things done: the raw-water cooling loop cleared, and the fuel system protected. Skip either and you’re looking at a cracked exchanger or a spring full of varnished fuel and clogged filters.
For the cooling side, close the raw-water seacock and run the generator while drawing nontoxic antifreeze through its intake until pink discharges overboard. For the fuel, top off the tank to limit condensation, add a marine fuel stabilizer, and run the generator long enough to pull treated fuel through the whole line and injector. Change the fuel filter and the water-separator element now, not in spring, so it starts clean.
16. Close and Lubricate Every Seacock
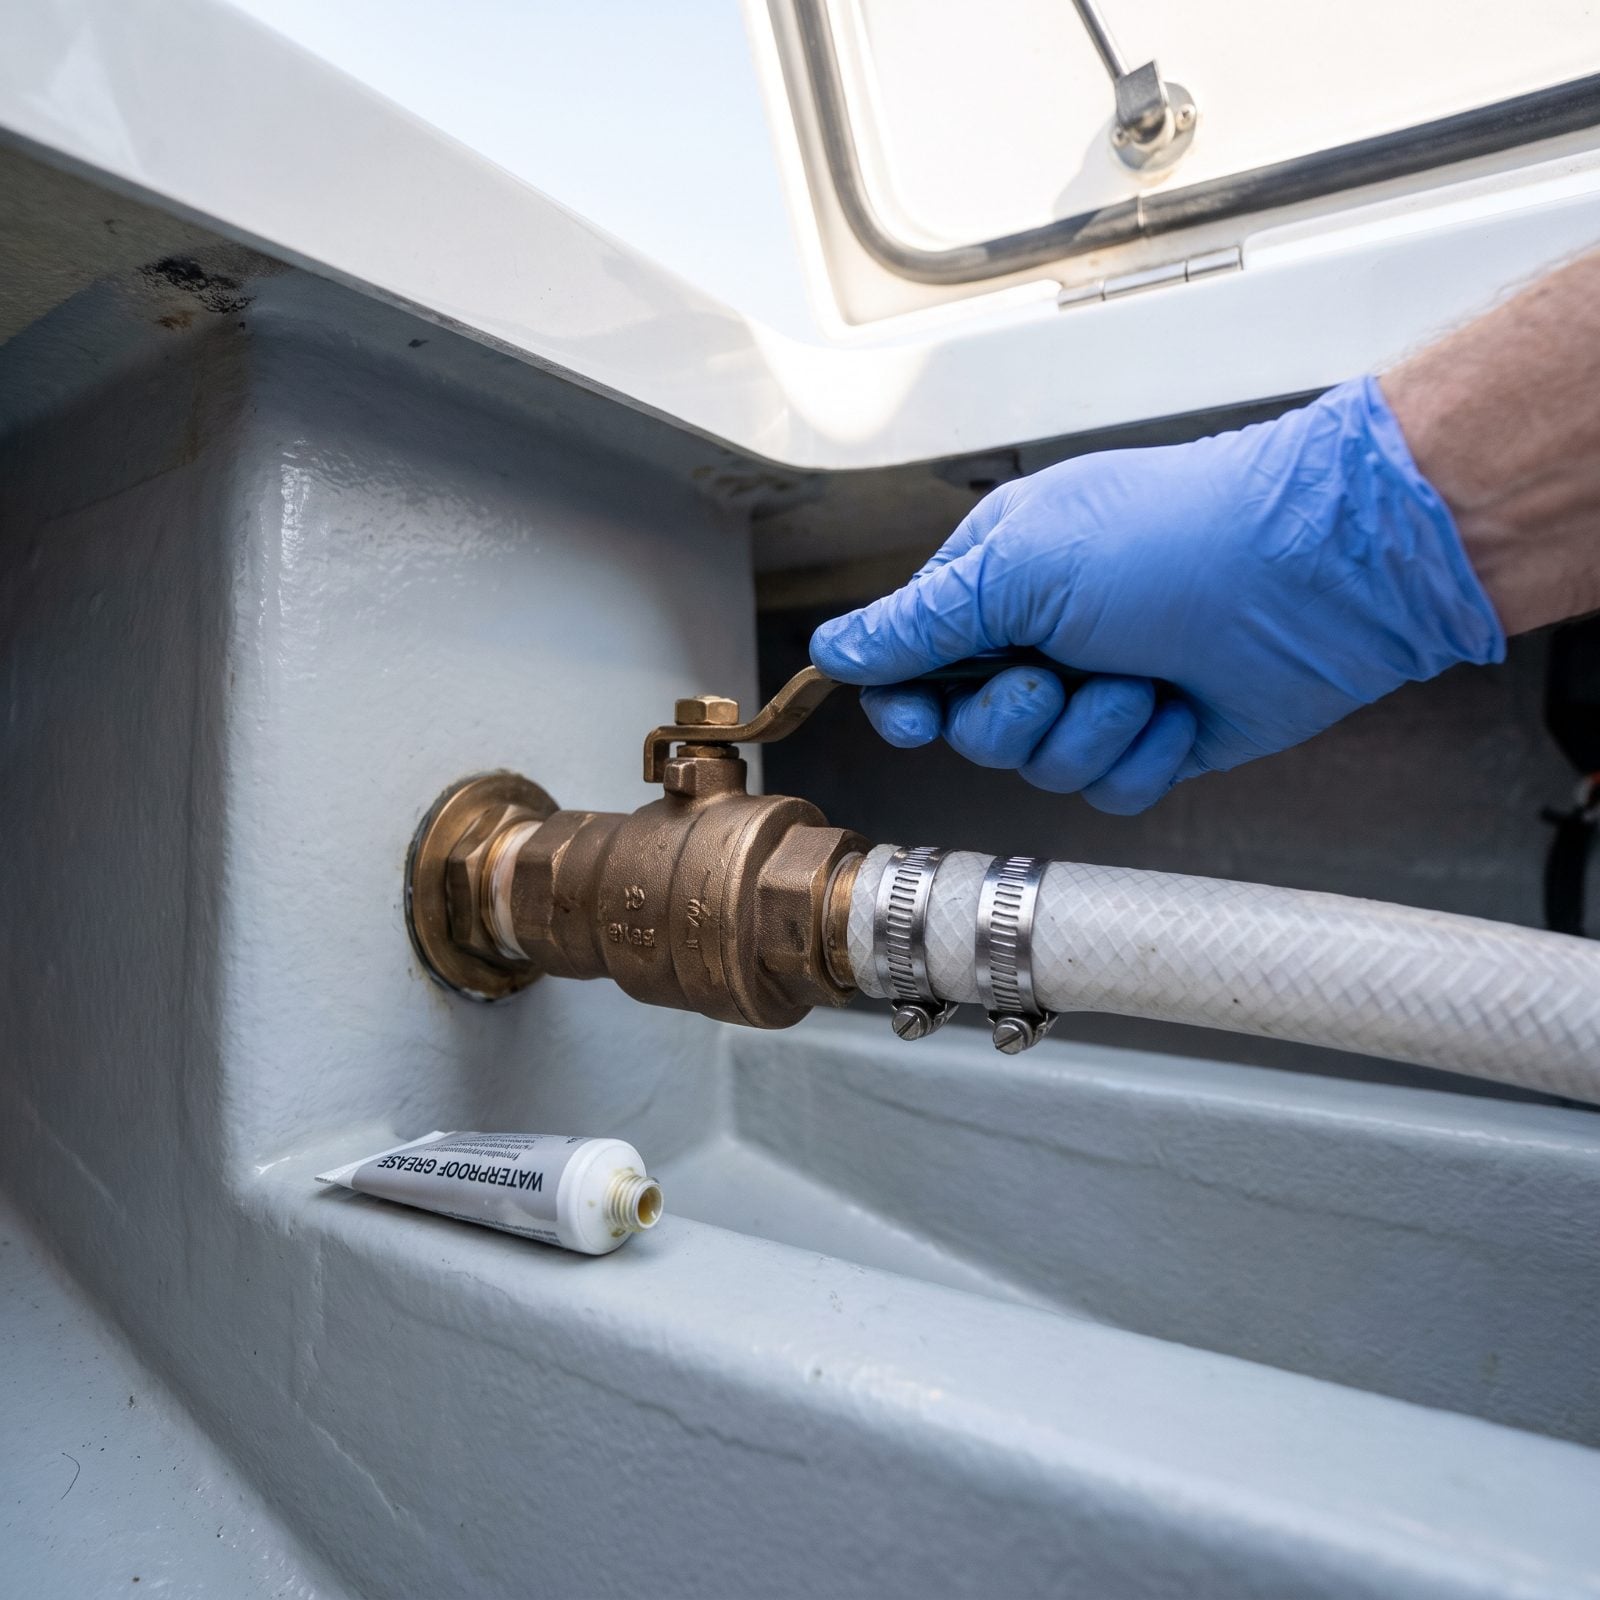
Water sitting in an open through-hull all winter is how you crack a fitting, or worse, how a slow leak fills a bilge nobody checks until April. Close every seacock you can reach, then exercise it. Work the handle fully open and fully closed three or four times. A valve that only ever lives in one position will seize solid, and a seized seacock in an emergency is a very bad day.
Here’s the part people skip. Lubrication. A dab of waterproof grease on the ball keeps bronze from binding and buys you years of smooth operation. Feel for stiffness as you turn it — a valve that fights you now is the one that snaps a handle off in your hand come spring.
15. Clean Raw-Water Strainers and Baskets
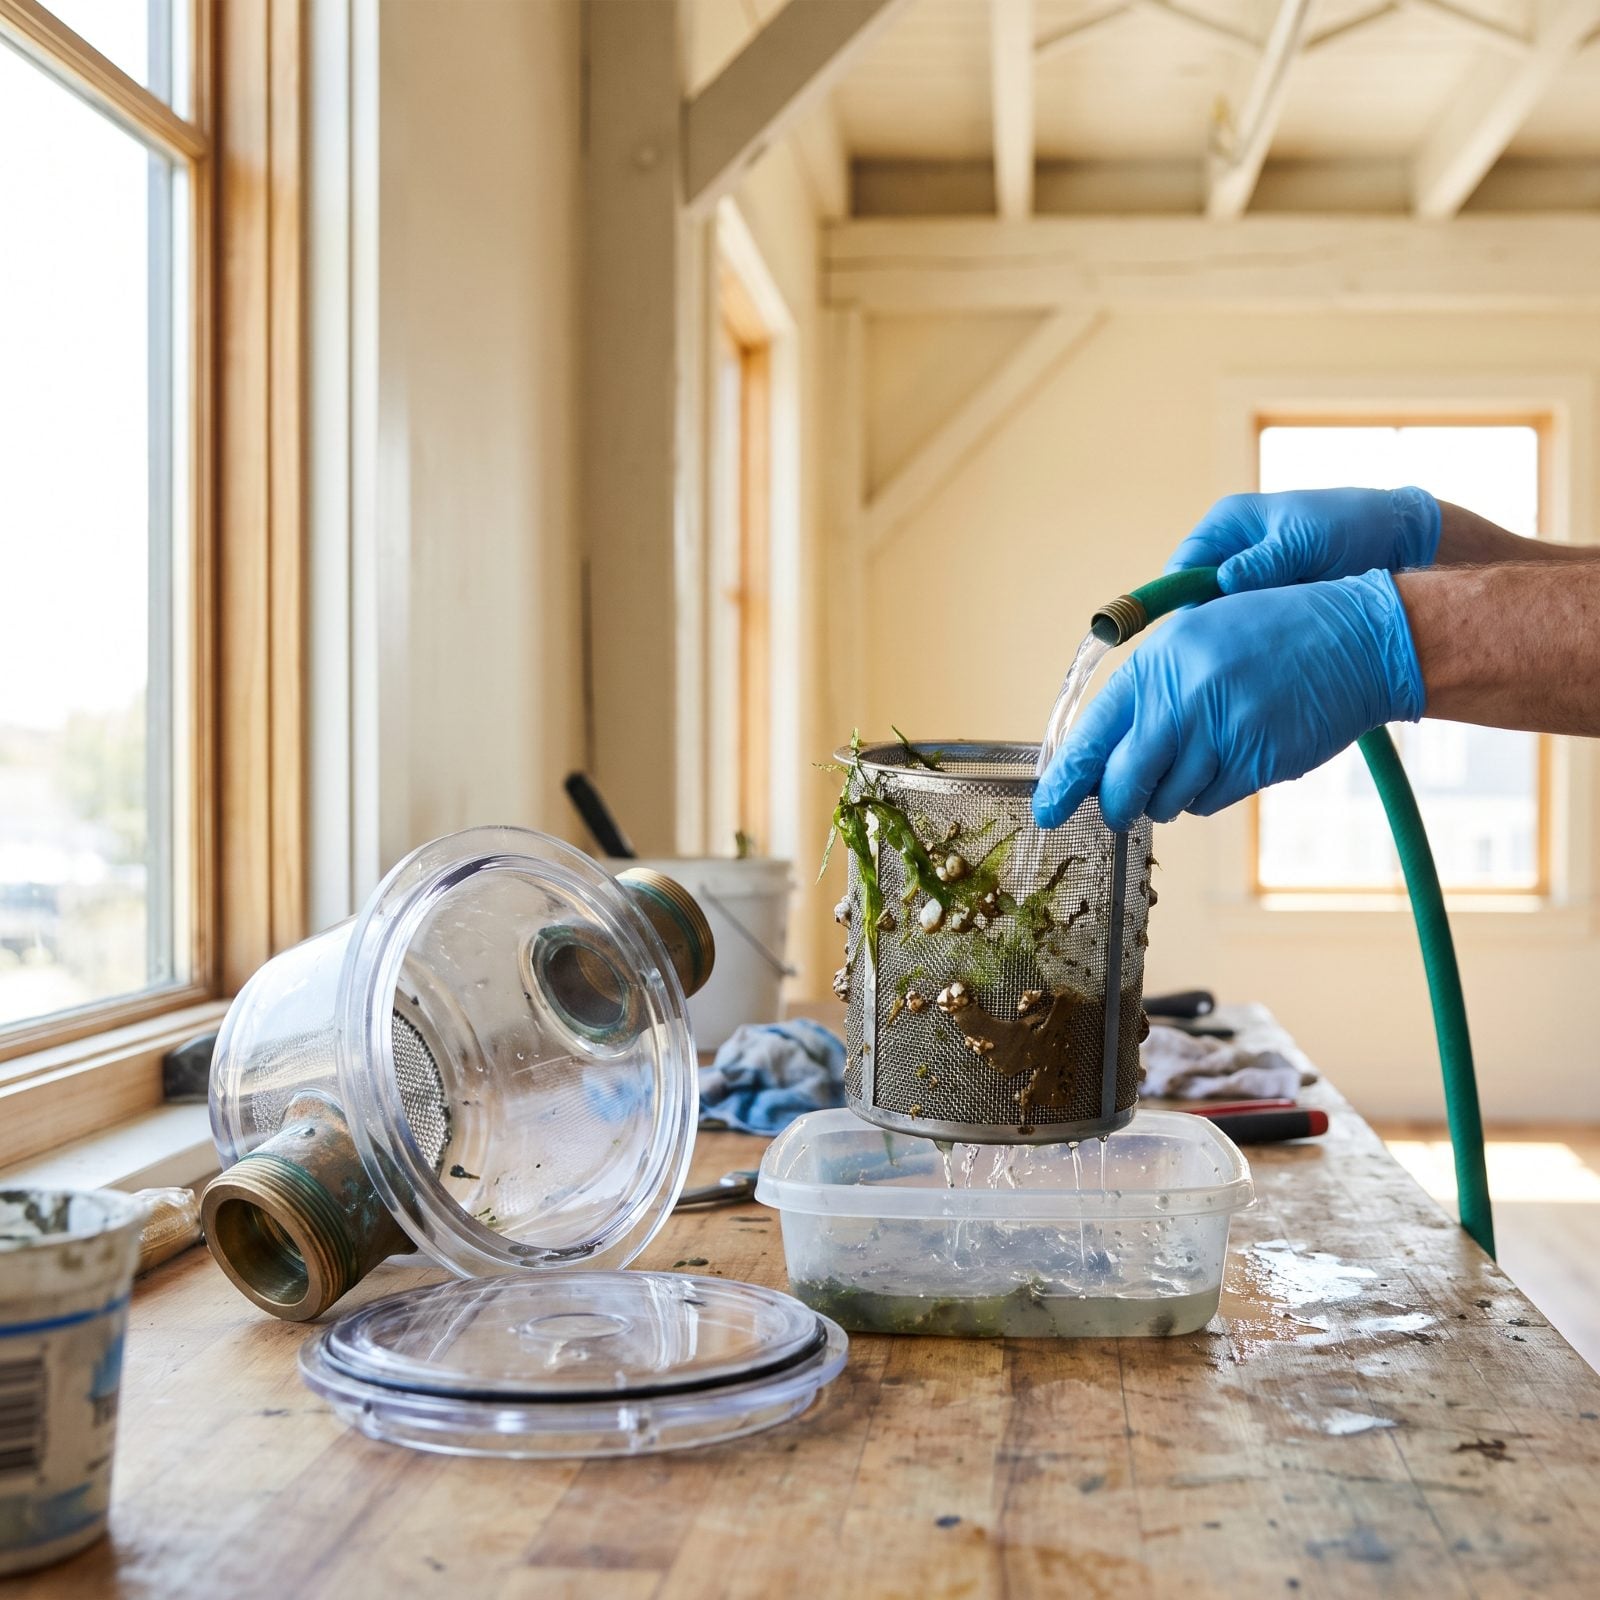
A strainer packed with silt and weed doesn’t just look bad. Organic muck left to sit all winter breeds slime and corrodes the mesh, and in a hard freeze the trapped water can split the bowl right open. You find out the day you launch, when the bilge fills.
So pull the basket. Rinse every strand of weed and every shell fragment out of the mesh under running water, check the clear bowl for hairline cracks while it’s apart, and inspect the lid O-ring for flattening or glaze. A dried, cracked O-ring is a drip waiting to happen.
Leave the bowl loosely seated, not torqued down, so any leftover moisture can evaporate instead of sitting against the seal.
14. Inspect the Shore-Power Cord for Heat Damage
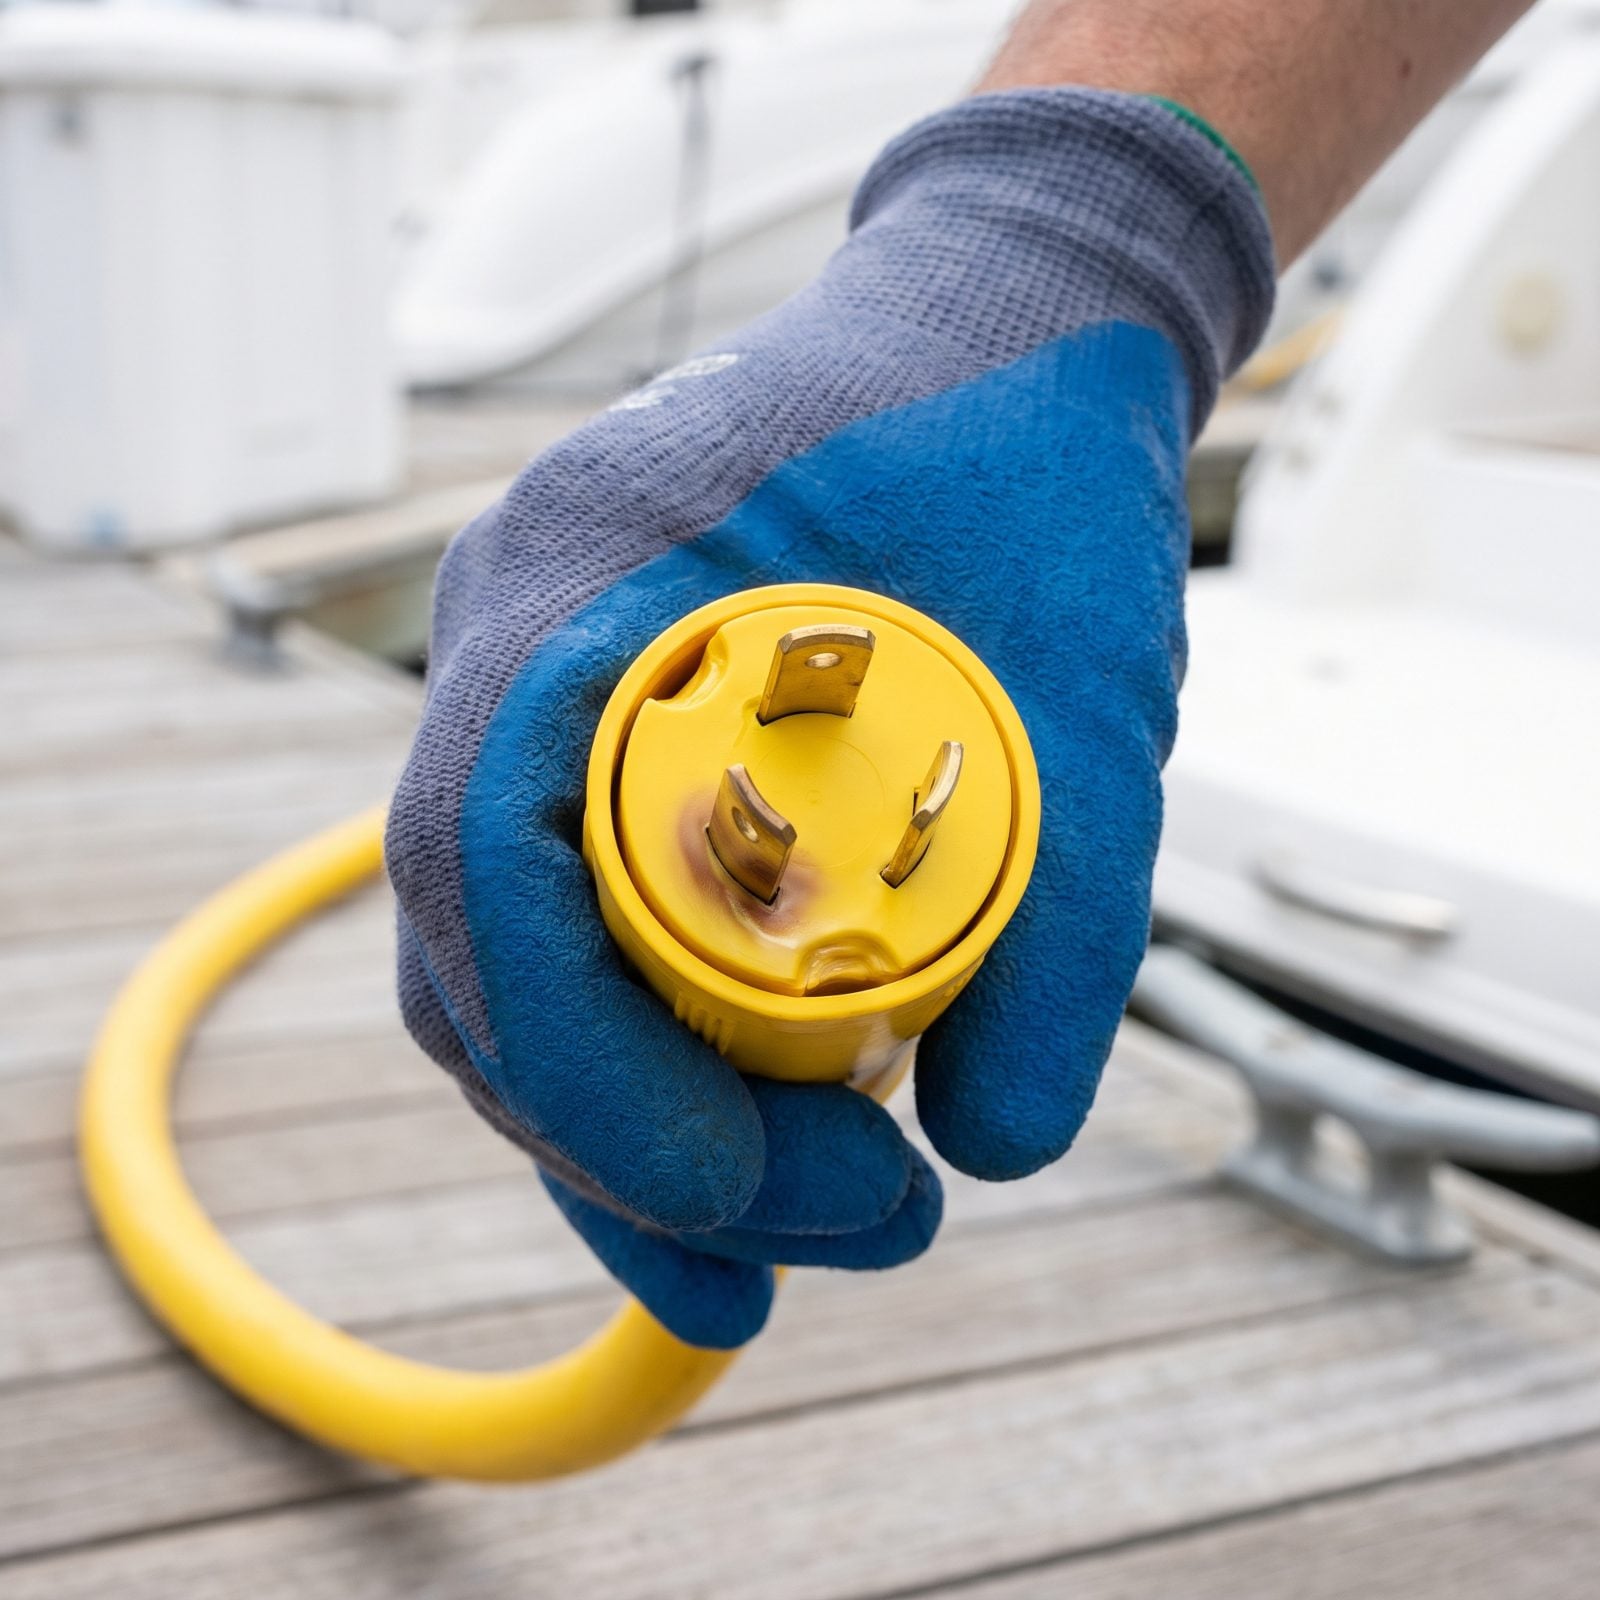
Shore-power cord fires aren’t rare, and they almost never give warning. A loose connection runs hot, melts the plastic a little, runs hotter, and one dry winter night it arcs. Catch it now.
Unplug both ends and look hard at the prongs and the receptacle faces. Brown discoloration, a melted or glassy sheen, pitting on the brass, any whiff of burnt plastic — all of it means retire the cord or the inlet. Don’t sand it clean and call it fixed. The damage tells you the connection was already failing, and it will fail again.
Run your thumb across the prongs. Smooth and bright is good. Rough, dark, or warm to the touch is not.
13. Disconnect and Fully Charge the Batteries
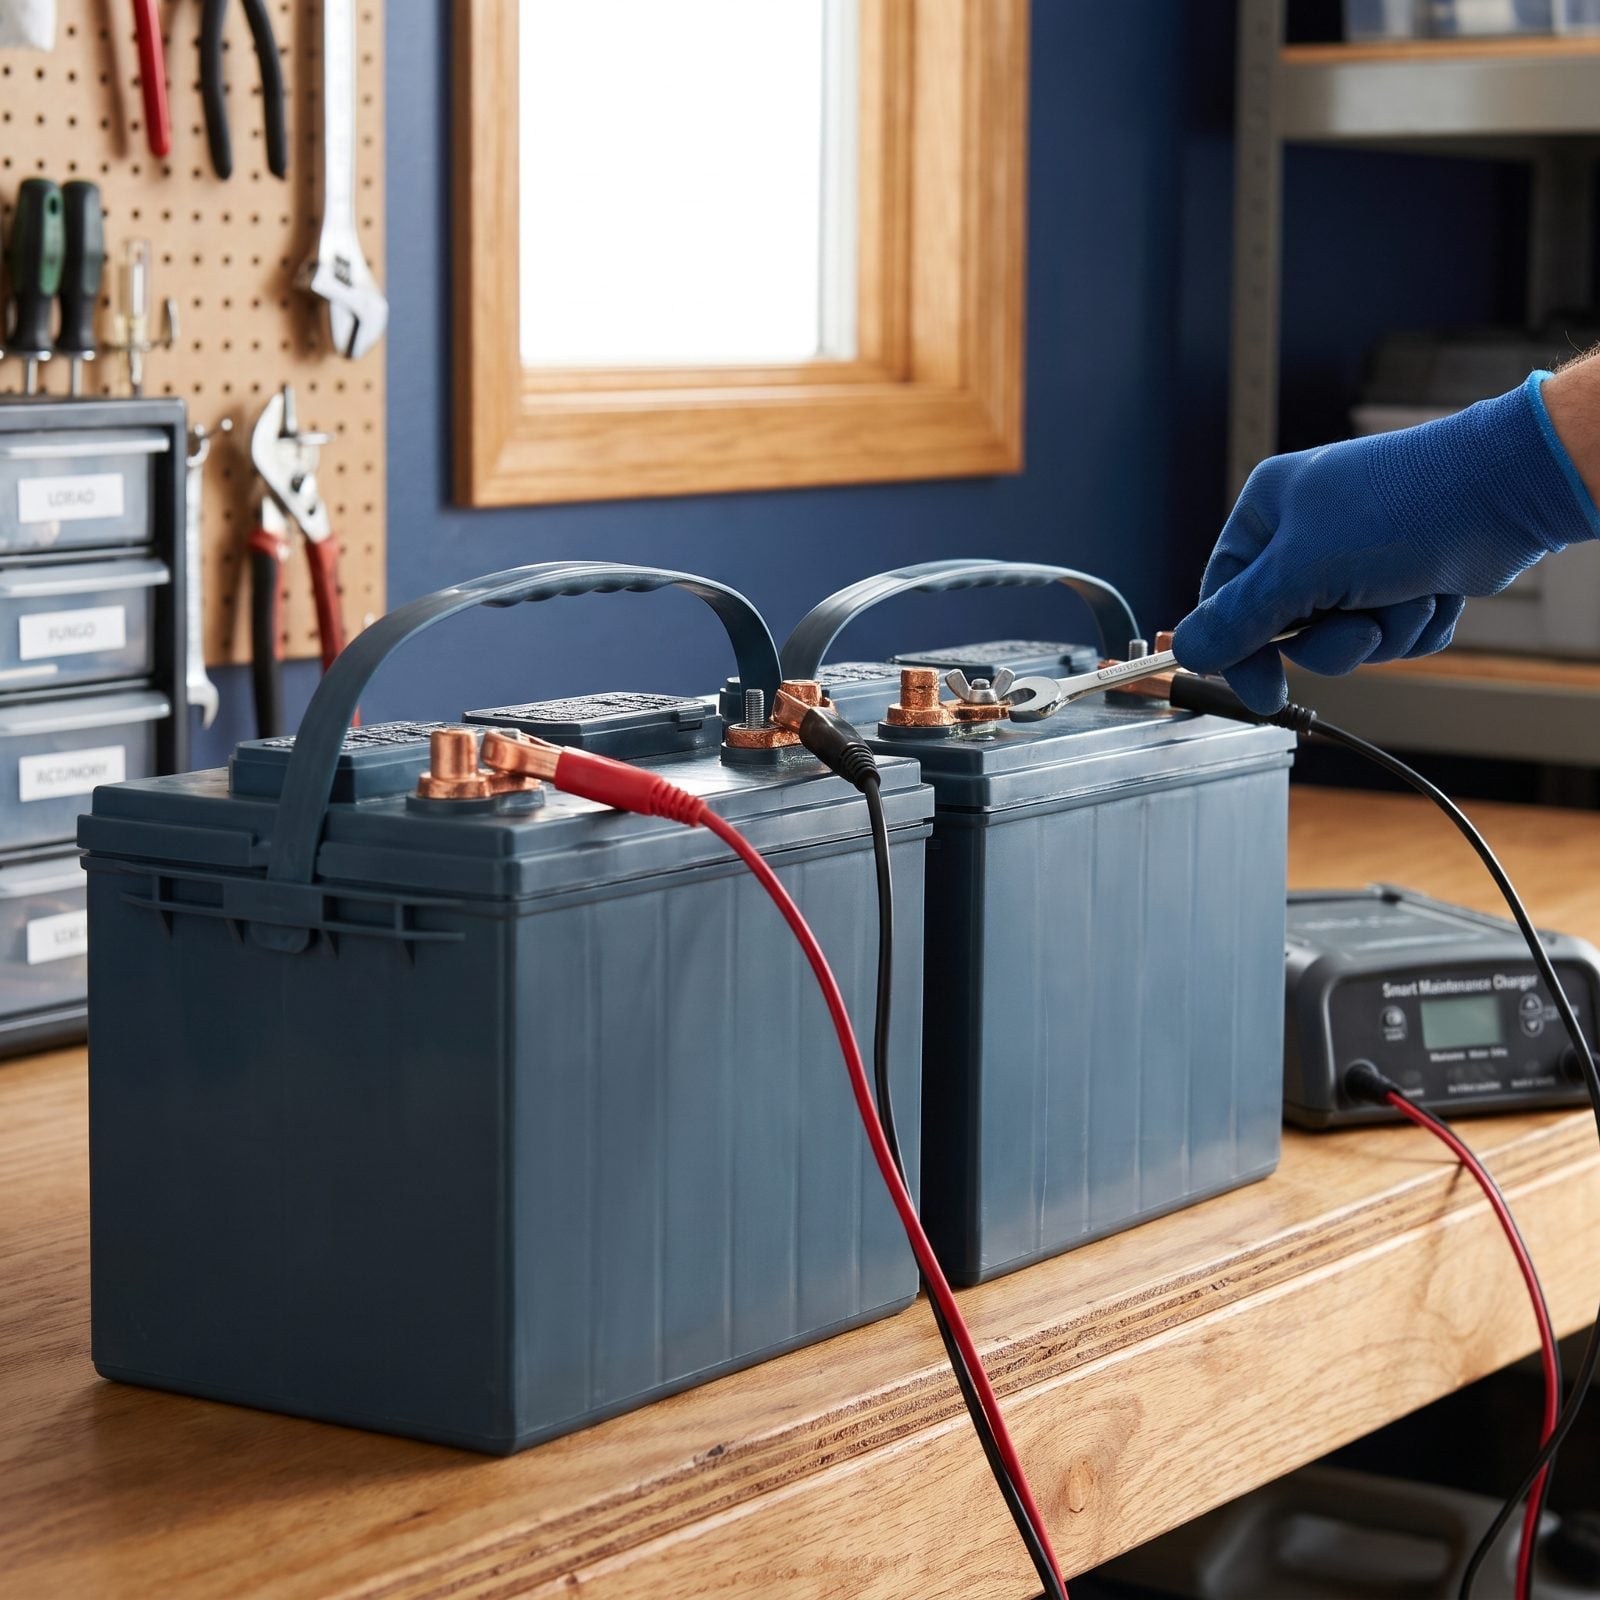
A flat battery in freezing weather can crack its own case. Discharged electrolyte freezes at a much higher temperature than a full charge does, which is why so many batteries die over winter. Half-charged and forgotten is the exact recipe for it.
Disconnect the negative first, then the positive, and if you can, pull the batteries somewhere that doesn’t drop below freezing. Charge them fully before storage, then keep them topped with a smart maintenance charger that cycles on and off instead of cooking them all season.
Wipe the terminals clean and film them with a little protective grease. Corrosion grows in the cold and damp, and a white crust on the posts come spring means a connection you’ll be scraping instead of boating.
12. Defrost the Fridge and Prop the Doors Open
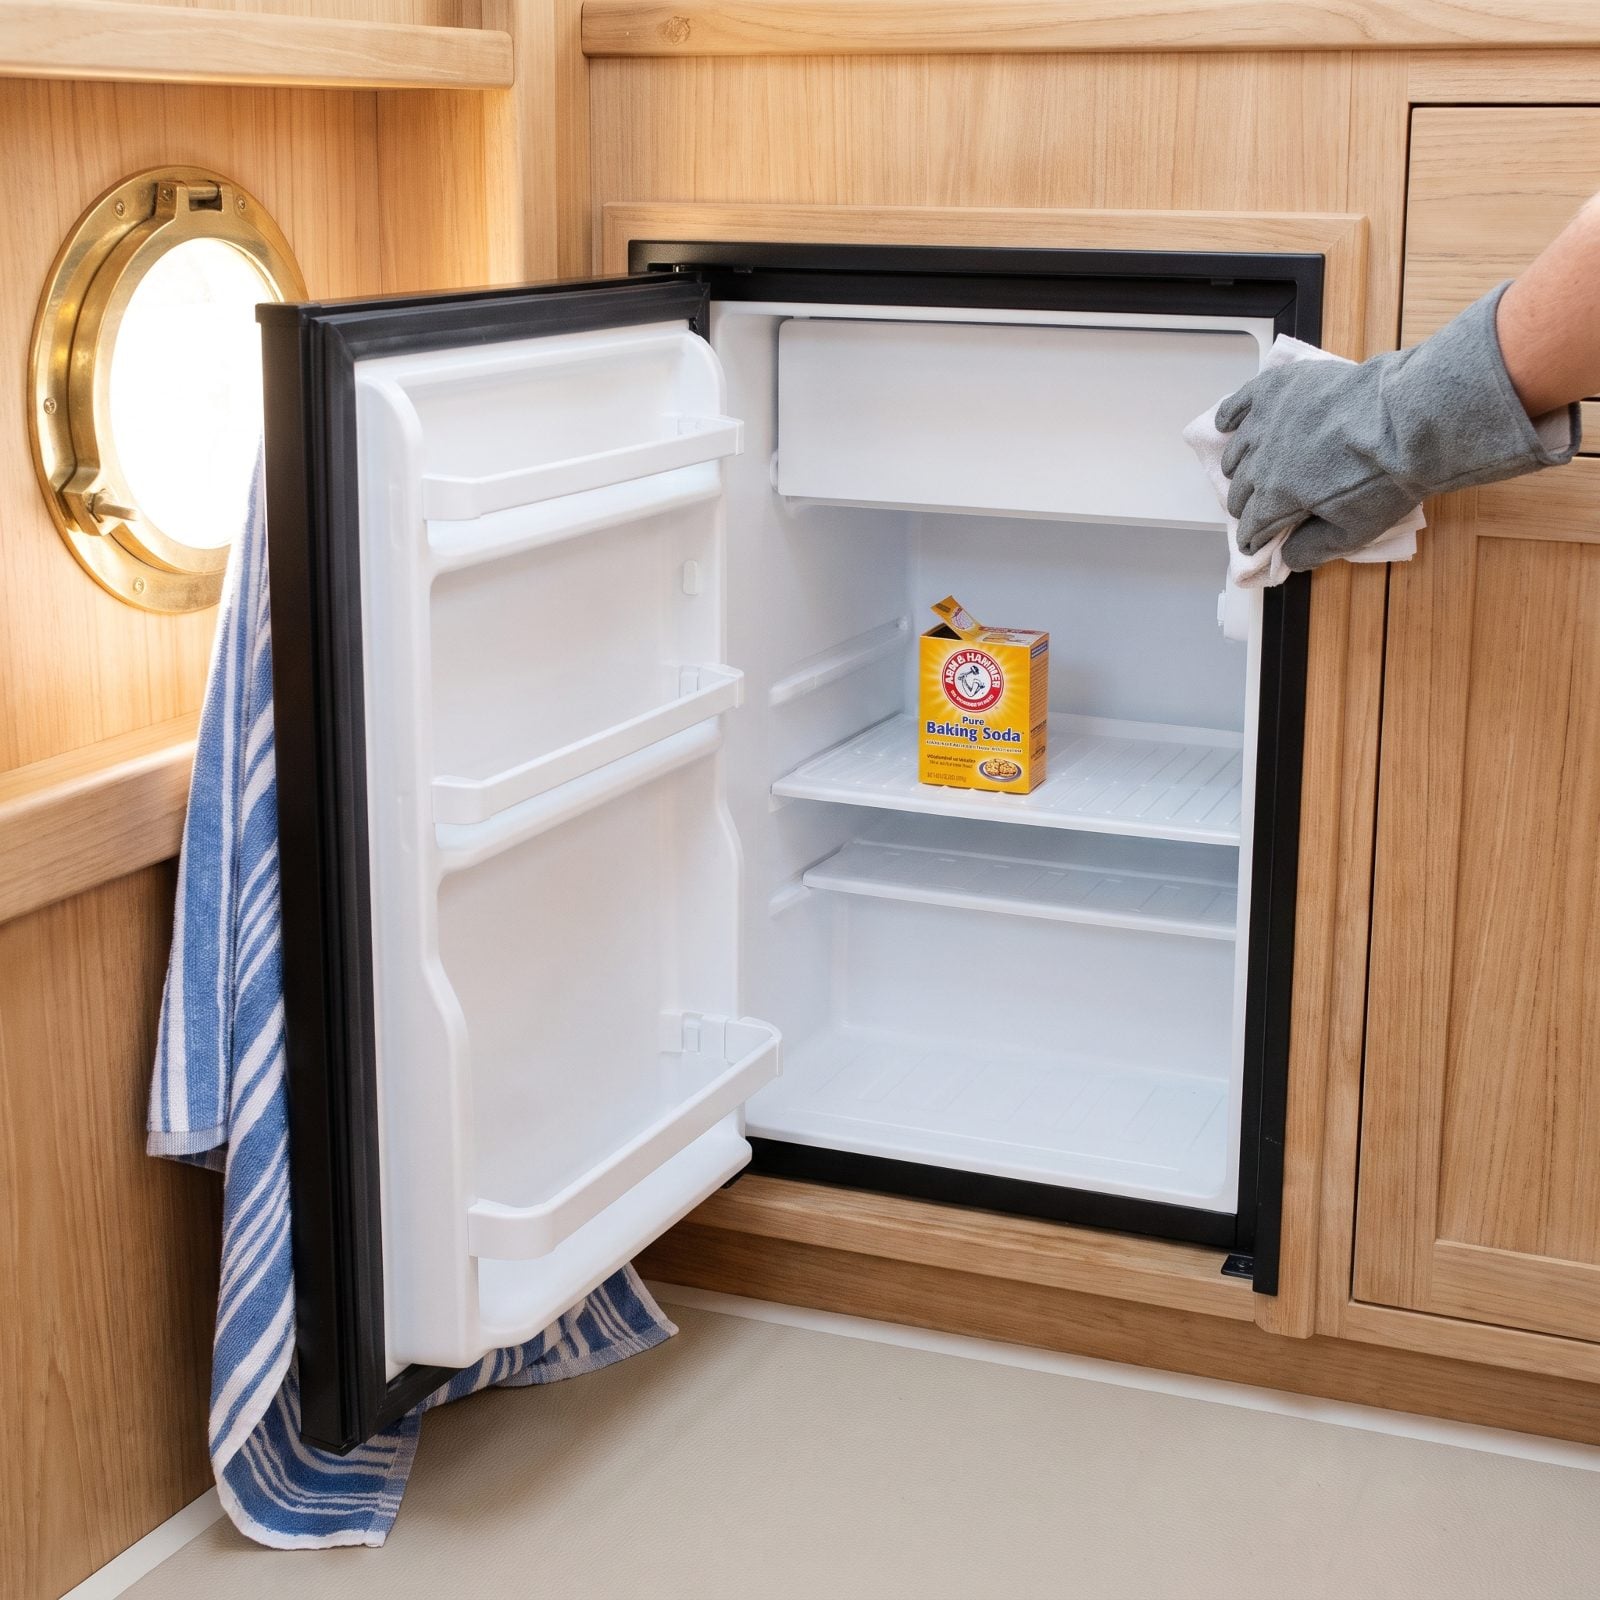
Shut a damp fridge up tight for four months and you open it in spring to a smell you will never forget. Mold loves a sealed, dark, slightly moist box. Don’t give it one.
Empty it completely, defrost any ice, and wipe the whole interior dry, gaskets included. Then prop the door open so air moves and the box breathes. A folded towel works, or a dedicated door prop. Toss an open box of baking soda on a shelf to soak up whatever lingers.
While you’re in there, check the gasket for tears and the drain line for gunk. A clogged defrost drain is a tiny problem now and a flooded bilge later.
11. Block Pest Entry Points Without Poisoning the Boat
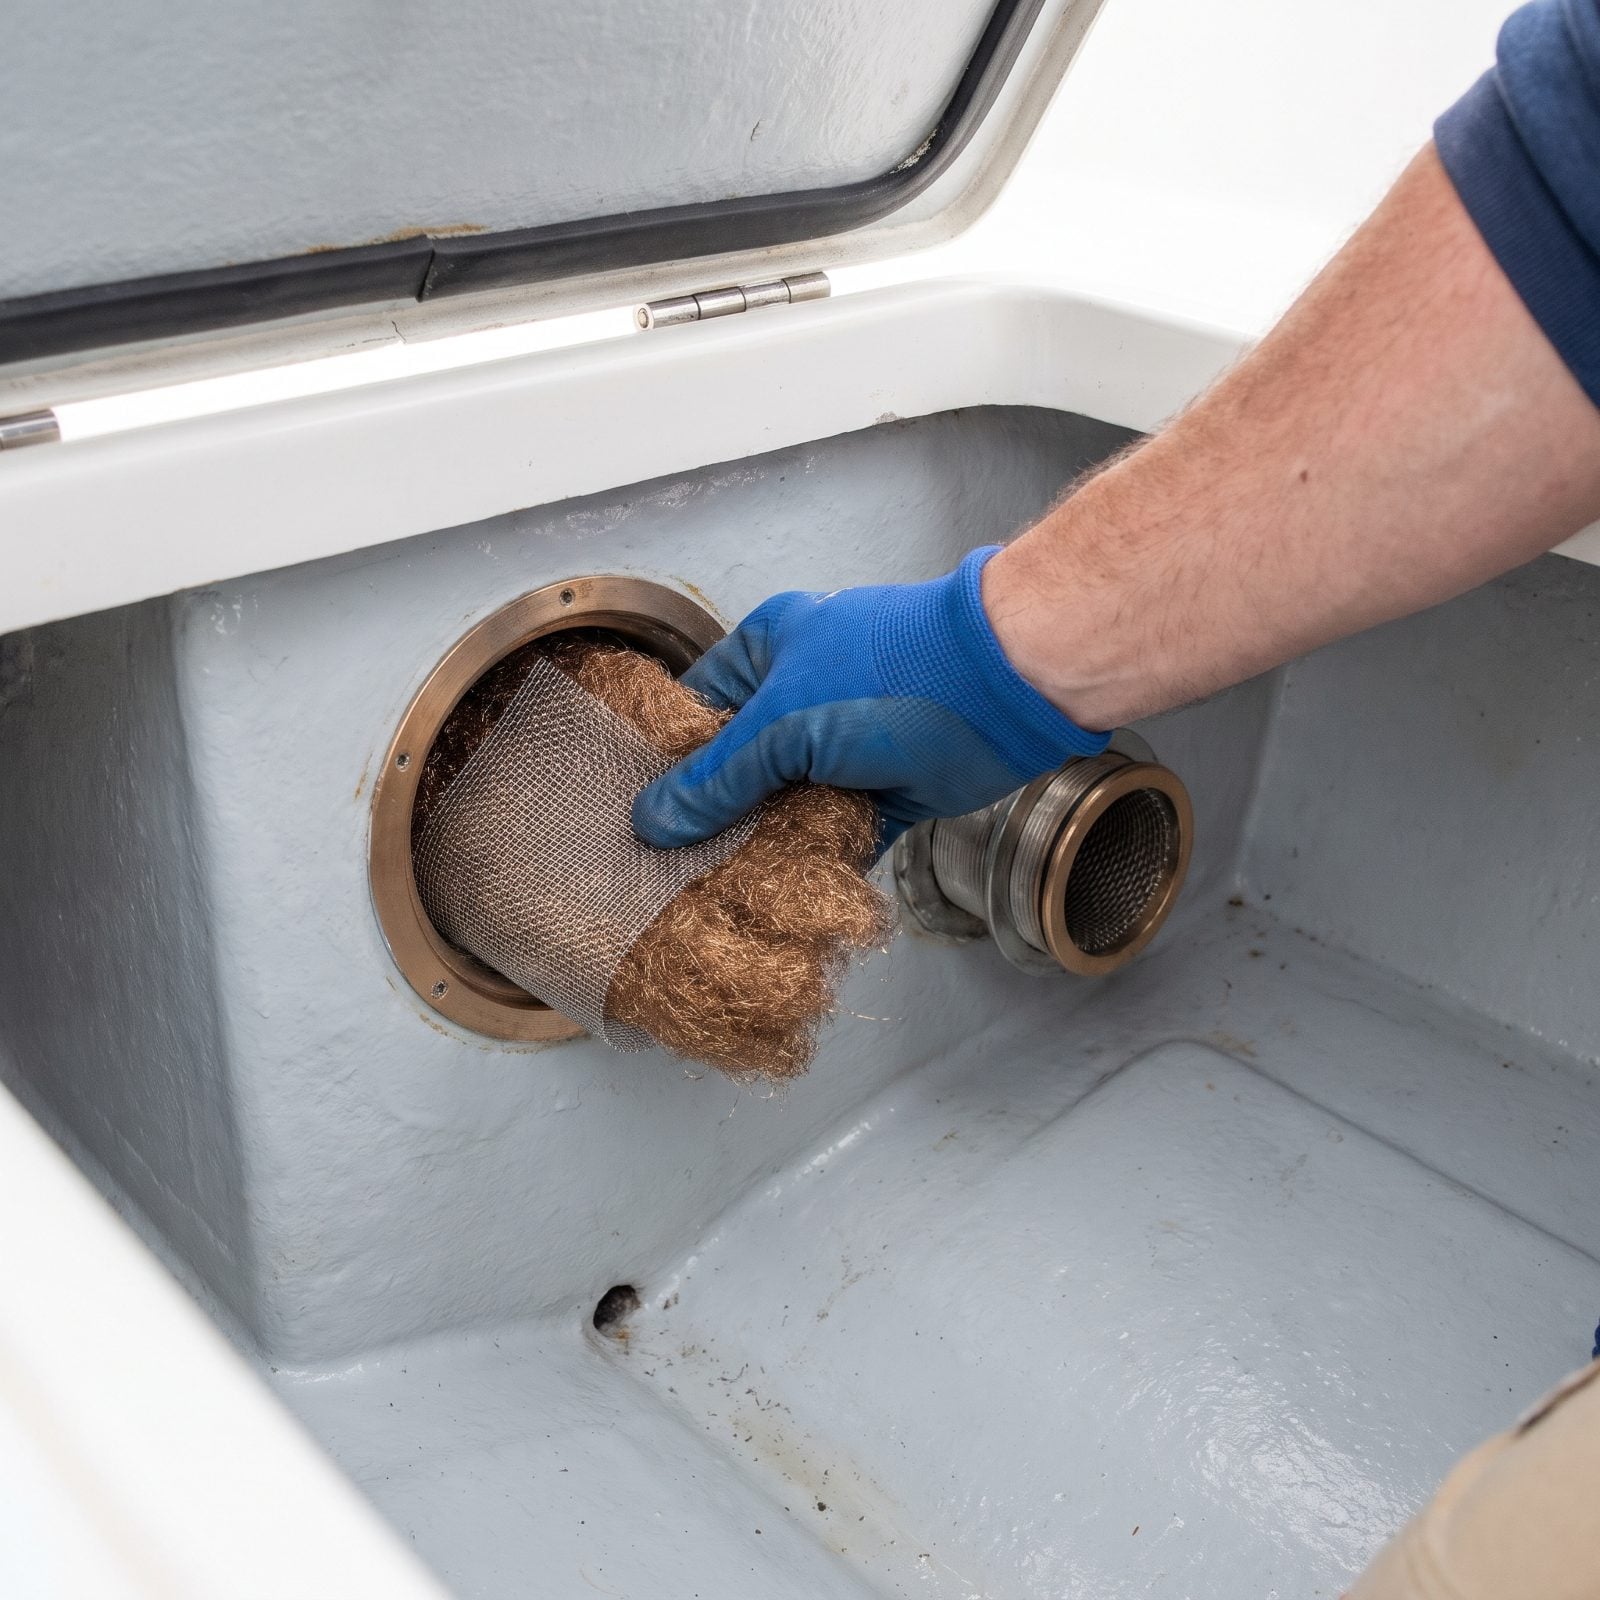
Mice will chew through a wiring harness in a single winter. A nest built from chewed insulation can take out a whole bilge pump float switch. They get in through exhaust ports, vents, and any gap bigger than a pencil.
Screen the openings with bronze wool or fine stainless mesh, packed loose enough that air still moves — seal a boat airtight and you trade one problem for another. Scent deterrents like peppermint pouches and dryer sheets help a little and do no harm.
What I’d steer you away from is loose poison bait inside the boat. A dead mouse wedged behind a tank is a stench you can’t reach and can’t forgive. If you must bait, use sealed stations, and check them.
10. Remove Marine Growth From Underwater Surfaces
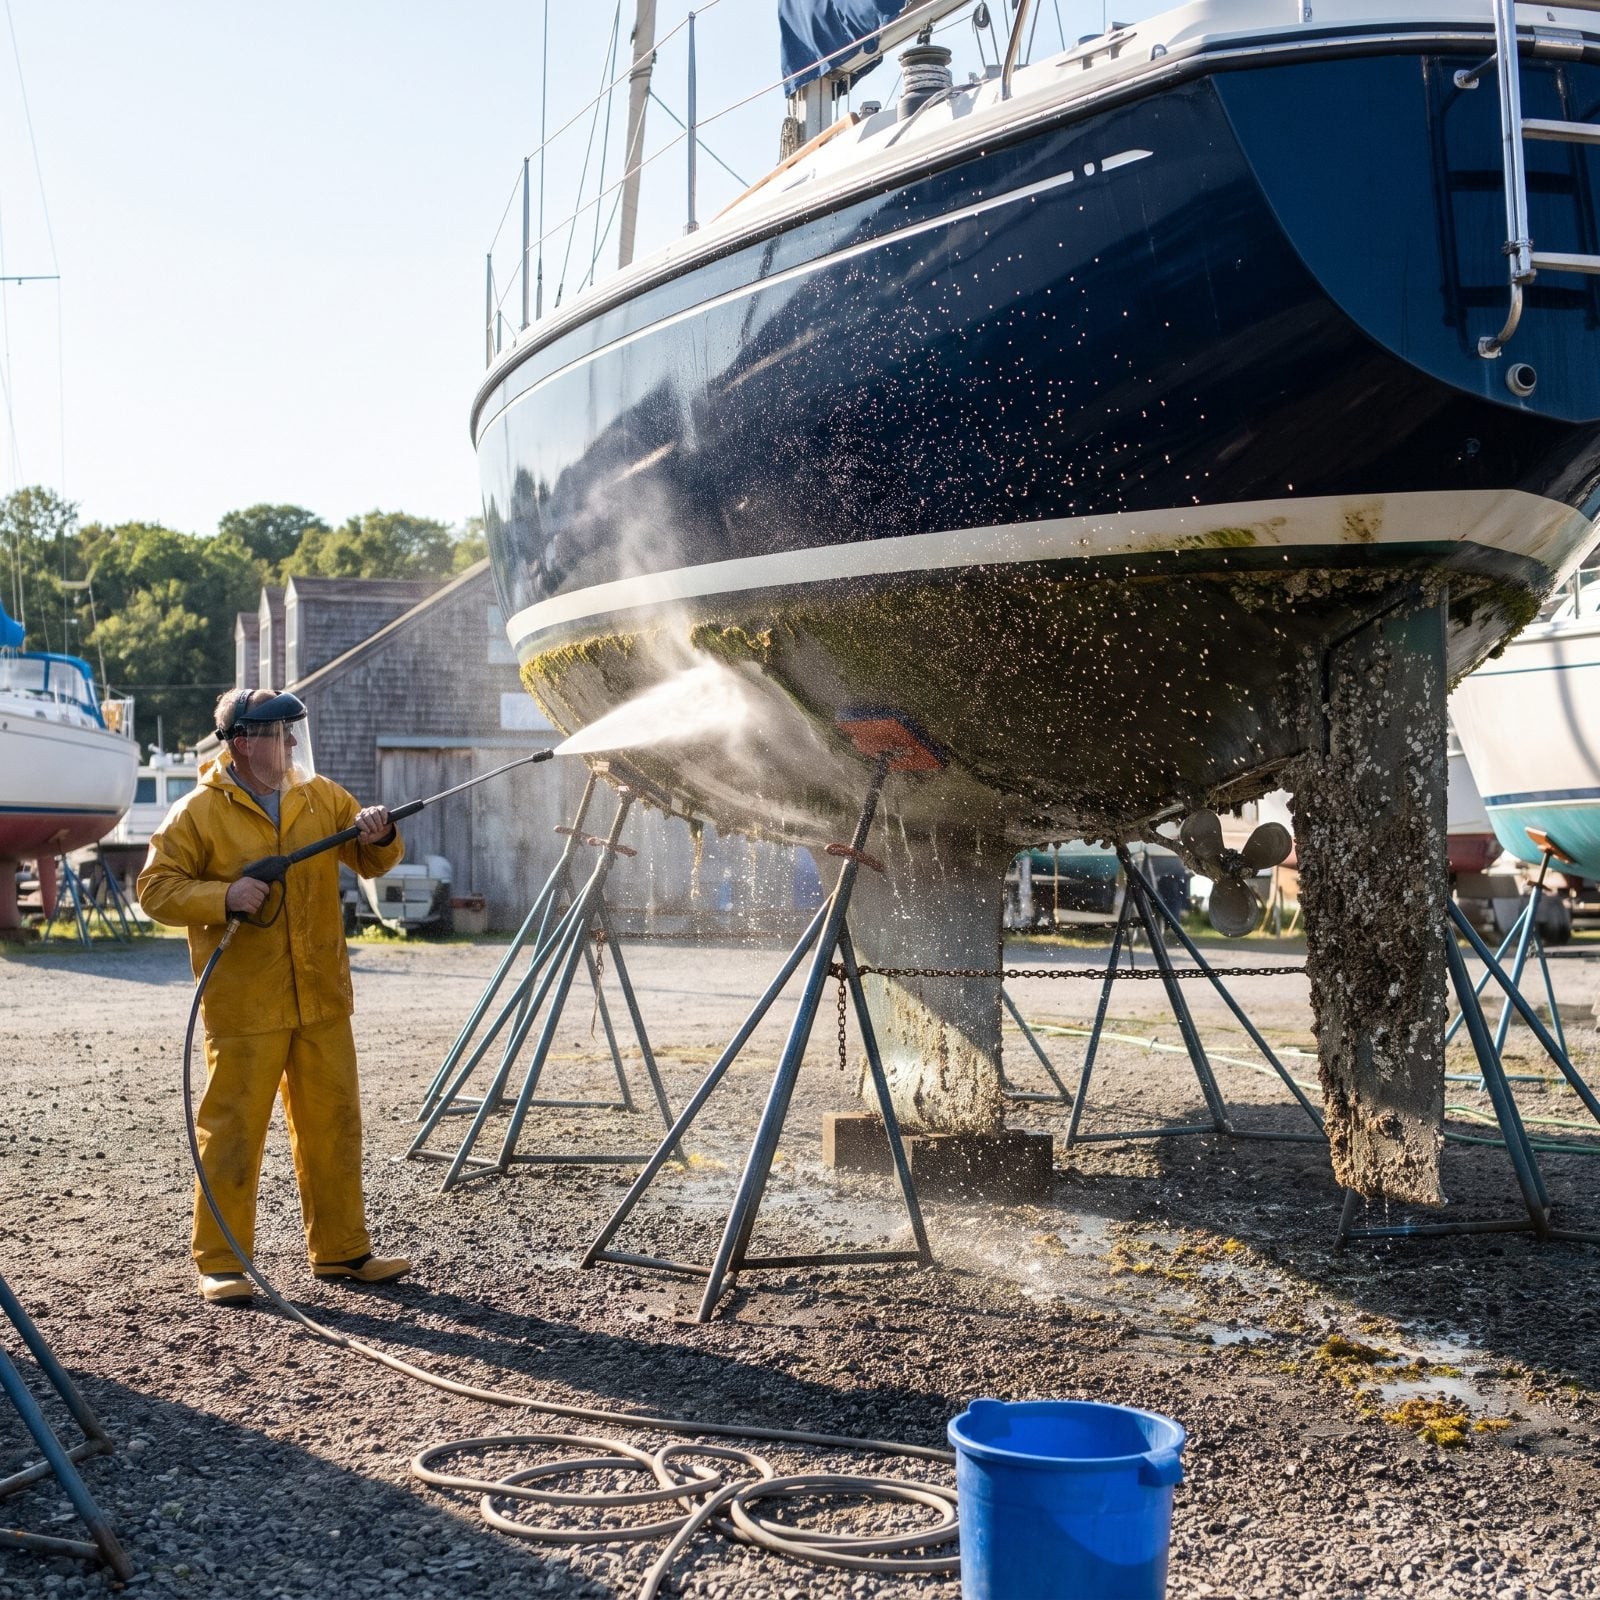
Barnacles and slime come off far easier wet. Let that growth dry and cure on the hull all winter and you’ll be chipping concrete off your running gear in April with a scraper and a bad attitude.
Pressure-wash the bottom the day you haul, before it dries. Get into the prop, the shaft, the trim tabs, the transducer face, and the waterline where barnacles cluster thickest. A fouled transducer reads garbage depth all next season, and a crusted prop quietly burns extra fuel every trip.
And while it’s clean, inspect what the growth was hiding. Blisters, nicks in the paint, a wobbly through-hull. The muck comes off and shows you the truth underneath.
9. Clear Leaves and Debris From Every Scupper
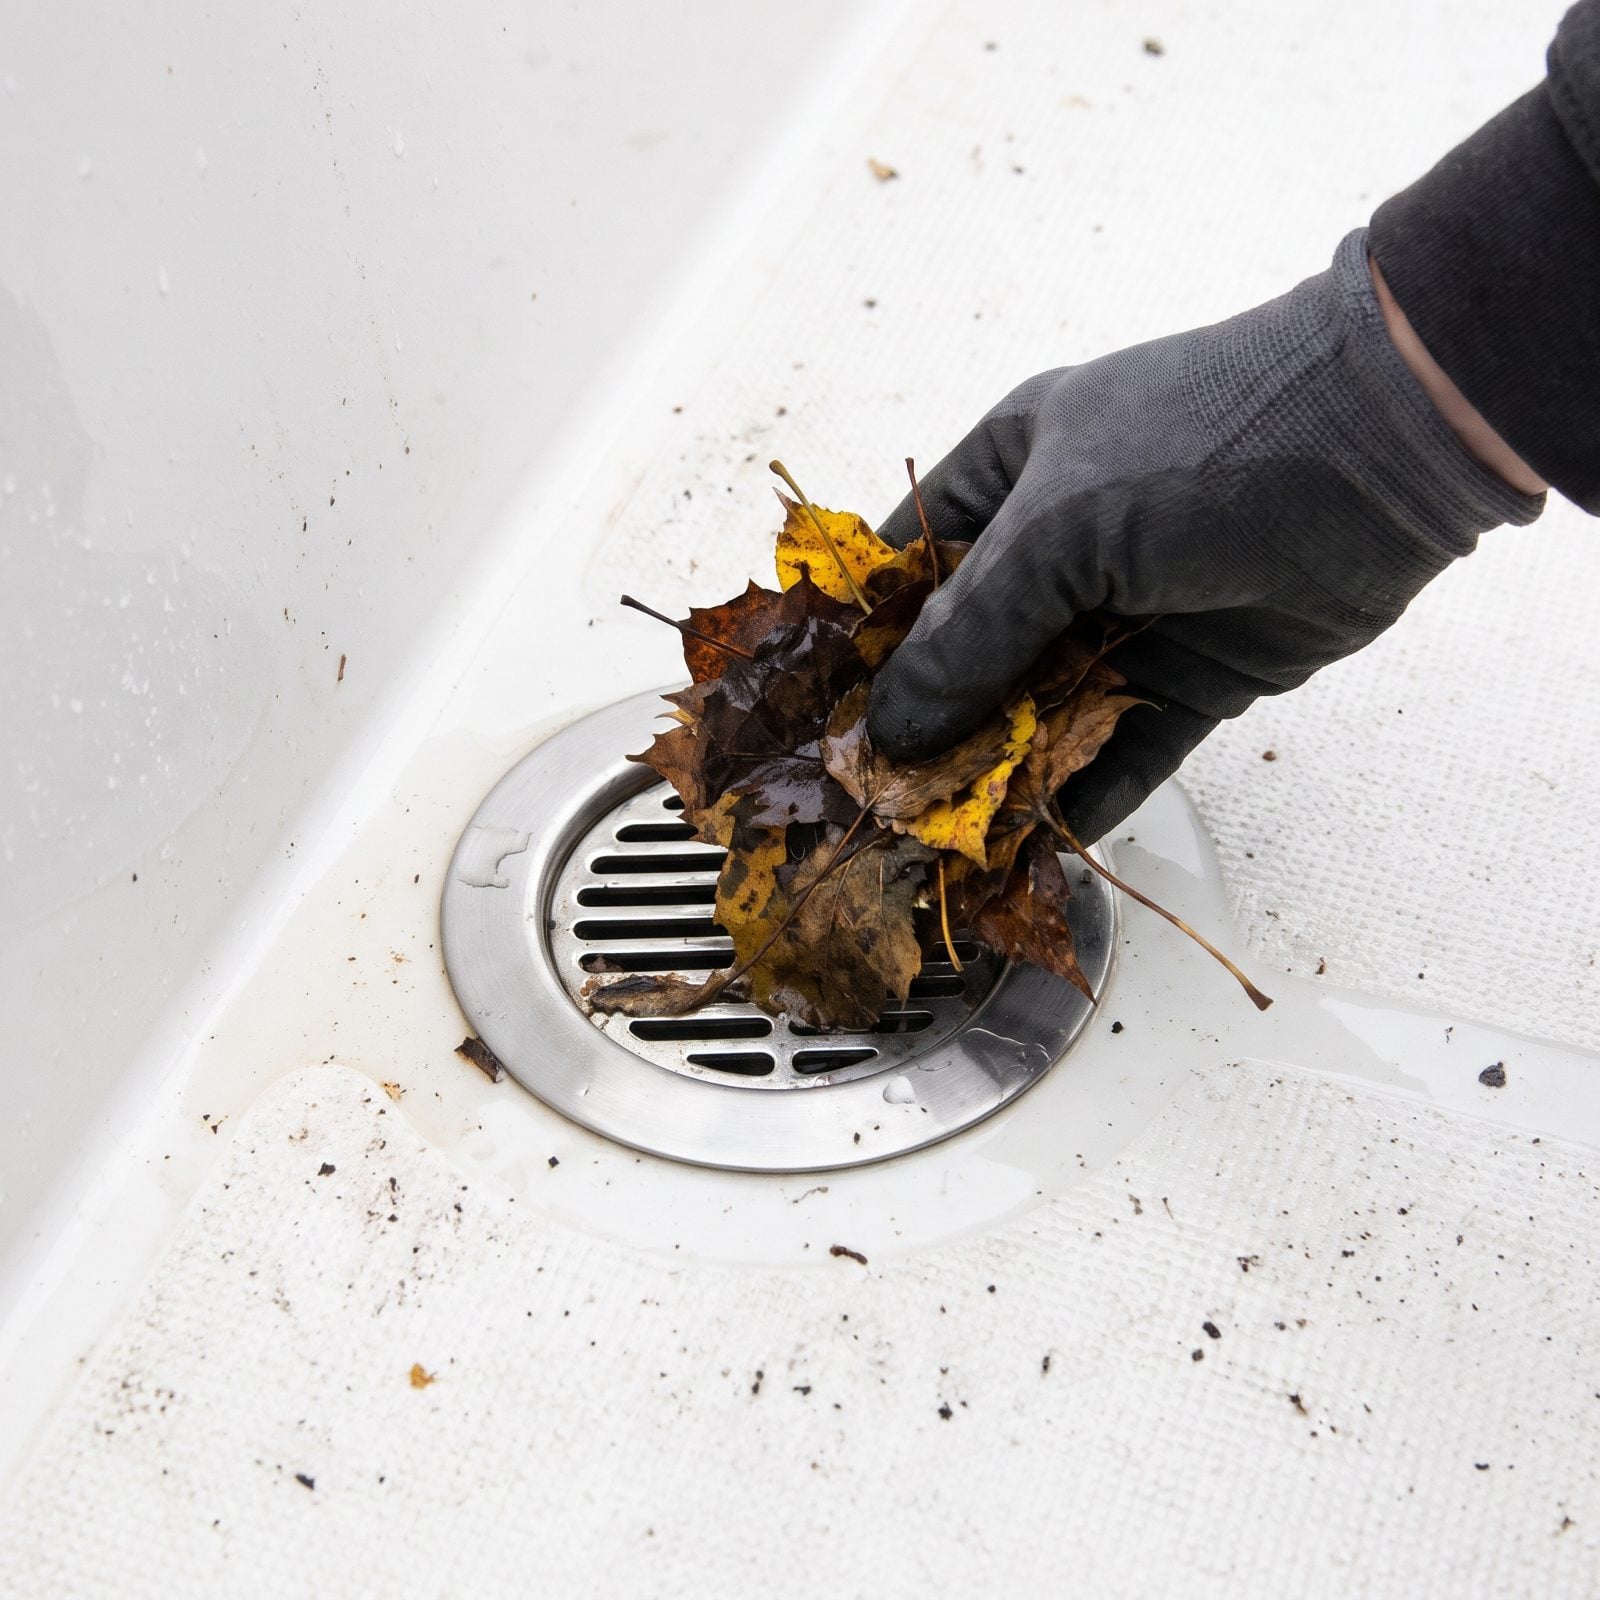
A blocked scupper turns your cockpit into a bathtub. Rain and snowmelt have nowhere to go, so the water pools, freezes, expands, and starts stressing your deck and finding its way below through seams that were fine until they weren’t.
Clear every scupper, cockpit drain, and deck channel of leaves and pine needles before you cover up. Run water through each one and watch it drain fast and clean. A slow trickle means there’s a blockage further down the hose you’ll need to chase.
Check the overboard discharge end too, outside the hull, where a wasp nest or a leaf plug can stop drainage you’d never spot from on deck.
8. Remove the Hull Drain Plug
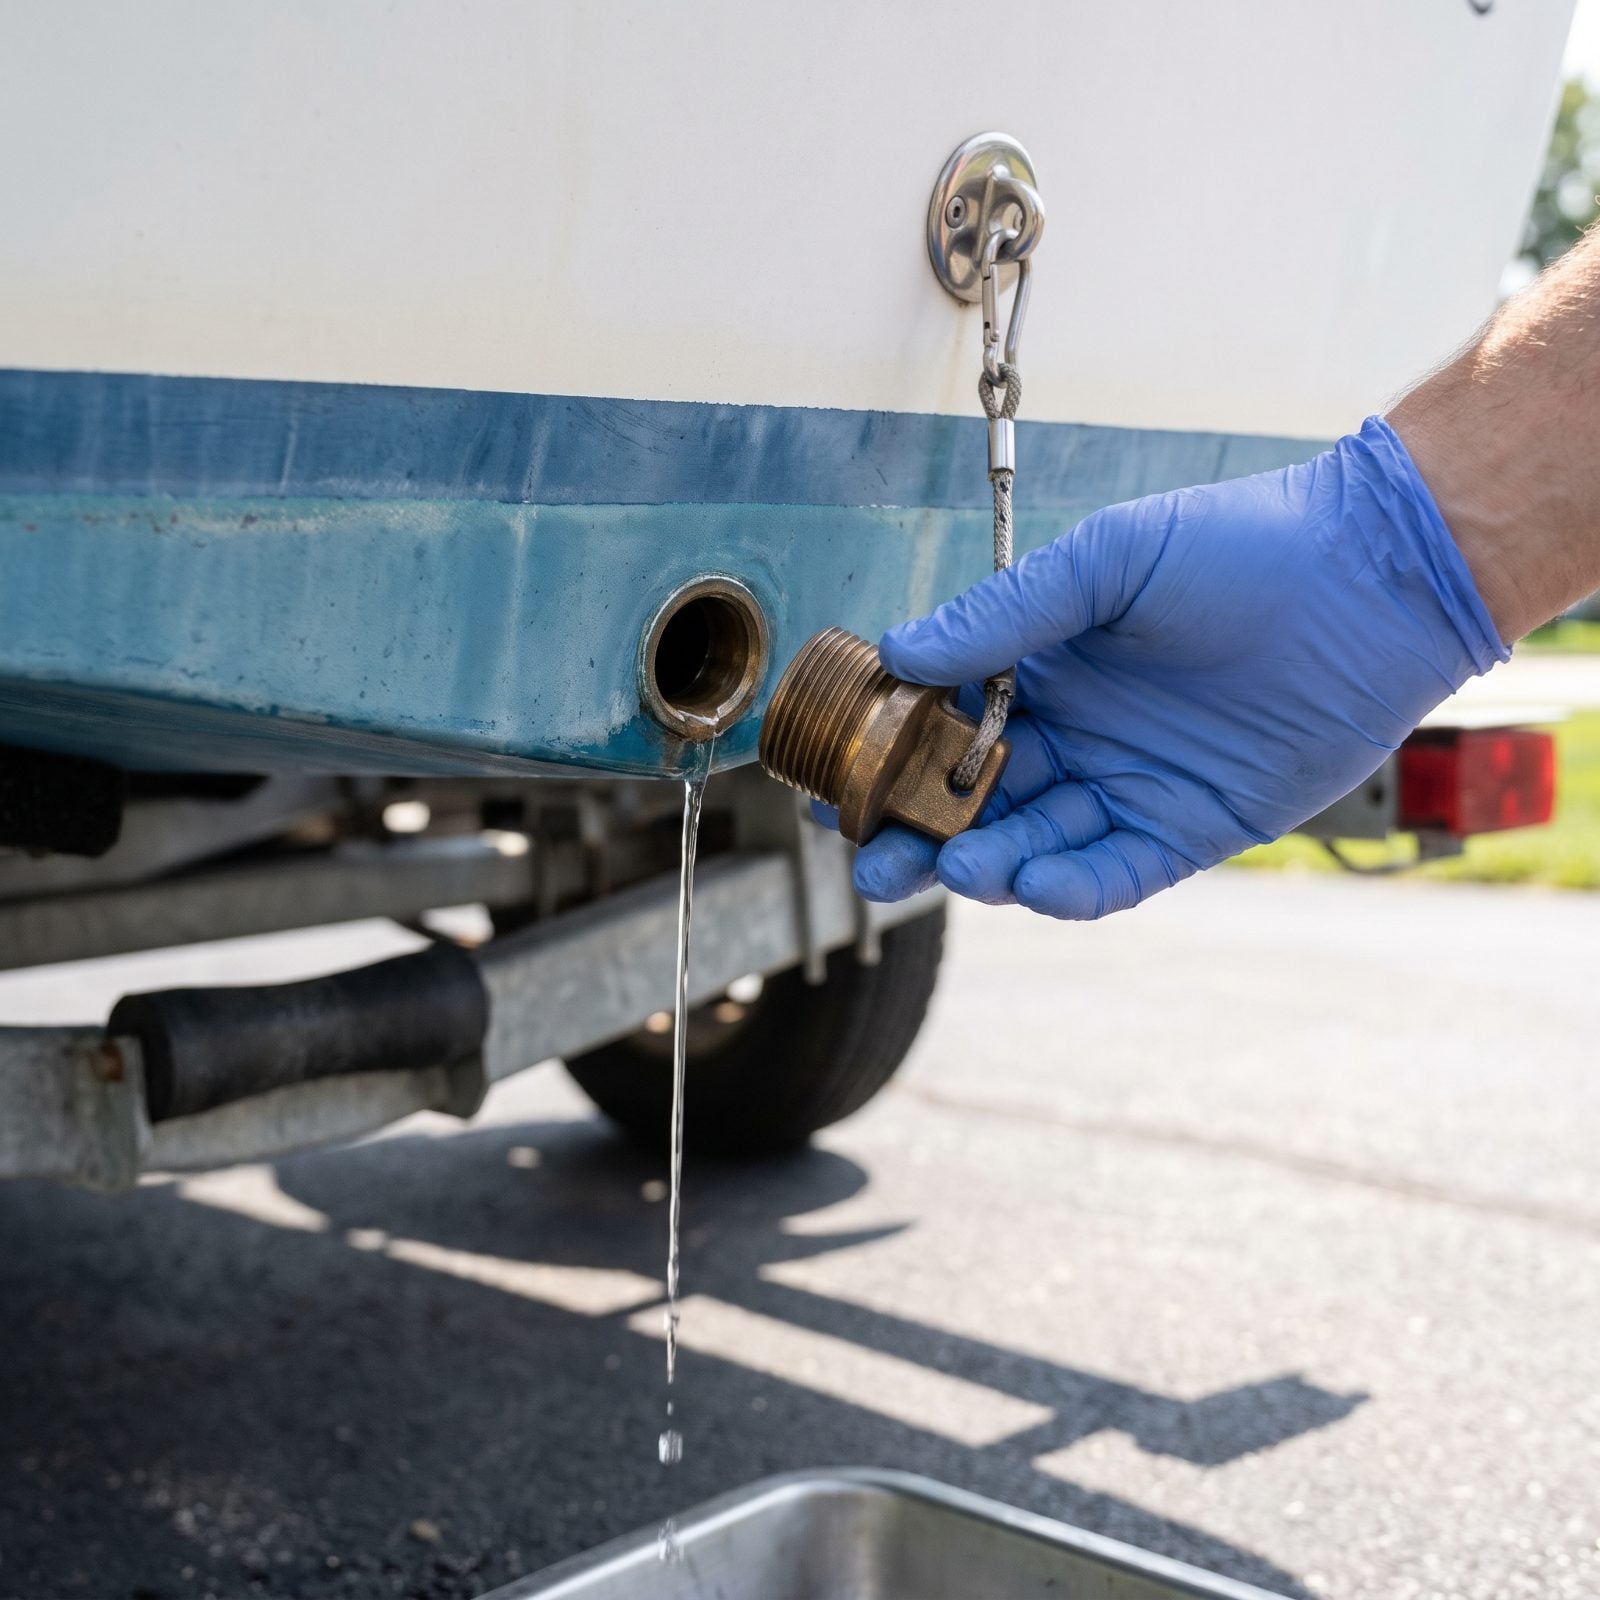
Simplest check on the list, and the one people forget — usually whoever’s trailering a boat home in a hurry. Pull the drain plug and let every drop out of the bilge. Water left standing freezes, expands, and cracks fiberglass or the hull liner you can’t easily repair.
Store the plug somewhere you’ll actually find it. Tie it to the trailer tongue, drop it in the glove box, loop it on the key ring, anything but loose in the bilge where it’ll get buried.
Tilt the bow up slightly on the trailer so the stern sits lowest and drains fully. A pocket of trapped water in a low spot is exactly the one that freezes and splits.
7. Verify Boat Stands and Hull Blocking
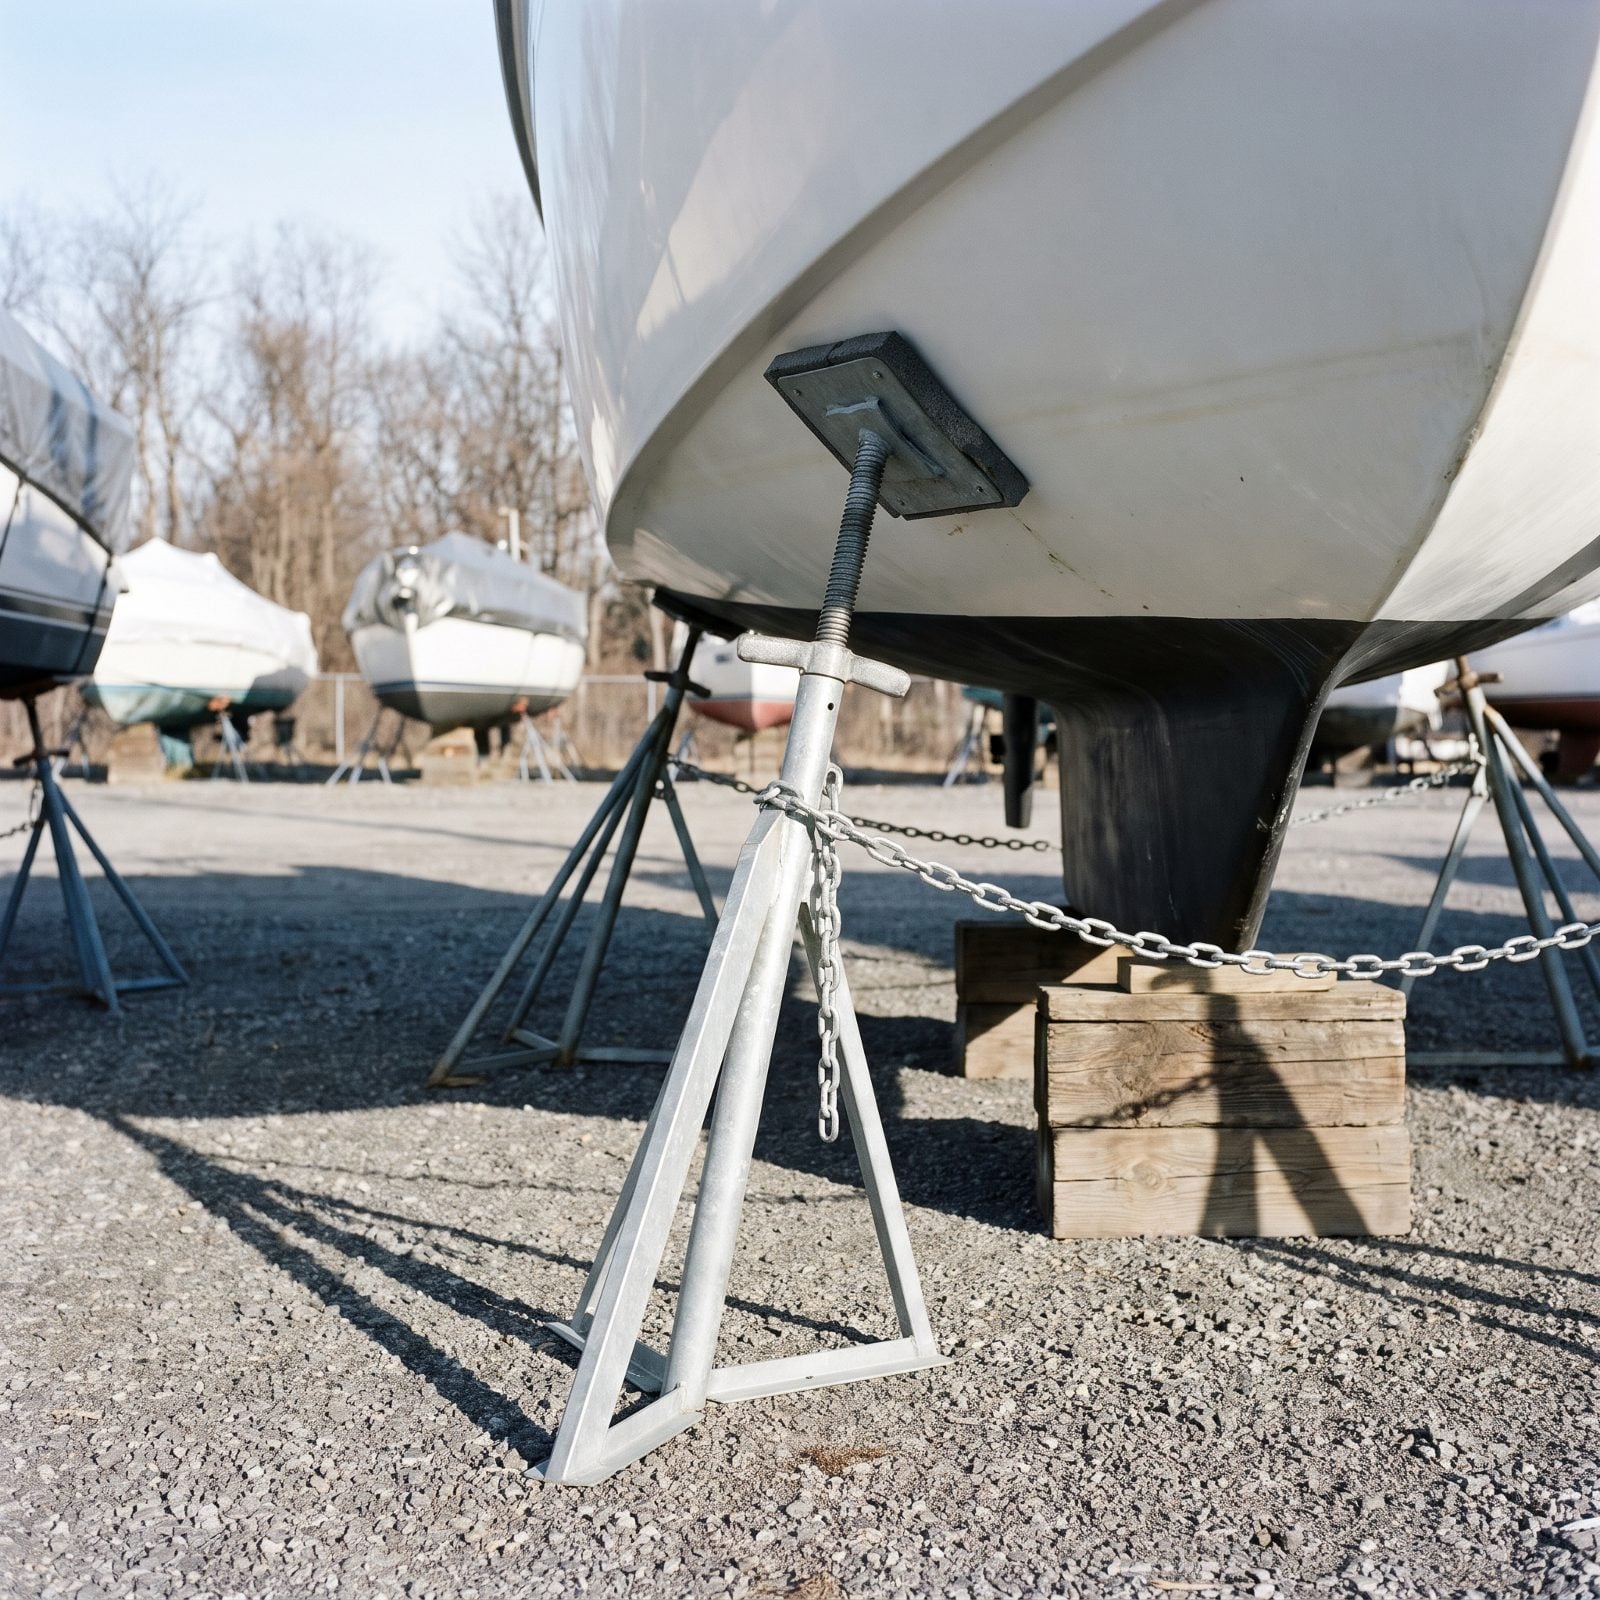
A boat tipping off its stands is the kind of disaster you only read about until it’s yours. Snow load, a shifting freeze-thaw cycle, a stand screwed down into soft ground that heaves. It happens in the dead of winter, when nobody’s around to catch it.
Check that stands sit on solid footing and not bare dirt that’ll turn to mud, and slide plywood pads under each base to spread the load. Confirm the keel carries the real weight on proper blocking, with the stands steadying the hull rather than holding it up.
Chain opposing stands together across the keel so one can’t kick out. Then walk the boat midwinter after heavy snow and reset anything that’s shifted.
6. Service Trailer Wheel Bearings
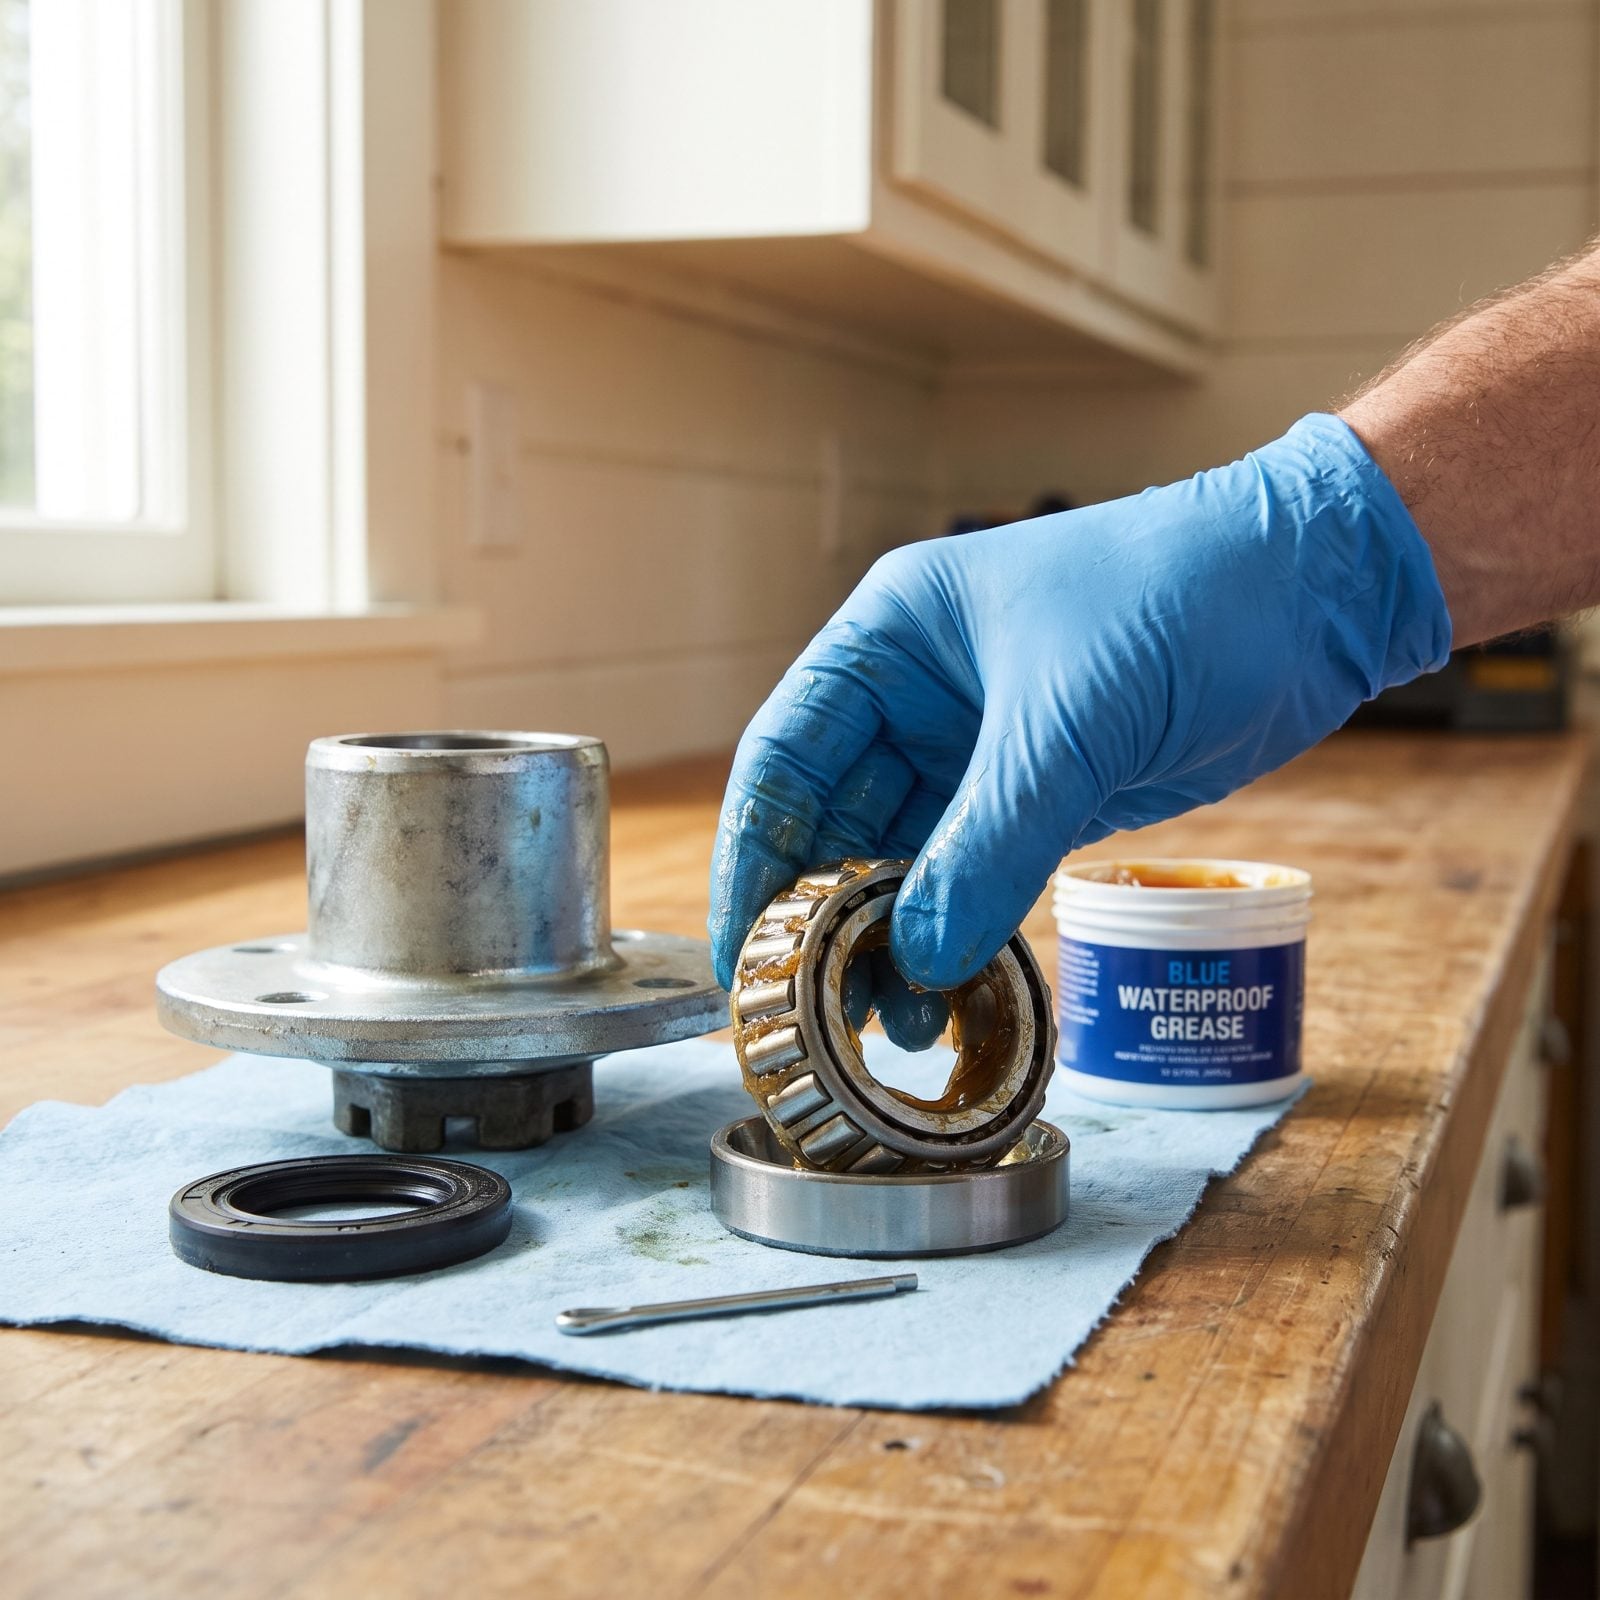
Wheel bearings are the part everybody forgets until smoke is rolling off the hub on the interstate. Here’s the mechanism nobody thinks about: you back a hot trailer into cold lake water, the pressure drops inside the hub, and that drop sucks moisture straight past the seal. Water plus grease makes a milky paste that quits lubricating. Winter is when you catch it, before it bites you two hundred miles from home.
Jack the wheel, spin it, rock it top to bottom. A good bearing turns quiet and smooth with no play. Grinding, grit, or a wobble means you pull the hub, clean it in solvent, check the races for pitting, and repack. And if the grease you pull out looks like chocolate milk? The water already won that round.
5. Inspect Trailer Brakes for Corrosion
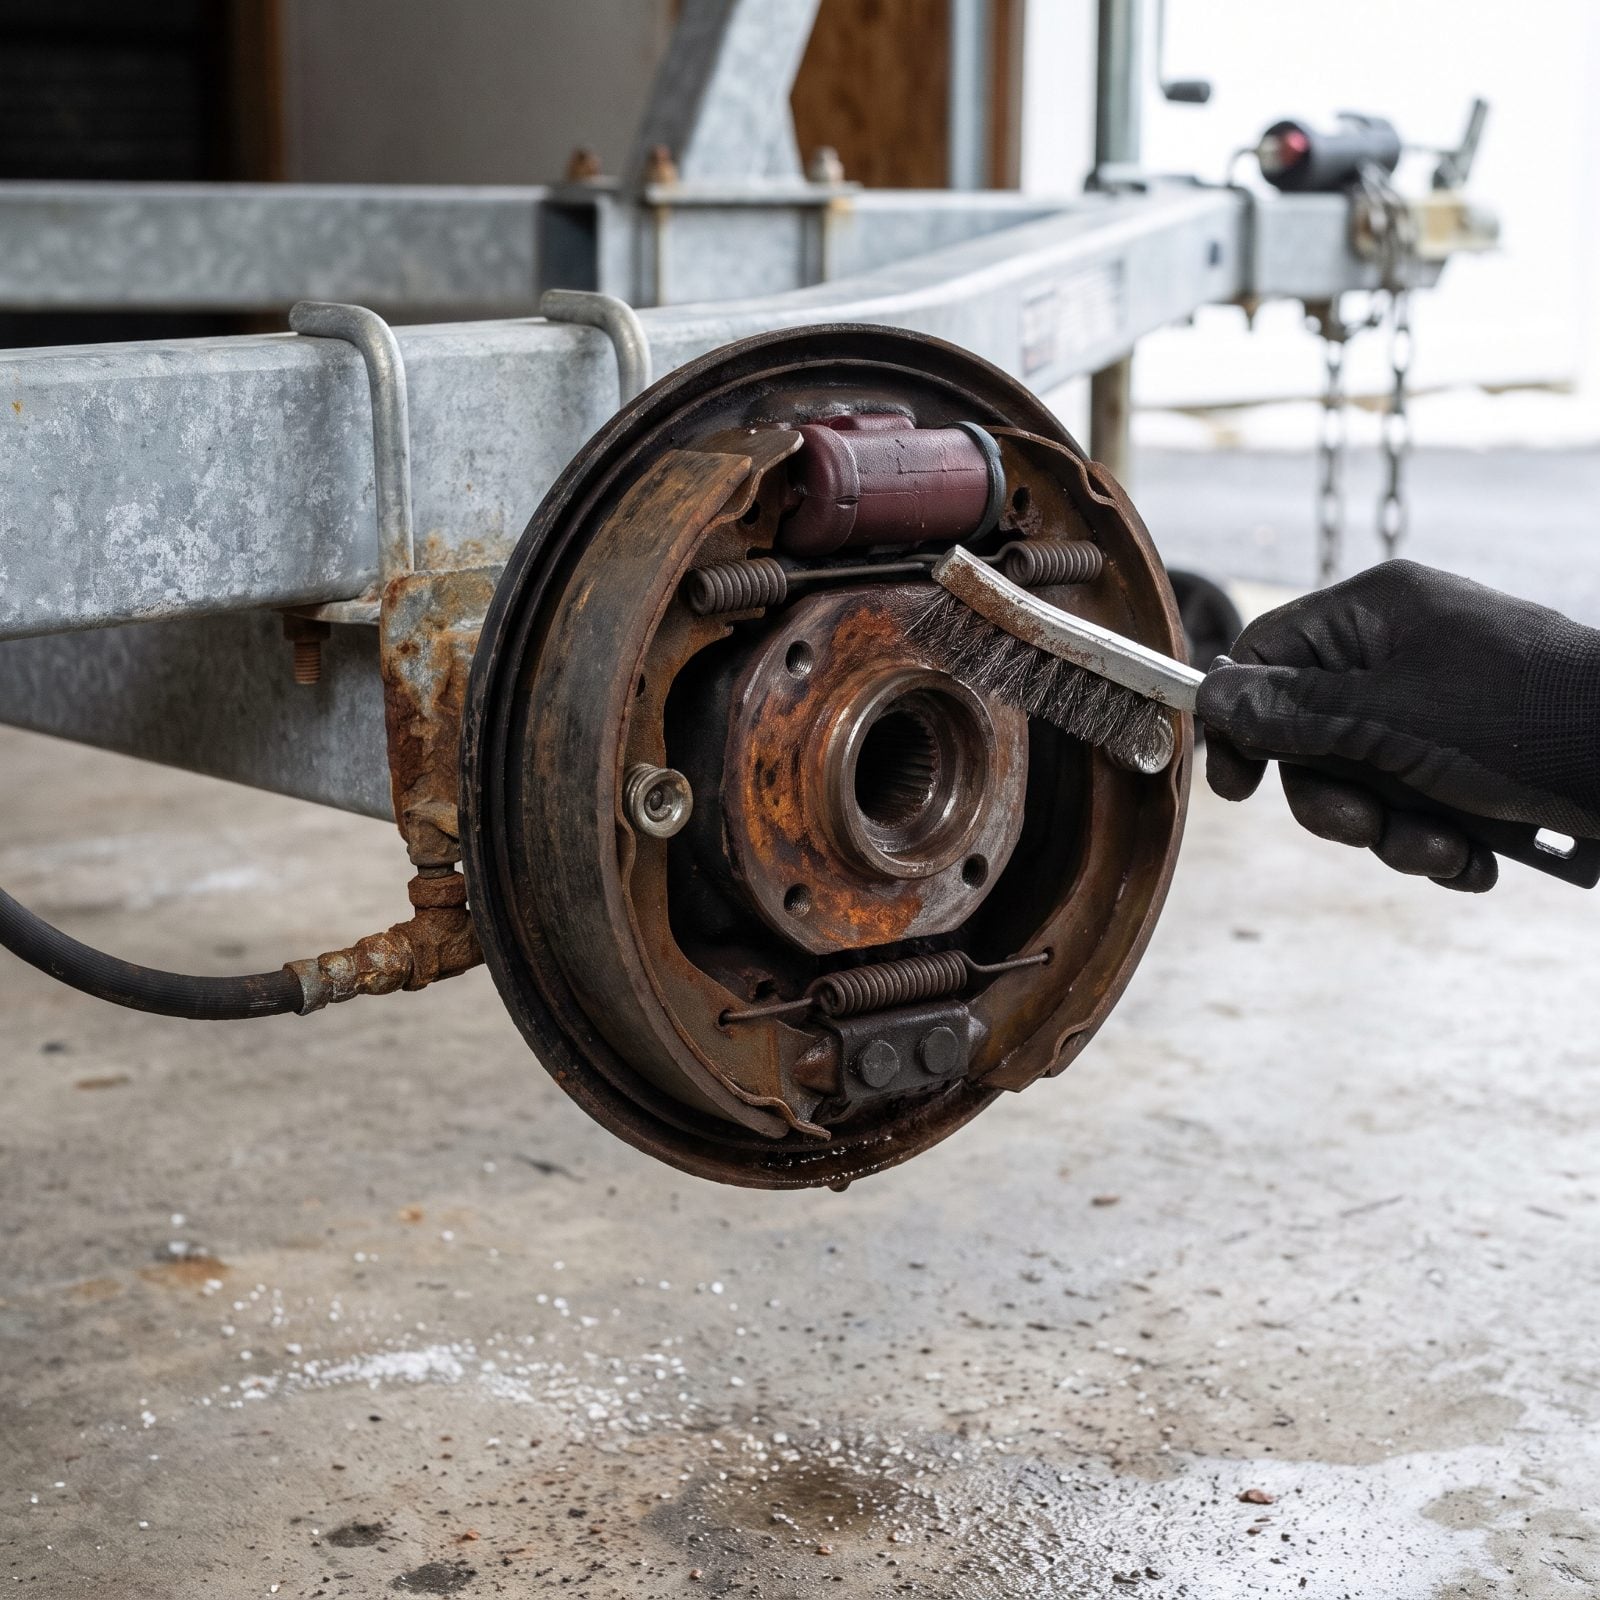
Saltwater eats trailer brakes alive, and freshwater is only a little slower. Surge and electric brakes both live right behind the wheel where every single launch soaks them. Leave them wet all winter and you come back in spring to seized calipers, frozen actuators, and brake lines that look like somebody dredged them out of a shipwreck.
Pull a wheel and look hard at the backing plate, the lines, the fittings. Surface rust you can wire-brush away and forget about. But flaking, pitting, or a line that leaves orange smears on your glove means you replace it before spring, no arguments. Work the surge coupler by hand and feel for smooth travel.
Flush the whole system with fresh water before you put it away. Most folks skip this step, then stand there baffled when the brakes lock up on the first trip out.
4. Chock Trailer Tires and Support Frame
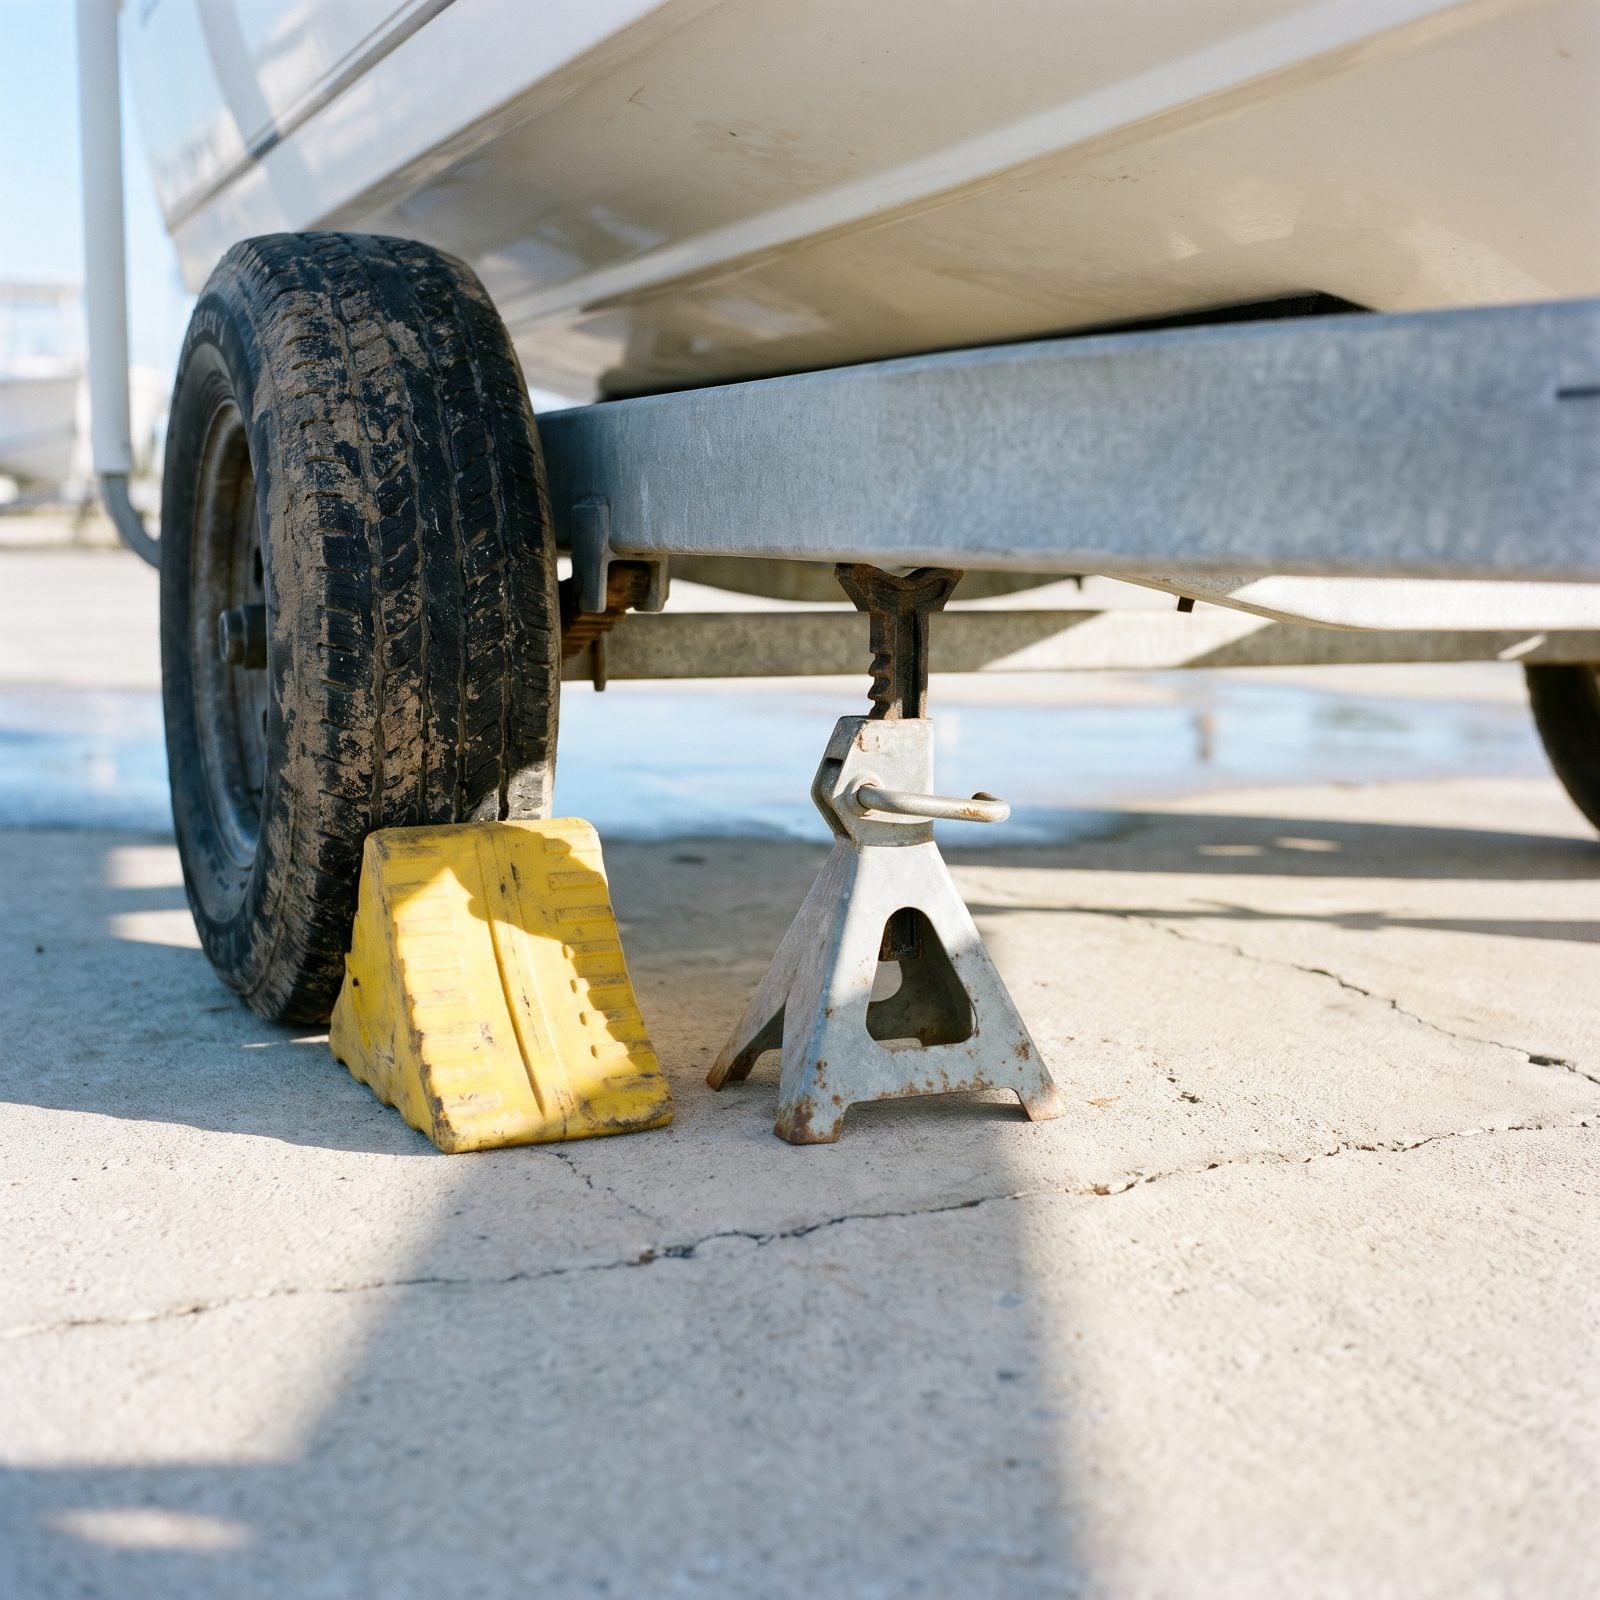
A trailer sitting on four tires all winter develops flat spots, because the sidewalls carry the full load for months while the rubber quietly degrades underneath them. Chocks and stands lift that weight off the equation and keep the whole rig from creeping down a sloped driveway every time the ground freezes and thaws.
Chock in front of and behind at least one tire, both sides if the ground slopes. Then set jack stands under the frame rails, not the axle, and raise the tires just clear of the ground. Rest the tongue on a stand too, so your jack isn’t bearing load all season long.
3. Build a Strong Cover Support Frame
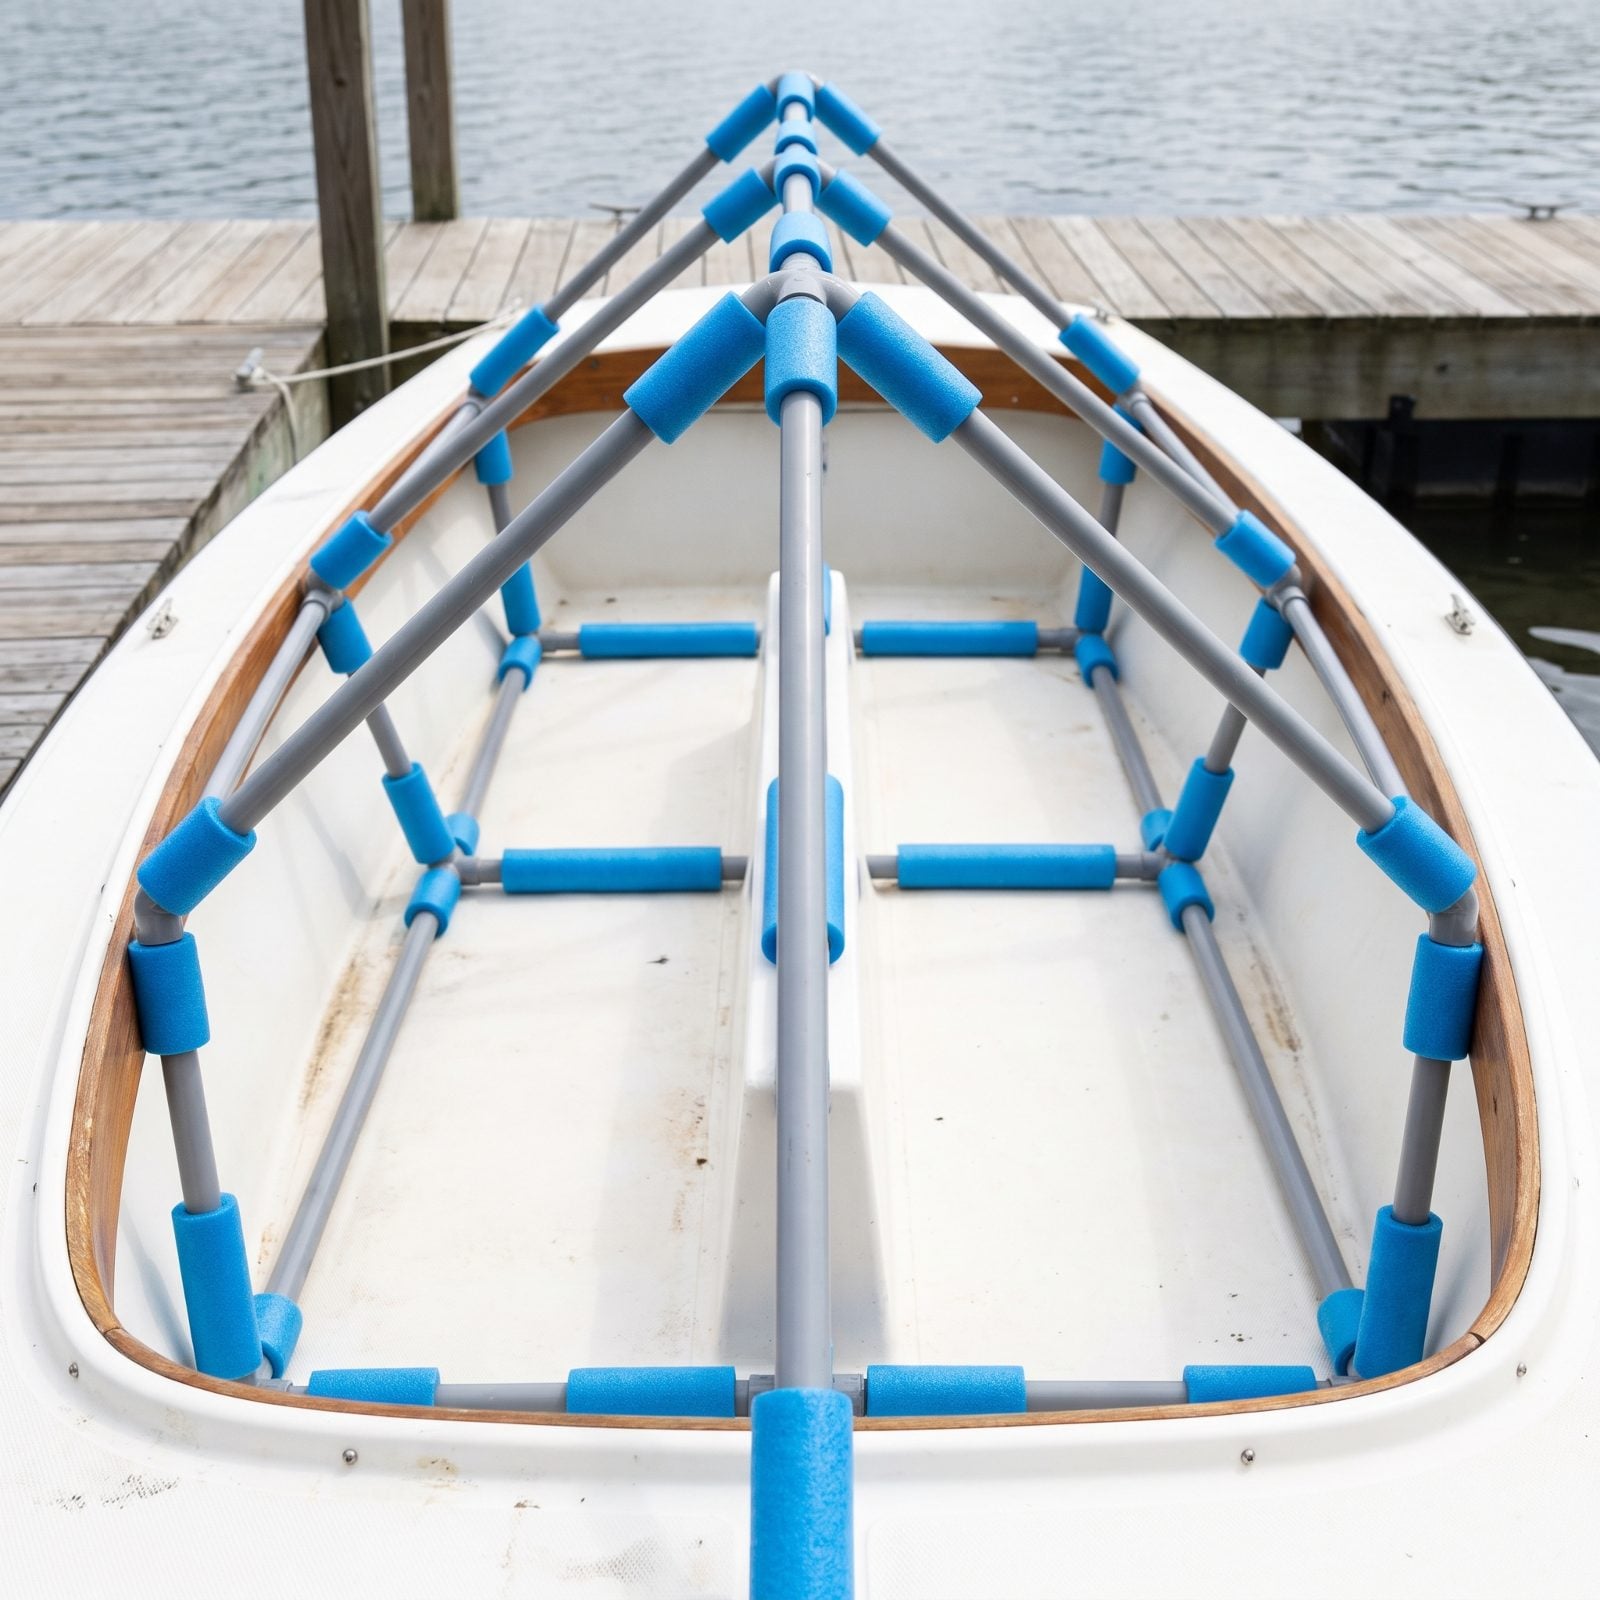
A cover with no backbone becomes a swimming pool. The first wet snow settles into the low spots, freezes solid, and that frozen weight tears grommets, snaps straps, and sometimes caves the whole sheet down onto your seats. Give it a support frame and the cover turns into a tent that sheds everything.
Run a ridge pole down the centerline, higher than both the windshield and the gunwales, so the peak is the highest point on the boat. PVC does the job. A center pole and a dedicated support system does it better. Pad every spot where the frame touches hull or fabric with foam pipe insulation, because a bare pipe end will wear a hole clean through canvas in one windy winter.
Check that nothing can slide sideways under load. A frame that collapses mid-storm is worse than no frame at all.
2. Tension Cover to Prevent Water Pooling
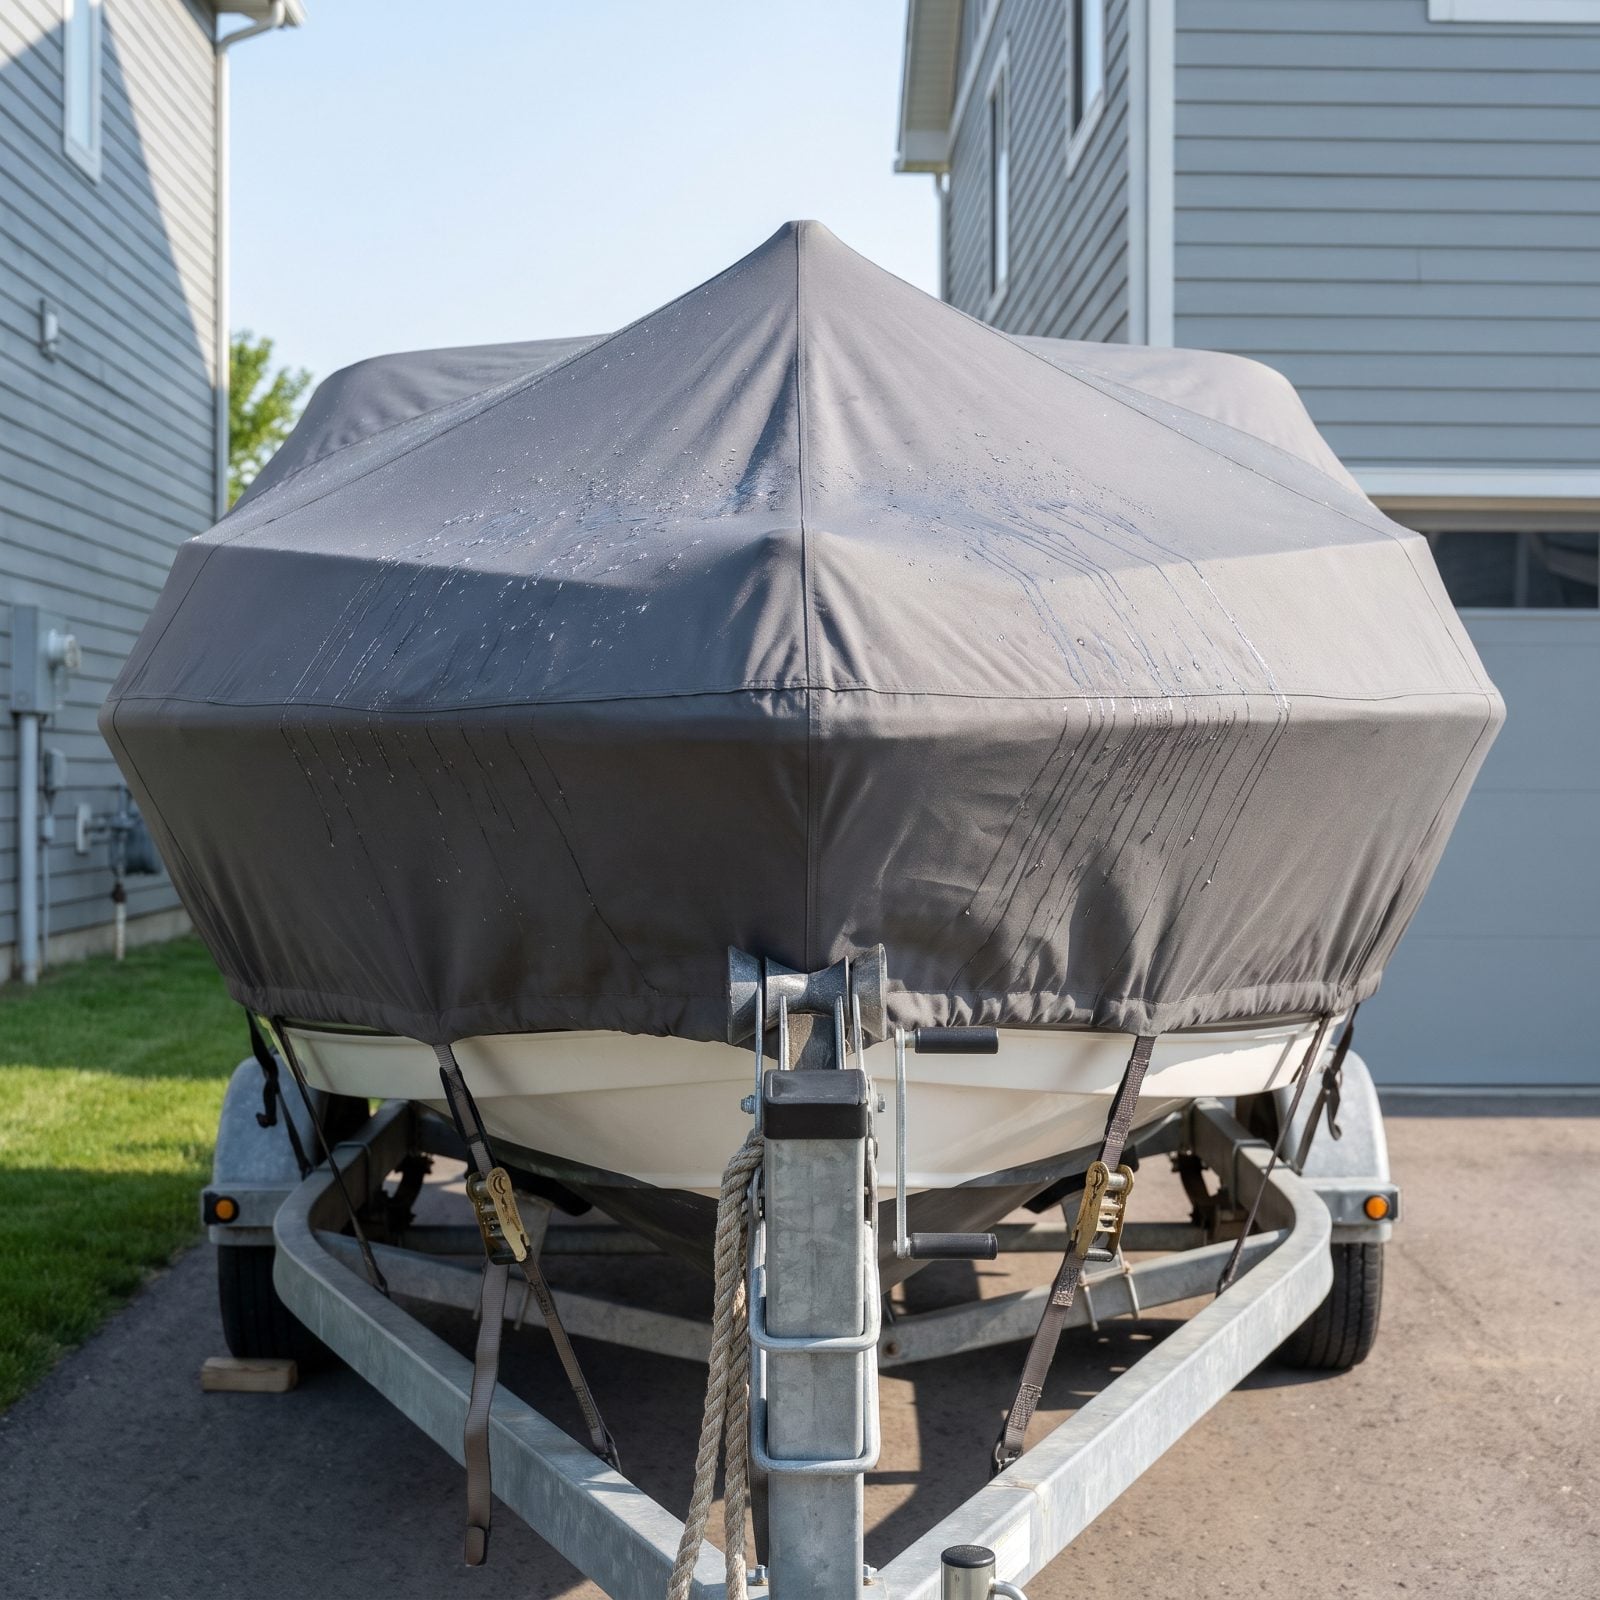
A loose cover is a bucket waiting for its first storm. Any sag collects rain and snowmelt, the weight deepens the sag, and within a season the fabric stretches out, seams let go, and water finds a path straight down onto the upholstery you were trying to protect.
Pull the cover tight over the frame until it drums when you tap it. Run straps or rope under the hull in a crisscross and work your way around the boat, taking up slack evenly instead of cranking one side down first. Then walk the perimeter and press anywhere that gives. If your palm leaves a dip, congratulations, you’ve found tomorrow’s puddle.
1. Provide Ventilation Beneath the Cover
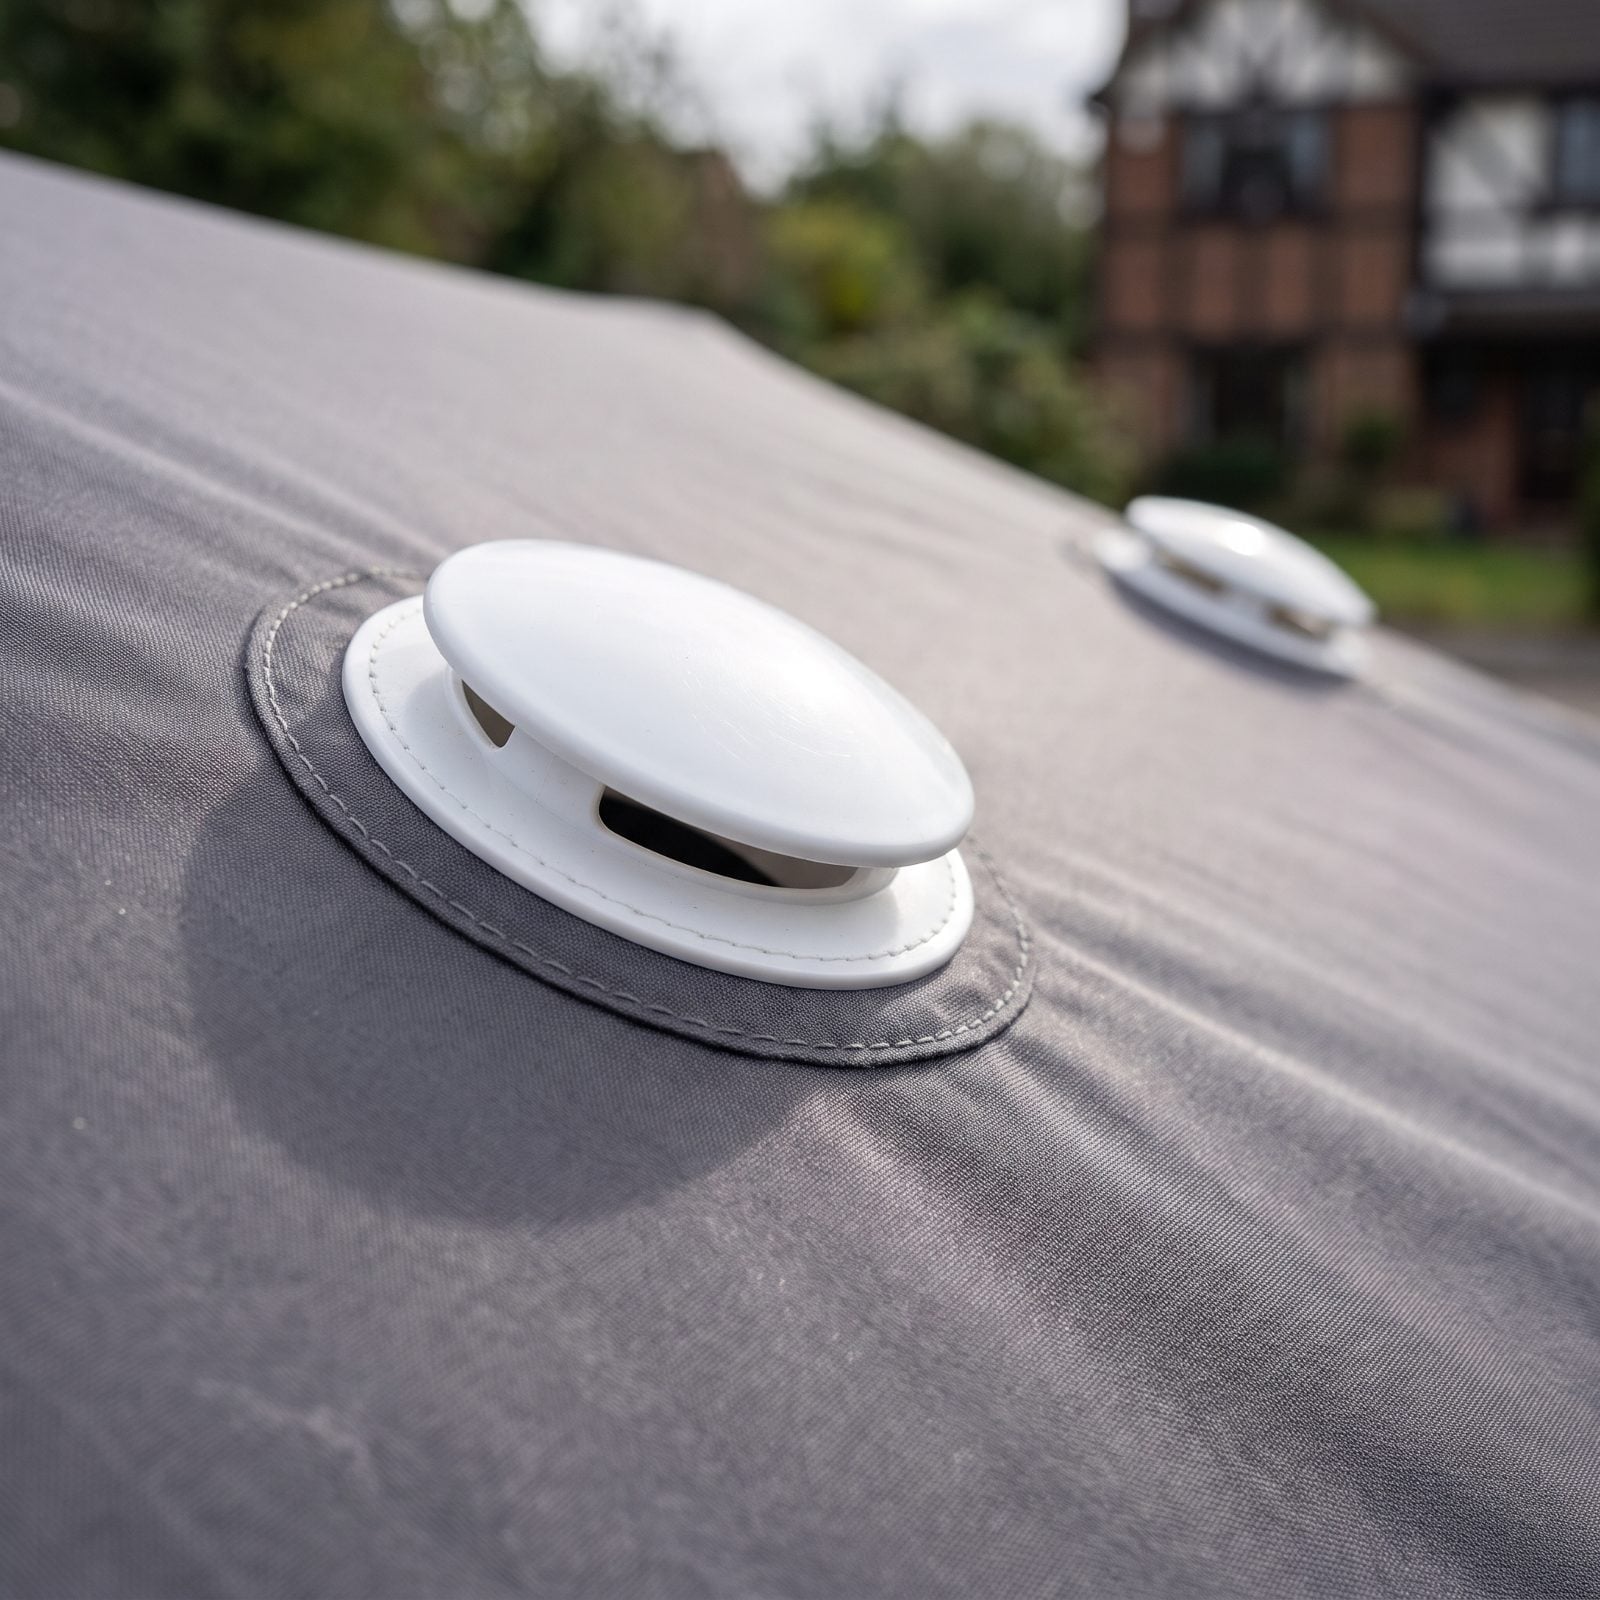
Seal a boat up airtight and you’ve built yourself a terrarium. Moisture rises off the bilge, the interior, the cushions, and with nowhere to escape it condenses on every surface and feeds mildew. Come spring the whole cabin smells like a flooded basement and the seats are freckled black.
Fit at least two cover vents so air can actually move: one low to draw in, one high to let the damp out. Pop-up fabric vents or hard mushroom vents, either works fine. And leave hatches, the engine box, and locker lids cracked underneath, so air circulates everywhere instead of just the open cockpit.
Drop a few desiccant tubs inside too. Ventilation moves the moisture along, desiccant grabs whatever lingers, and between the two of them you get a fresh boat in April instead of a fuzzy one.
Your Printable Checklist
Save it to Pinterest or print it — every check from the list above on one page.